Review

SentryShield Level IIIA backpack insert

 SentryShield is making a IIIA ballistic panel intended for backpacks. I noticed the press release a while back and inquired about it. Sentry Shield then sent me a panel to review. Having a teenage daughter that attends high school, any bit of extra protection for her is a good thing. Plus, I get the advantage of using it also.

 I am going to not actually shoot at this ballistic panel. Having a NIJ (National Institute of Justice) certified level IIIA rating tells me what I need to know about its protection level. I have shot level IIIA vests, so I understand what this level of protection does. This rating is for handguns only, as rifles and fast moving projectiles will pass right through the armor. Click on the picture wheel to see what level IIIA is. Remember level IIIA covers the previous levels also.

 Now that that's out if the way. The SentryShield panel is made of UHMWPE (ultra-high-molecular-weight polyethylene) thread woven together. It then has a nylon shell around the UHMWPE. UHMWPE does have its pros and cons. One big pro is its weight. The 16.25×11.75” panel only weighs 1.74 pounds. So putting it in a pack is barely noticeable. Another pro is its slim size. At less than ½ inch thick, it doesn't take up much of the useful space in your pack. Now a downside to UHMWPE is temperature. Basically you want to keep it between -15°F and 150°F. Anything above or below this specification and the material will start to degrade. And no one wants that in a ballistic panel.

 Some of you might be wondering why anyone would want or need this. Well, we live in an unpredictable society. A backpack or laptop bag is basically a man purse. Anyone seen wearing or carrying one is not really noticed. Now you can blend in and still have some ballistic protection, if needed. With a backpack, if the need arises, one can just put the backpack on backward, and have a front level IIIA protection while keeping your hands free to do other work. As mentioned earlier, you can equip a child with a ballistic panel, without adding huge amounts of weight. It may not be rated for rifle rounds, but level IIIA is better than nothing to keep a loved one safe.

 Gun fire is also not the only use for ballistic panels. As we have seen, explosives can be a hazard also. Just look at the Boston marathon bombing. Panel's, like the Sentry Shield, may also protect you from shrapnel or flying metal produced by an explosion.

 I know we are talking about just one single ballistic panel. But, what about the use of it against blunt objects. Every body armor I've tried, seemed to also help with spreading out the force, of say, a bat, or even a fist. So a backpack panel might also help you out of other situations.

 When I used the backpack panel, I really didn’t even notice it. The panel slides nicely into most packs. I happen to slide it in the laptop section of my pack. The Sentry Shield panel does goes have a front and back side, just remember to put the side labelled “strike face” outward, away from your body. I really did not even notice the panel when carrying the backpack. If you want a smaller panel, they make one for a handbag, so it is slightly smaller.

 The SentryShield ballistic panel is pretty nice. It fits into just about anything, even a plate carrier, if one wanted to do so. The price is excellent at $90. It’s rated for most handgun and shotgun rounds. So if you’re in the market for something like this, go check out SentryShield.

Firearms Insider Reviews - 8 Key Points

Claim to Fame:

Level IIIA ballistic panel for backpacks

Target Market:

Travelers, children, those wanting ballistic protection without the typical “vest”

FNBs (Features & Benefits of this product):

  • NIJ level IIIA

  • 16.25×11.75”

  • Less than ½” thick

  • 1.74 lbs

  • -15 to 150 F temperature range

  • Made in China

What other aesthetic options or finishes are available?

Handbag version

What others are saying?:

Kerry 5/5 stars at Sentry Shield
Fit great and actually comfortable
I have a backpack that I really like because it has a weird kinda design that I haven’t been able to find anywhere else so I didn’t want to replace it, even though everyone’s talking about bulletproof backpacks nowadays. I can’t afford a bulletproof tactical backpack and a kevlar vest is uncomfortable. My friend told me about inserts and then I saw that SentryShield makes them. It came to me in about 2 days (business) and it’s made nice. it fits the weird inner slot of my backpack perfectly. I’m hoping I never have to use it, but I’m glad I got it. I did have some questions about the product and I called customer service. They were nice!

Link to other reviews:

Best Travel Gear

Price point:

MSRP = $120.00

Retail = $89.99

I need it now! Availability:

SentryShield

Our Rating:

Pros:

  • Lightweight

  • Fits into most packs well

  • Price

  • Slim

Cons:

  • Made in China

  • Temperature range

Score: 8.00 Great

80.jpg

Favorite Link:   Medford Knife & Tool

Peltor Tactical 500

 Peltor has been making hearing protection for many years. The Peltor Tactical 500’s are one of their newest releases. They sent me these after talking with them at SHOT show. As we all know, hearing protection is very important. Especially if you do a lot of shooting. The Tac 500’s will help with that and even give you some bonus features.

 I am not new to electronic noise cancelling hearing protection. I’ve used a set of Peltor tactical 6-S’ for almost 20 years, as well as other manufacturers also. These new Tac 500’s have way more features than my old trusty 6-s pair. They have a noise reduction rating of 26 dB while reducing any sound above 82 dB. In order to reduce the sound of loud noises, the tac 500’s use what Peltor calls “Dynamic Suppression Time” technology. What this means to you, is that the electronics monitor the harsh sounds and echoes to determine how quickly and how much to mute the volume. This feature works outstandingly well. I really liked how it only cut the gunshots or loud noises to a manageable level. While still being able to hear them. They do not cut out the sound completely like my 6-s or some of the less expensive hearing protection.

 Another feature that somewhat resembles the Dynamic Suppression, is the “Clear Voice Tracking.” The Clear Voice tracking also appears to work very well. What it does is sense voice levels getting input from the microphones. It then enhances them so that you can clearly hear what others are saying. Ant time I was wearing the Tac 500’s at the range, I had zero problems understanding or hearing people talk. It sound almost as if I didn’t have the hearing protection on at all.

 The Tactical 500’s were comfortable when worn. Except the headband can press in the top of your head some and cause discomfort. I noticed this a little when wearing them without a baseball hat. But when wearing them over the hat, they were comfortable to me for long periods of time (6+ hours). The headband is vented some, it has three vent squares in the top. One of these vent squares is made to clear the button on top of a hat, so that the button doesn’t press into your head and start hurting. The ear cups were also comfortable for me. They also sealed over my glasses pretty well. I believe the gel cups that 3m sells will fit on the Tac 500’s also.

 Hearing protection that rides up, or opens up, when shooting rifles can be a real problem. Peltor has made the Tac 500’s with a cut-out, or scoop, on the bottom of the ear cups. This cut-out help them sit lower when putting your cheek on a rifle. The 500’s worked well for me when shooting rifles and shotguns. They didn’t try to lift up like my Howard Leights do. Even though the 500’s are larger, size wise, then my 6-s’, I didn’t notice any differences in comfort.

 Possibly one of the coolest features of the Tactical 500’s is the built in BlueTooth. This allows you to pair your smartphone to the hearing protection. I think most people have missed a phone call or text while at the range. Having the bluetooth feature allows for you to hear incoming notifications from your phone. You can even answer a phone call by pushing the center of the right ear cup. Because of the dual microphones in the headset, people can actually hear you talk, within reason, you are still at a shooting range. This particular ear protection has an annoying whine or static when turned on. It happens with the bluetooth on or off. If you up the volume, it just gets louder. If these didn’t have that whine, I’d give them a much better rating. Having the bluetooth also allow me to listen to music when I wear these around the house, lawn mowing and the like. These are not music headphones, so the sound quality of music is pretty blah. Another feature with the bluetooth, is being able to use it with a shooting app on the smartphone. It makes it super easy to hear the tones, or beeps. If you want to use them without bluetooth, they have a 3.5mm audio jack and come with a cable.

 The Tactical 500’s also fold up into themselves. Of course this is for storage. But they also include a nice bag for putting them in. A rechargeable battery pack is also available and can be charged with a micro usb plugged into the right ear cup. Otherwise it uses 2 AA batteries. But don’t worry, it has an auto off feature for people like me that forget to turn stuff off. The Tac 500’s will also alert you, by talking, that your batteries are low or when you “power on” and “power off” the hearing protection.

 I probably missed something that the Tactical 500’s do. I have a love / hate relationship with them. I love all the features, but hate the annoying static sound when they are turned up. Go check them out if your in the market for some electronic hearing protection.

Firearms Insider Reviews - 8 Key Points

Claim to Fame:

Noise cancelling over ear hearing protectors

Target Market:

Shooters, Hunters, anyone needing hearing protection

FNBs (Features & Benefits of this product):

  • 26 dB NRR

  • Dynamic Suppression

  • Clear Voice Tracking

  • Bluetooth

  • Auto shut-off

  • Recessed Microphones

  • Cheek cutouts for rifle stocks

  • Vented Headband

  • 3.5mm Audio Jack - Cable Included

  • Carrying bag

What other aesthetic options or finishes are available?

None - You get Black

What others are saying?:

From 3M -  ⅘ stars.

ToddInTexas
  
Dynamic supression great, but odd interference

I bought these a few months ago and use them at indoor and outdoor ranges and also while I'm woodworking (both handtool for chopping mortises and dovetail waste) and when using power tools. It is great to be able to hear sounds and voices. In fact, these have an uncanny way of amplifying low level sounds, which is kind of cool. As to ear protection, these work well for both indoor and outdoor ranges as well as in woodworking. As others note, the headband can be uncomfortable. It appears that 3M simply didn't user test these, which is very odd. If I am careful about positioning I can usually wear them for hours, but if they are slightly off the top of my head starts hurting. For me though, the main issue is the strange audio signal that I hear. I'm not sure what it is from, perhaps bluetooth, but it is almost always there and detracts from the experience. As to music quality, these are only OK. My Bose QC35s blow them away. Listening to music through the Peltors is not a great experience--it all sounds flat and compressed. But I didn't really buy them for music--that's just an extra for me.

From Amazon - ⅗ stars

Mychajloon

A lot of unnecessary feedback and buzzing in the headsets

Bought so my kids could go hunting with me. A lot of unnecessary feedback and buzzing in the headsets. Any solutions to this would be appreciated.

Link to other reviews:

Gun Holsters & Gear

Price point:

MSRP = $199.99

Retail = $119.99 on Amazon

I need it now! Availability:

Amazon

Our Rating:

Pros:

  • Excellent Noise cancellation

  • Uses AA batteries

  • Bluetooth

  • Auto Shut-off

  • Fits over hat button

Cons:

  • Static sound

  • Headband comfort

Score: 7.50 Good

75.jpg


Favorite Link:   ABC House Benefit Match


You Suck, It's not the Gun

Written by: Kenny O.

  How many times has someone said “there’s something wrong with this gun” yet it performs perfectly in someone else’s hand? This is where You Suck, It’s Not The Gun was born. People are always ready to blame an equipment failure when there are certain aspects at play that cause them to fail. Recently, I had the opportunity to train with Erik “Trek” Utrecht, owner of Michigan Defensive Firearms Institute, MDFI, and learn how and why I suck. The gun just does what it’s told.

  Trek starts out by giving us some background, interspersed with movie quotes every now and again, and tells us what to expect for the day. Hearing that we will only be firing 115 rounds for a full day seems incredulous at first. How can so few rounds make one a better shooter? It all comes down to taming the wolves. After a 10 round qualification, at 10 yards, the day really gets going. Trek tells you to bury that qualification target somewhere that you won’t see it for the rest of the day. What comes next is the introduction of the two wolves that need to be tamed.

  Obviously, these are not real wolves. They are analogous to the controls that we need to master to be better shots. They are referred to as the Sight Wolf and the Trigger Wolf. The illustration that is set up is one of two children, one adolescent and one teenager. The younger of the two is kind, gentle, and obedient. This is the Sight Wolf; he wants to behave. The Trigger Wolf is not the same. He is the bad seed, rebellious, hellion of a child that will buck authority and society at every opportunity. The challenge is teaching this Wolf to obey and not corrupt the good wolf. The first way to tame him is to take your time with him. The motto of the class therefore is there is no time limit. It doesn’t matter how fast you can miss a target.

  Starting at the 1 yard line, the fundamentals get refined making many of the students 1 yard snipers. Get the T-shirt, it should be good for a laugh. Being a 1-yard sniper doesn’t sound impressive, but it helps to build on the fact that good shooting is a possibility. After a break, Trek continues to emphasize how the wolves can be tamed and becomes a chef. His shooting recipes for wolves will highlight your strengths and weaknesses on the firing line. After the first recipe or two, shooters really start to see where they need to improve or continue what’s working for them.

  Trek might just be the Bobby Flay of the shooting world because his recipes can be magical. This is evidenced at the 3 and 5 yard lines with more drills. All these drills use a 1” dot as the target. There is something to be said about using a small target to aid in improvement. It is also incredibly rewarding when you’re able to keep your shots inside of the dot. By the end of the day, after all the recipes, stories, and wolf warnings have been shared, it’s time to reshoot the 10 yard qualification. After only firing about 100 rounds, many of the students saw a significant improvement in their shooting. I myself was able to cut my group size in half from morning to afternoon.

  I strongly recommend anyone that wants to improve their shooting skills to take this class. It is not sexy, cool, or tactical. It is practical though and well priced at $175. Every bullet that a shooter fires, whether on the range or on the street, has a lawyer attached to it. Wouldn’t you want the confidence of knowing your rounds are going where you want them to go? I know I do and I consider this a small price to pay to help me do that. Trek is a great instructor who keeps what could be boring and mundane entertaining and enlightening. He is not overbearing, and he has a good sense of humor. Throughout all of that, safety is paramount. I was not in fear of injury like I have been in other classes. It was clear that I suck, it’s not the gun.

  I learned valuable lessons that day of how to suck less so I can be a better shooter.

XTech Pistol Training Gloves

 XTech Tactical has come out with their Pistol Training Gloves or PTG for short. We talked about these, when they first came out, on Episode 199 of the podcast. These gloves are basically shooting gloves with hook and loop sewn on to the fingers. After the episode, I contacted XTech and they sent me a pair for review.

 The PTG’s can be had in 4 sizes. XS, S, M, and L. They have a sizing chart on the PTG page. My size was a medium, and they actually fit me decently. If you have really large hands and want these, I think you might be out of luck. But for the rest of us, they can be had for $29.95. Which really isn’t a bad price for helping to learn proper shooting form. They are decent as regular shooting gloves also.

 I’ll go a little into what and how these gloves work. First off, they are blue in color, and only blue. But really for what they are for, color doesn’t really matter. Next up, the have an elastic cuff with a hook & loop strap to snug them on your wrist. Now comes the hook & loop on the fingers. It is on all of them except the index finger. On the inside, or where the pads of your fingers are, is a small pad of the soft loop portion of the hook & loop. On the outside of the fingers and thumb, where your second knuckle is, is where the hook portion is sewn onto the gloves. What this does is enable the shooter to wrap the support hand around the shooting hand by connecting the hook & loop pads. Thus teaching where to place the fingers. You might think that it would be hard to release the grip, but it isn’t, it is not very grippy hook & loop. Because they are made to teach a Thumb Forward grip, there are also pads on the thumbs to aid in placing them in the correct place also.

 I have been shooting with these for some time now. They have held up fairly well. I like them because they aren’t as thick and bulky as some shooting gloves. The synthetic leather palms give good feel. The stretchy backing also flexes to give good fit. They have vented fingers, but all gloves are warm to me during the summer. I have had friends try them out also. Most of them could see the benefits of using them for teaching. Some even seemed intrigued. I even had my daughter put them on as I explained what they did, She didn’t have any trouble lining the pads up to get a proper grip.

 There is a decent video on the XTech site discussing the PTG’s. As one can guess, these are a training aid. Because of this, they aren’t for everyone. Plus you need different sizes for different hand sizes, so a trainer may want to buy more than one size.

 I found the Pistol Training Gloves to do what they are said to do. They help teach where to put those fingers. XTech seems to have done a decent job creating them. So if you think they might be something to help yourself or others, go check out Xtech and their PTG’s

Firearms Insider Reviews - 8 Key Points

Claim to Fame:

Gloves to help new pistol shooters with proper finger placement

Target Market:

New pistol shooters and Firearms Trainers

FNBs (Features & Benefits of this product):

  • Designed for “Thumb Forward” grip

  • Promotes Muscle Memory

  • Ambidextrous Design

  • Hook and Loop Fasteners

  • Durable Synthetic Leather

  • Stretchable Polyester

  • Ventilated Fingers

  • Available in different sizes

What other aesthetic options or finishes are available?

None

What others are saying?:

Nothing found

Link to other reviews:

None found

Price point:

MSRP = $29.95

I need it now! Availability:

XTech Tactical

Our Rating:

Pros:

  • Teaches Thumb Forward grip

  • Comfortable

  • Sizing chart seems to work well

  • Just enough hook & loop to help with grip

Cons:

  • No XL or XXL sizes

  • May have to buy more than one pair

Score: 7.5 Good

75.jpg


Favorite Link:   AR15 Podcast


JP Enterprise Silent Captured Spring

Written by: Michael Caprioli


  I’ve been interested in since they first appeared in 2012. It’s a buffer spring and a buffer, it’s two – two items in one!  The JP Enterprise Silent Captured Spring is genius!  The system uses a spring like a 1911 recoil spring around an aluminum rod with adjustable weights at the BCG mating side with a cone like base at the rear of the unit.  

  JP Enterprise puts a lot of research into their products and won’t release a product if it doesn’t work 100%.  Specifically, JP did a lot of research to see if there are any limitations to their SCS.

  There are two generations of the AR15 SCS – First and Second.  The difference being the first generation uses a steel guide rod, are metric (M5) and take a 3mm hex key.  The second generation uses an aluminum guide rod and a 1/8 hex wrench.

  The AR15 JP Silent Capture Spring 2-15 (JPSCS2-15), is not compatible the Primary Weapons System (PWS) old style Enhanced Bolt Carrier (EBC).   This is because the back-bore, rear opening of the bolt carrier, is not large enough to allow the guide rod of the SCS to travel through it.  This is important because the EBC guide rod is stationary and has the BCG retracts in to the buffer tube during the firing cycle the guide rod penetrates the rear of the BCG.  The PWS EBC is easily identified by the larger rear bearing area and smaller diameter back bore.  As a side notice I remember when the SCS first came out it was also recommended not for use with the PWS Enhanced Buffer 416 Tube because the tube had a slight interior taper that did not allow the SCS to fully seat to the rear.  This is not currently listed in the product instructions.

  JP also makes an AR10 second generation version of the SCS, JP Silent Capture Spring 2-10 (JPSCS2-10).  The AR10 version is not recommended for use with HK MR762 due to its larger diameter buffer, nor the DPMS GII, which will not cycle with the SCS due to its carrier design.  It’s nice that a company cares enough about its products to let you know it’s limitations before you buy it.  

  The JP 9mm SCS will work with some 9mm pistol caliber carbines, but won’t work with others. A key to look for is if the 9mm bolt has an opening large enough and deep enough to the guide rod to penetrate.  With the numerous 9mm PCCs hitting the market I can see why it’s difficult for JP to specifically state which PCC it will work for and which ones it won’t.  But I can guarantee it will work in the JP GMR-15 9mm PCC.  (Hopefully I can review one of these in the future.)  Or if you are building your own JP sells an outstanding line of 9mm PCC products.

  Both the AR15 and AR10 are available in a heavy H2 version.  The heavy H2 is recommended for use with short barrel rifles, suppressors, select-fire, piston-operated systems and when manufacture recommends use of an H2.

  If you’re not sure what system to get JP has a SCS selection guide.

  The SCS is pricey, $139.00 to $196.00, depending on type: standard, H2, with assorted spring kit; AR15, AR10 or 9mm.  Price is the main thing that kept me away from buying the SCS.  While walking the prize table at the 2017 He-Man Nationals I picked up a gift certificate from JP Enterprise that allowed me to get two Silent Captured Springs and two Low Mass BCGs.  I ordered the AR15 SCS standard version with the assorted spring kit.  The set arrives in a neat triangular shaped box.   The kit includes the SCS system, five springs, spacer and steel weights.   You can also order additional tungsten or steel weights to customize the system for your AR15 application and ammunition.  The SCS is designed to be used in a carbine buffer tube.  If you have a rifle length buffer tube don’t worry.  JP includes a spacer to be used in a rifle length buffer tube.  Simply drop the spacer in the rifle length buffer tube first, then install the SCS next.  If you have an A5 buffer tube you should be able to trim it to fit.

  A note on carbine buffer tubes.  As I stated earlier, JP does a lot of research on their products before they release them.  They also listen to feed back from their customers.  Due to the different manufactures of buffers tubes not all of them may have the same exact internal dimensions.  As a result, the SCS was seating deeper in some tubes then necessary.  JP came up with a solution to the problem.  Place a quarter in the bottom of the buffer tube and it will fill the space needed.  There should be no gap between the back of the BCG and the buffer end of the SCS.

The standard version is designed to be a low-mass system.  The weight on the system is set by using steel or tungsten sleeves.  A standard buffer uses small steel cylinders. The H buffer comes with two steel sleeves and one tungsten sleeve.  Additional steel and tungsten sleeves can be purchased to fine tune your rifle

  The five springs are rated from light to heavy and are color coded.  You must refer to the product instructions to reference the colors (so keep the product instructions with your springs!)  Changing the springs is very easy. Remember safety – wear safety glasses! You are dealing with a spring under tension and parts may fly into your eyes. Depress the weight end and place a small Allen wrench or pin into the hole in the guide rod.  Unscrew the guide rod screw.  Now remember the weights are under spring tension and now there is nothing to keep them from flying off into the oblivion that your detent pin flew off to last month. Push the weights down to relieve tension on the Allen wrench, or pin, and remove it.  Slowly allow the spring to expand until there is no more pressure against the weights.  The weights should be clear of the guide rod, remove them and then you can remove the spring.  Select what spring you want to use, and install it in reverse order.  The guide rod screw comes a dap dried of 242 loc-tite on it and should be good for about two removals and resets.

  I used the white spring because my intended purpose was a light weight 3-gun rifle with a JP Low Mass BCG.  I also have JP Adjustable gas block on the rifle length gas system.  After tuning the gas system for reliability, I ran the rifle through a series of tests.  I used both JCAA 55 grain and 77 grain long range ammo.  The cycling was flawless and fast.  I also noticed the rifle recoil was smooth and shot very flat, it did not nose dive when it returned to battery.  I think this is because of the limited range of motion of the SCS.  The forward motion of the spring is stop by the retention screw in the guide rod.  In a standard AR15 the buffer is pushed forward by the spring and the buffer hits the detent pin in the lower receiver.  This may or may not be correct but either way, the system provides smooth cycling.

  So is the JP Silent Captured Spring worth the money?  I would say, “Yes.”  I did not find anything negative about the system and saw an advantage to it.  I would highly recommend it for any higher end build.  And I think everyone needs at least one high end build AR15.

  DISCLAIMER:  The products reviewed have been personally purchased or won as prizes from shooting competitions.  Any items provided to the writer for review shall be stated and disclosed in the review. The writer does not receive any financial compensation from any company’s in this review and will identify any sponsorship relationship with any companies in the review.


FIREARMS INSIDER REVIEW – 8 KEY POINTS


CLAIM TO FAME:

Self-contained, complete spring buffer system. Eliminates the drag and twang of traditional buffer springs.  

TARGET MARKET:

AR15 shooters looking to improve the performance of their rifle and end the twang.

FNBS (FEATURES & BENEFITES OF THIS PRODUCT):

  • Exceptionally smooth operation

  • Easy installation

  • Unique look

  • Adds in recoil efficiency

  • No bolt bounces

WHAT OTHER AESTHETIC OPTIONS OR FINISHES ARE AVAILABLE?

Available for all types of AR systems.

Easy to adjust buffer weights

Easy to adjust spring weights

WHAT OTHERS ARE SAYING:

One of those things I can’t imagine living without. – The Truth About Guns

It will blow your mind how smooth it makes your rifle. – The Firearm Blog

LINK TO OTHER REVIEWS:

The Firearm Blog: Gadget Review

Tactical Gun Review – JP Rifles LMOS and Silent Captured Spring Review

PRICE POINT:

MSRP:  $139.95-$206.95

Retail: $139.95-$169.95 @ Brownell's

I NEED IT NOW! AVAILABILTY:

Brownell’s

JP Enterprises

OUR RATING:

Pros:

  • Easy to install

  • Easy to adjust

  • Smooths weapons reciprocation

  • Quite

Cons:

  • Expensive (but worth it)


SCORE:  9.0 EXCELLENT

90.jpg


Guntec 15" Compression Handguard

 Guntec Usa sent me their new compression M-Lok handguard for review. They were also kind enough to send an extra one that we gave away on the podcast. This particular handguard is a 15” free float and anodized black. Guntec has been making AR accessories in the US for decades.

 I noticed a few new things about this compression handguard. Guntec put some QD mounts at the rear of the handguard. In my opinion, this is a great asset. It also came with 1 QD swivel. This handguard also has M-Lok slots all the way down both sides as well as the bottom. That was one of my complaints with their Air-Lite that I reviewed some time ago. This one also has a full length top picatinny rail. As well as diamond cuts throughout to reduce weight. The black anodizing is also a little dull looking, more of a matte finish as compared to a gloss one. It doesn’t scratch off or anything, so there is no need to worry about it.

You can see the slight misalignment of the rail to the receiver

 Installation on the compression handguard is super easy. All you really need to do is install the barrel nut and tighten to manufacturers specifications (standard AR15 barrel nut torque). There is no need to index the barrel nut. Slide the tube on. Line up the top rail with the receiver rail. Then tighten down the 4 clamp screws. I put some medium threadlocker on these 4 screws, but it probably isn’t needed. That is really all there was to it. One slight problem with this particular handguard, is that the rail on the handguard sits a little bit lower than the receiver’s rail. Not enough that flip up iron sights won’t zero, but enough to notice.

 At first I was a little hesitant about the compression style of handguard. But after crashing it up against some 2x4 barricades, I’m not worried about it twisting or not lining up. The clamping force around the barrel nut seems more than enough to hold everything lined up. I really liked the feel of the handguard. It is small enough for me to get my hand around. This makes it very easy to drive the muzzle from target to target. It is just under 2” from the top of the rail to the bottom of the handguard and 1.5” outside diameter everywhere else. The inside diameter measures 1.34”, so don’t expect to put a suppressor under it. And you will definitely need a low profile gas block. The whole combination of screws, barrel nut, and handguard came in weighing 10 ounces on my scale. So pretty lightweight.

 As mentioned earlier, I like how this handguard feels. It does however get warm after 3 or 4 mag dumps. That’s pretty normal given the diameter and how close it is to the gas block. As with a lot of long handguards, there is some flex out at the end by the barrel. Not as much as I have seen on others, but a little. This leads into the location of the QD mount. Because they are located by the barrel nut, any force put on them doesn’t appear to flex the handguard any. Guntec also sent some rubber M-lok plugs with the handguard. These plugs just kind of push into any unused slots and give a rubbery grip to the handguard.

 If you’re interested in some quality, value priced AR parts, go check out Guntec USA. This particular handguard is pretty decent. It feels good in the hand, looks decent, and won’t break the bank. Plus, if it’s not your style, they probably have something that is.

Firearms Insider Reviews - 8 Key Points

Claim to Fame:

15" Compression handguard for modern sporting rifles

Target Market:

Users wanting to upgrade to a 15" handguard

FNBs (Features & Benefits of this product):

  • T6 Aluminum Body
  • Proprietary Lightweight Aluminum Barrel Nut Included
  • Total Weight Including Barrel Nut Is 10 oz.
  • Triangle / Diamond Cuts Throughout Handguard to Reduce Weight
  • Rail System Slides Over Barrel Nut , And Is clamped on with 4 clamp screws
  • Monolithic Top Rail
  • 15" Length
  • Internal Diameter: 1.34"
  • Outside Diameter: 1.50"
  • Made in USA

What other aesthetic options or finishes are available?

10" and 12"

What others are saying?:

Nothing found

Link to other reviews:

Rusty Reviews on Facebook

Price point:

MSRP = $150 approximately (Not on website at writing)

I need it now! Availability:

Guntec USA

Our Rating:

Pros:

  • Lightweight

  • M-Lok

  • QD points

  • QD swivel included

  • Easy Installation

  • Made in USA

  • Rubber M-Lok covers included

  • Small Diameter

Cons:

  • Rail doesn't line up with receiver

  • Dull anodizing

  • Lack of instructions

Score: 6.5 Okay

65.jpg


Favorite Link:   AR15 Podcast

Night Fision Tritium Sights

 Night Fision is a new company joining into the tritium night sight community. Their first offerings are for Glock model pistols, with other models to follow. As anyone with a Glock knows, get rid of the stock plastic sights and put on some decent ones. Well Night Fision is here to help. They graciously sent me some for review.

Almost no light

Low Light

 When I first received these, I was waiting for a slide to put them on. So I tossed them in the safe. These things could be seen glowing through the packaging. Yes, they are the brightest set of tritium sights I have seen. I ended up installing them on a GreyGhost G19 slide for the review. Even when you would consider there to be enough light to see non tritium sights, these still glow bright. Of course they are also made out of steel, as sights should be. A black nitride coating should also make them last a long time, as well as look good

 But wait, just the bright tritium inserts isn’t all they have going for them. The front sight also has a colored ring around the tritium. They call this the "Perfect Dot." This ring is available in yellow, orange, or white. I opted for the yellow. My next choice would have been orange. With these colored outer rings, one can pick up the front sight easily during the day also. And because why not, they even added daytime florescence to the color ring. The front sight is available by itself also.

 The rear sight has a few options also. As expected, you can get it in white outlined dots. Or blacked out, so just the tritium inserts. I chose the blacked out rear sight because I only want color on my front sight. One can get the rear sight with 2 options: a square notch, or a “U” notch. I chose the square notch because that’s what I am use to. Another thing to note is that the rear sight is very square on the front and back. This gives a good sight picture and the added benefit of being able to use it to rack the slide on a table, belt, etc.

 Now onto shooting these sights. It is super easy to pick up the front sight during draw and shoot. When dumping a magazine fast, same thing. Where it gets a little dicey is on farther away targets. Even though the front sight is easy to pick up, it is wider than I like for 20+ yard shooting. It measures 0.142” for me. The rear sight measures in at 0.140”. I really prefer a wider rear sight, or narrower front sight. Target transitions were also easy with the Night Fision sights. When using the sights at dusk, the tritium really pops out. The three dot system works just fine. However, the sights/gun do shoot a little lower point of impact with the three tritiums lined up. These are really a great combo day/night sight.

 The Night Fision sights are a really nice change from traditional night sights. I love the yellow front dot for daytime use. And the super bright tritium really pops out in lower light conditions. Go over and check out Night Fision, I think they will be going places in the sight business.


Firearms Insider Reviews - 8 Key Points

Claim to Fame:

Tritium Night Sights with a twist

Target Market:

Those wanting tritium sights

FNBs (Features & Benefits of this product):

  • "Perfect Dot" with daytime florescence

  • Bright Tritium inserts

  • Made from 4140 steel

  • Black Nitride coating

  • Made in USA

  • Different color rings (White, Orange, or Yellow)

  • Square or "U" notch rear

What other aesthetic options or finishes are available?

White Front, Orange Front, U-notch rear, White dot rear

What others are saying?:

Keith D. @ Rainier Arms 5/5 stars

Just got em , (FAST) and they look pretty nice, definitely like the price for my spare red dot equipped G19 slide

Link to other reviews:

None found (These are pretty new)

Price point:

MSRP = $89.99

Retail = $80.10 at Rainier Arms

I need it now! Availability:

Night Fision or Rainier Arms

Our Rating:

Pros:

  • Bright tritium

  • Front daytime florescence dot

  • Nitride coated

  • Price

  • Made in USA

Cons:

  • Wide front post

  • Tritium dots have different point of aim

Score: 8.00 Great

80.jpg


Favorite Link:   Axelson Tactical


Brigand Arms Forearm Review

Written by: Michael C.

I’ve always been a function over style type person.  When I first saw the Brigand Arms handguard I thought it was stylish, but not very functional.  It looked like under heavy firing it would get hot because it was so wide open the heat from the barrel would radiate to the shooters hand.  

When I took the Tactical Performance Center Multi-gun class we were told to bring a wrap or glove because the rifle forearm would probably get very hot due to the large amount of fast shooting we would we be conducting.  During the three-day course, the forearm on my Armalite 3-gun rifle did get warm but not so much that it bothered me.  After this experience I thought the Brigand Arms would really get too hot to handle.

The lack of a rails didn’t bother me as those are only needed on a “tactical” rifle to mount lights, lasers, grips and bottle openers.  This is not a rail that one would choose for that application.  It just looked cool.

After hearing a positive review of the Brigand Arms handguard on the We Like Shooting podcast and the AR-15 podcast on the Firearms Radio Network  I thought I would give it a try. But first I had to see if Brownell’s carried the Brigand Arms handguard.  I’ve been a Brownell’s customer long before I started reviewing gear.  The customer service has always been excellent, and they have the best website in the business.  Has a bonus Brownell’s has the Forever Guarantee - no questions asked return policy.  So, if I don’t like it or decide I don’t want it, I can return it. And has an Edge member I don’t pay for shipping!  Including returns!

When the package arrived, I thought the box was empty because it was so light.  I opened the box and there was my new woven carbon fiber handguard!  I ordered the fifteen inch “Blade” version.  I think the Blade version really adds to the unique design of the handguard design.  The Blade is angled at the front and because of the mounting system you can run the angle however you like: long on the bottom, short on the top; long on the top, short on the bottom; or anywhere along the 360 degree radius.   

Unpackaging the forearm I was reminded of an issue with woven carbon fiber – loose fibers.  I caught a loose fiber in my hand, like a wood splinter.  I took a break to remove the foreign body from my finger and then put on my welding gloves.  I ran the gloves over the handguard to remove any loose fibers I imagine you could do the same thing with a shop rag, just make sure to throw the shop rag away when you are done.  This is not a negative against the Brigand Arms handguard, it’s common to all woven carbon fiber products, just part of the required pre-installation: wipe down the handguard.  Please note I have taken the rifle out five times since I mounted the hand guard with no more splinter issues.  There are three parts in the package: handguard, barrel nut and cinch nut.  The barrel nut is aluminum and appears to be similar to the YHM barrel nut, and the cinch nut appears to be similar to the YHM jam nut.  This is smart outsourcing by Brigand Arms, use off the shelf items to cut cost.  This is a smart move by Brigand Arms to lower the price of the handguard.  And since this is one of the pricier handguards on the market anything that can be used to lower costs while maintaining quality is a smart move.  Like Scrooge McDuck said, “Don’t work harder, work smarter.”

To start the installation I put a dap of release agent on the barrel extension on my custom order 18 inch, light profile, rifle gas system, 1-7 barrel I from Columbia River Arms and inserted it into a Vltor MUR upper receiver.  I really like the Vltor because I have yet to find one out of spec.  They look like billet, but they are forged and a little thicker than a mil-spec upper.  Next, I put a dap of LocTite 242 (blue) onto the threads of the receiver and tightened the barrel nut to the recommended torque of 34 – 40 foot pounds.  Next I installed the Brownell’s black nitride gas tube mounted to a JP Enterprise  AR-15 2 piece detent adjustable low profile gas block. The gas tube runs through the barrel nut so it’s important to make sure the barrel nut is aligned properly.  If the tube doesn’t fit through the nut keep tightening it a little bit at a time until it freely aligns with the gas key on the bolt carrier group.

Installing the handguard was very straight forward.  Like installing a YHM handguard.  In fact, Brigand Arms recommends on their FAQ web page to use the YHM handguard wrench to install the handguard.  Alternative ways are to tighten the cinch nut is with a spanner wrench, strap wrench or give the cinch nut a tap with a flat head screw driver.   I had a spanner wrench on hand and I wrapped the areas that might mare the finish with duct tape.  I was unable to get adequate torque on the cinch nut to keep the handguard form turning.  I made a quick trip to my local gun store Cobra Tactical (one of my sponsors) and asked Eric if he had the YHM handguard wrench.  He was kind enough to loan me the tool, so I could finish the build.

With the upper assembled I headed out to the range.  One of the first thing I noticed was how easy it was to access the adjustable gas block.  All too often the handguard must be removed to access the adjustments to the gas block, then reinstalled and you hope you have it adjusted properly.  

The test and evaluation for this upper was actually for five new parts: Brigand Arms handguard, Columbia Arms Barrel, UM Tactical RAGE muzzle brake, JP Enterprise low mass bolt carrier group and JP Enterprise silent captured spring recoil system, and Geisslle charging handle.  After getting everything tuned up (I will cover these items in a later review) I laid the handguard on a sand bag to check the accuracy of the build.  Awesome is all I can say regarding the accuracy of this build.  I was pleasantly surprised at how solid the handguard was on the rest.  No flexing or torquing while shooting off the sand bag. The sand bags at the range are the heavy plastic and I was surprised to see no melting or deformation from heat of the barrel to the bag.  Inspecting the handguard, I could not see and deformation or wear marks on it.

Next test came the test for what I thought would be the problem, heat radiating from the barrel through the hand guard.  I did a series of speed and transition drills without pause.  I finished with two 30 round magazine dumps.  Surprisingly the handguard never became too hot to handle or uncomfortable to hold.  Another surprise was how quickly the barrel cooled.  Just has the Brigand Arms stated in their interviews on the Firearms Radio Network because of the lack of surface area on the handguard the barrel cools quickly.

I’ve been able to take the rifle to the range five more times and even practiced dumping the rifle into a USPSA box and 3 Gun Nation barrel.  No damage to the handguard.  The handguard is a little larger in diameter than some other handguards but still fits well in the hand. The woven pattern of the hand guard makes for a good gripping surface. I practiced holding the handguard in different positions, all were secure, and it was easy to control the weapon.  

Brigand Arms makes three models of the woven carbon fiber handguard: Blade, Edge and Atlas.  The Edge is like the Blade but with a flat front.  The Atlas is like the Edge but adds a four short picatinny rails at 3, 6, 9 and 12 positions at the front of the handguard.   If you want to add rails Brigand Arms handguards, they are prepared for you.  You can purchase rail sections and add them wherever you want on the handguard.  Brigand Arms also sells M-Loc panels you can add anywhere to the handguard.

Overall, I am very pleased with the Brigand Arms handguard. It is performing better than I imagined it would.  The handguards are expensive, $259.00 to $414.00, but they are worth it.  Brigand Arms has added AR-10 DPMS-Hi style handguards to their shop.  I will be buying one of these for a light weight AR-.308 build.  I’m expecting the same outstanding performance from the .308 models.

Brigand Arms are innovators and I look forward to seeing other products they bring to market.

FIREARMS INSIDER REVIEW – 8 KEY POINTS


CLAIM TO FAME:

Lightest handguard available

TARGET MARKET:

Modern Sporting Rifle users who want a light weight unique handguard.

FNBS (FEATURES & BENEFITS OF THIS PRODUCT):

  • Lightweight

  • Easy installation

  • Unique look

  • Adds in barrel cooling

  • Off the shelf mounting hardware

  • Ease of access to adjustable gas blocks

WHAT OTHER AESTHETIC OPTIONS OR FINISHES ARE AVAILABLE?

  • Three different styles

  • Four different lengths

  • Available for AR15 and AR10 (DPMS)

  • Bare carbon fiber

  • Handguard can be Cerakoted

WHAT OTHERS ARE SAYING?:

Coolest and most interesting product at SHOT Show

LINK TO OTHER REVIEWS:

Brigand Arms website - Reviews

PRICE POINT:

MSRP:  $269.00 - $414.00

I NEED IT NOW! AVAILABILTY:

Brownells or Brigand Arms

OUR RATING:

Pros:

  • Easy to install

  • Lightweight

  • Feels good in the grasp

  • Looks wicked cool

Cons:

  • Expensive

  • No continuous rail on top


SCORE:  9.0 EXCELLENT

90.jpg

SAM XT TOURNIQUET

CAT, SOF-T, SWAT-T... And now SAM XT Tourniquet has entered the battlefield. For over 30 years, SAM Medical Products, an industry leader in the pre-hospital, trauma care market. “From the front lines to behind the lines to the sidelines, our products treat the problem at hand fast and effectively…”

Recently they’ve released a handful of new products on the market and I was lucky enough to receive a few of the XT TQs. Thankfully, I’ve not had to use one in a real world application, but I’ve tested them out extensively. I also brought it around my local shooting club that has members from all branches of the military, law enforcement, medical personnel, and regular Joes. Some of the big concerns where the plastic that SAM used in the buckle and other components, and the fact that you have to pull in a different plane than others. With those concerns, no one was able to break the plastic buckle(or other components), and after showing someone the correct way to pull(against the buckle, not perpendicular) everyone got it after the fact. Additionally, it was very intuitive to use by people who’ve never had TQ training.

What sets the SAM XT TQ apart from the rest of the herd is the Truforce Buckle. It’s a special buckle that releases forks to hold the tourniquet strap in place, and not allow it to loosen while you're securing the rest of the strap to itself. Slack in the strap is the leading cause for tourniquet failure, resulting in loss of life. With the Truforce Buckle, it secures the strap at a preset circumferential force, and allows you to use fewer windlass turns to fully tighten and cut off blood flow. Once it’s tight, you secure the windlass in the C-hooks, and lock it in the a velcro time band.

As with all tourniquets, they recommend you get one for training and one for use in your kit. As it falls in line with the price of other TQs, you should take a look at your concerns and consider this for your kit. I know I’ll be keeping one with me.

Firearms Insider Reviews - 8 Key Points

Claim to Fame:

Stopping extremity blood loss due to trauma

Target Market:

MIL/LEO, anyone who owns a gun, car, chainsaw, etc.

FNBs (Features & Benefits of this product):

  • Auto-lock Buckle
  • Metal Windlass
  • Windlass C-Hooks
  • Meets MIL-STD 810G

What other aesthetic options or finishes are available?

Available in Civilian Orange and Military Black.

What others are saying?:

Only 2 reviews were founds at the writing of this article, they’re from amazon.

★★★☆☆ Good functionality, but very steep learning curve.

★★★★★ Even better than the CAT.

Price point:

MSRP = N/A SAMXT.com

Retail = $37.99 Boundtree (preferred distributor)

$36.96 Amazon

$37.95 Rescue Essentials

I need it now! Availability:

For speedy results, the best bet would be to buy it on amazon.

Our Rating:

Pros:

  • Auto locking buckle

  • Metal Windlass

  • Circumferential range: 5.5in - 35in

  • MIL-STD 810G Proven

Cons:

  • Plastic components

  • Additional training required (as with all different TQs)

Score: 8.5 Great

90.jpg

2A Armament Aethon Rail

  Since everyone has an AR15, or at least should, aftermarket accessories for them have become the norm. That brings us to 2A Armament. They produce a variety of products, including complete rifles, for the AR15. 2A sent me one of their 7" Aethon rail handguards with M-Lok slots.

  The Aethon rail has some interesting design features. The first one I noticed was the scalloped picatinny rail sections. Of course this helps to reduce weight, but also looks very nice. The Aethon features a full top rail, that lines up with the receiver nicely. Under the top picatinny rail there are lightening holes, which also help vent heat away from the barrel. At 90°, 180°, and 270° are the flats with the M-Lok slots. Since this is a 7" handguard, there are only 2 slots per side. In front and behind the M-Lok slots are holes for QD mounts! Between the flats on the handguard, 2A has reduced more weight by milling out an angled half circle style design. Also the top picatinny rail has "T" markings on it.

  Installation of the Aethon rail is pretty straight forward. I'll run you through the simple method. After taking off the old parts. Just install the 2A Armament titanium barrel nut per specified torque, line up one of the cut-outs for the gas tube and the barrel is tightened back on. I used my armorers wrench and it worked just fine. Now here is one of the niceties of the Aethon. To install the handguard, you just slide it over the barrel nut and align the top rail with your receiver. Then you just tighten down the four angled set screws, 2 per side, and your done. The way the barrel nut is designed, along with the angled set screws, is what makes this so easy. A warning, do not over tighten the set screws as they are going into aluminum and could possibly strip out fairly easy. I just put blue threadlocker on them and called it a day.

  The Aethon rail saw plenty of use. Partly because the rifle I installed it on, wasn't working properly. This had zero to do with the Aethon. I will say that because of the small internal diameter of the Aethon, it does get very warm when shooting quickly, so much that I wouldn't recommend it for a registered full auto, unless you always wear gloves. Other than that, the Aethon performed great. I liked the smaller diameter of the Aethon, it allowed me to get a good grip around it to help reduce muzzle jump. If you have really large hands, you could probably wrap them all the way around this handguard. Because this is a 7" handguard, it is very sturdy with no flex whatsoever. There are also no sharp edges anywhere, even where the set screws lock the handguard on. My only complaint is that it only measures 6.7" long instead of 7", leaving a little gap between the end of the handguard and the fixed front sight post. 

  2A Armament has done an excellent job with the Aethon handguard. It is a deep black anodizing, so much that it is much darker and shinier than my receiver. It is fairly lightweight and installs easily. If your in the market for some nice AR parts, go take a look at 2A Armament.

Firearms Insider Reviews - 8 Key Points

Claim to Fame:

Lightweight AR15 handguard

Target Market:

Users wanting a lighter weight, or M-Lok handguard

FNBs (Features & Benefits of this product):

  • Made in U.S.A
  • U.S.A. sourced 6AL-4V Titanium barrel nut
  • M-LOK mounting solution
  • Free floating design
  • QD mounts on both ends
  • 1.3” Internal Diameter
  • 6.7" length
  • "T" markings
  • Weighs 6.2 oz's complete

What other aesthetic options or finishes are available?

10", 12", and 15" lengths

What others are saying?:

None Found

Link to other reviews:

None Found

Price point:

MSRP = $179.00

Retail = $170.00 at Optics Planet

I need it now! Availability:

2A Armament or Optics Planet

Our Rating:

Pros:

  • M-Lok

  • Easy Installation

  • Dark Anodizing

  • Small overall diameter

  • Full top rail

  • QD mounts

Cons:

  • Not a full 7" in length

  • Gets hot

Score: 8.0 Great

80.jpg


Favorite Link:   Poly Gun Mods


Glock 19 Gen 5

 Written by Zane M.

  In case you haven’t heard the worlds most perfect pistol just got an upgrade. That’s right perfection has been perfected. In all seriousness glock has released their gen 5 line of g19 and g17 guns and people seem to have mixed emotions.

  Being a fan of glocks, I was naturally curious and later reading a few write up and internet scuttlebutt I definitely wanted to get my hands on one.  It worked out well because a friend called saying he was getting one and did I want to check it out.

  I drove out to his house and picked up a brand new g19 gen5. “Bring it back sometime next week” he said. I also had an alert from UPS letting me know I had a case of ammo on my doorstep, how convenient.

  The new finish on slide looks very nice, it looks a bit darker and is more subdued. A blacker black if you will, and not as shiny as my gen4 and gen3 glocks. The gun lacks finger grooves, a welcomed change from most people I know, but so does my gen4 thanks to a dremmel. The barrel on the gen5 uses traditional rifling instead of the polygonal rifling glock has previously used. Probably the most notable difference aside from the lack of finger grooves is the ambidextrous slide release/stop. So if you’re wrong handed, glock thought about you. One change I was most interested in checking out was the Flared magwell. I was underwhelmed by it at first glance but it definitely grew on me. Glock is still using those plastic atrocities they call sights but this gun had already had them replaced with some fiber optics. The biggest thing I noticed is still no front cocking serrations. Come on, glock, get with it.

  The gun came to me with one magazine through it but was otherwise brand new. In the box there were three mags and mag loaded tool, Cleaning rod and brush, cable lock and manual. I took the gun to the range as it came to me with a few hundred rounds of ammo.

The trigger is a glock trigger, it seemed a bit smoother than my gen 4 and gen 3 but lighter than the g42 I used to have. The take up did seem bit stiffer but I’ll take that for the seemingly more consistent “push” if you will through the “wall” The gun handled and fired like a glock. The flared magwell did grow on me with every reload. In 300+ rounds of two hand, primary hand and support hand only shooting. I had no malfunctions to speak of aside from three failures to lock back on the last round. These were completely shooter induced and occurred with a 19, 17 and magpul 21 mag. It’s also worth noting this is a problem I have with all glocks because my support hand contacts the slide release.

  Holster compatibility was something I was curious about so I tried the gun in several that I had laying around. The starboard side slide release dragged on two of them, touched one, and worked fine with four. Two of those were home made by yours truly and the other two require the use of a weapon mount light. Overall it seemed to work in many existing holsters and with some quick modifications I don’t see why it wouldn’t work in most all of them.

  Final thoughts: I like it. For an out of the box carry/duty gun, it’s hard to beat save the sights. However, if you’re going to modify or send it off, I’d probably just save the little extra and go gen 4

Firearms Insider Reviews - 8 Key Points

Claim to Fame:

It’s a glock, not much else to say. It’s been upgraded

Target Market:

Law enforcement, security and law abiding citizen looking for a reliable, ambi pistol. And glock fanboys like myself

FNBs (Features & Benefits of this product):

  • glock reliably

  • ambidextrous slide stop

  • flared magwell

  • lack of finger grooves

  • new more durable coating

  • replaceable back straps (not new)

  • traditional rifling

What other aesthetic options or finishes are available?

None

What others are saying?:

Too New

Link to other reviews:

Concealed Nation

Price point:

MSRP = $629.00+

Retail = $559 at Brownells

I need it now! Availability:

Brownells

Our Rating:

Pros:

  • Works like a glock

  • flared magwell

  • pleasing to shoot

  • smoother trigger

Cons:

  • Still no front serrations

  • sights are still terrible (not a big deal to me)

Pros/Cons: You Decide

  • lack of finger grooves

  • ambi slide release

Score: 8.5 Great or slightly better than the gen 4

85.jpg


TandemKross Halo Charging handle

  If you have been around certain types of handguns, like the Ruger MK series, you know how hard they can be to cycle by hand. This brings us to the "Halo" charging ring by Tandemkross. The Halo is a nifty device that clamps on your existing charging handle/slide. Tandemkross sent me the Halo for review. It is one of the few made for the square style bolt on the earlier Ruger 22/45 and MKII's.

  When you first get the Halo, you notice that it is a real simple design. It is basically a squared off ring with a slot and a bolt. Simple yes, but more importantly is the function. Once I mounted it up, I immediately found it easier to cycle the bolt. All you have to do is put a finger inside the loop, and pull back, then let go, and your done. I had my whole family try it, and they all said it was way easier and more intuitive. I was also told it made the 22/45 look like a space gun.

  Of course I was also worried about adding weight to the bolt. After trying everything from sub-sonic to hyper-sonic .22lr shells, I put that thought to rest as everything functioned great! Now on the other hand, I was a little disappointed the the inside of the Halo ring was squared off. It digs into your joint a little when using it. If Tandemkross were to round the inside, it would be much more ergonomic. I wasn't the only person who thought this either. With the Halo installed, you can cycle the bolt the same way as before, if you want, but with the added benefit of the tabs sticking out farther than standard.

  Everything needed for the installation is included. Basically the screw and allen wrench. To install the Halo. Just slide it down over the cocking serrations/nubs. Install the screw, and tighten it down. I put some blue threadlocker on the screw, just in case. One thing to note, you can put the Halo on upside down. Yes, I did this, and it does still function fine. But put the writing so you can read it, and that is the correct way to install it.

  The Ruger series of pistols is not the only ones that Tandemkross makes the Halo for. Some of the others look a little different, but function the same. So if you are having a problem racking the slide, or know someone that is, you might want to look into the Halo series of charging handles. 

Firearms Insider Reviews - 8 Key Points

Claim to Fame:

Easier to use charging handle

Target Market:

Shooters wanting a quicker, larger, and easier to use charging handle

FNBs (Features & Benefits of this product):

  • Pull Ring Design

  • Ease of use

  • Ambidextrous

  • Lightweight

  • Anodized

  • Made in U.S.A.

What other aesthetic options or finishes are available?

Black only, but available for other firearm models

What others are saying?:

Jon @tandemcross: 5/5 stars

Ruger 22/45 Lite Halo

This has to be one of the best upgrades for the Ruger 22/45. I got this for my wife because she has a hard time pulling back the bolt with her small hands. The halo ring makes it simple and easy for her to rack the bolt with just one finger. I also like how secure it is on the bolt, just a dab of blue loctite on the screw and its not going anywhere. Lastly, I believe the extra weight of the halo on the bolt helps cycle the gun better which is an added bonus. I would definitely recommend this upgrade for people who have trouble pulling back the bolt on their Ruger pistol easily.

Link to other reviews:

AmmoLand

Price point:

MSRP = $44.99

Retail = $42.99 at Brownells

I need it now! Availability:

TandemKross or Brownells

Our Rating:

Pros:

  • Easy to use

  • Weight doesn't induce malfunctions

  • Model availability

  • Easy Installation

  • Made in U.S.A.

Cons:

  • Squared Off (Not Rounded)

  • Only available in black

Score: 8.0 Great


Chad’s Favorite Link:   AR15 Podcast

"Game Changer" .22lr Compensator from TandemKross

  Compensator's for small caliber handguns can seem pointless to some. After all, .22lr doesn't have much recoil. But, I tend to believe that all calibers benefit from reduced recoil and muzzle rise. I tend to think TandemKross feels the same way I do. After all, they did send me the Game Changer comp to review.

  I installed the Game Changer on my Ruger 22/45 MKII. The barrel had been previously threaded to the 1/2-28 that the compensator is designed for. So I installed the supplied O-ring that they use as a type of crush washer and seal. Then screwed the Game Changer on and aligned the top holes up.  There is some resistance once the O-ring starts getting pressure on it, but it isn't a lot. This compensator does not have bottom holes/vents. I prefer this to other styles that have vent holes all the way around the compensator. 

  So it is time to tell my experience with the Game Changer. I originally thought the name was a little boisterous, but then I shot it. This little compensator does a great job of reducing the recoil. Since it didn't have much to start with, it took it down to almost nothing! But that's not all, it also reduced the muzzle rise. On a side note. While at a steel challenge match, I was talking with a guy who had been using the Game Changer for a couple of years in rimfire open class. He told me it was his favorite comp. So I am not the only one that likes it. Also when shooting the comp, you can actually see the gases coming out the sides and top. I did not notice it being any louder than without it, but it is only a .22, so it is not like a large caliber with a compensator.

  The Game Changer is constructed out of anodized aluminum. It has 4 holes in the top and 4 slots on each side. TandemKross says it has large ports for easy cleaning, and yes, you can get in there to clean out the lead and powder junk. As usual, it has 1/2-28 threads, the standard for rimfires. But there is one thing I don't like about the comp. It has a 1" diameter, so it is larger than the 22/45's barrel, and would also be larger than a 10/22 bull barrel. It is just cosmetic, but it would be nice if it was the same diameter to give firearm a smooth look. At 1.75" long, it is not really long either. It will also fit just about any .22lr that has 1/2-28 threads.

  After shooting the Game Changer a bunch. I've concluded that it lives up to the name. So if you are looking for an "actual" compensator, not just a diffuser, go look at TandemKross. They pretty much are a one stop shop for anything .22lr, not just products for Ruger's. 

Firearms Insider Reviews - 8 Key Points

Claim to Fame:

.22lr compensator to reduce felt recoil and muzzle rise

Target Market:

Shooters wanting less muzzle rise to get back on target faster

FNBs (Features & Benefits of this product):

  • Reduces Muzzle Rise

  • Large openings for ease of cleaning

  • Standard 1/2"x28 Threads

  • 1" Outside Diameter

  • 1.75" Long

  • Black Hardcoat Anodizing

  • Made in U.S.A.

  • Lifetime Guarantee

  • Fits: 
  • Ruger Mark III
  • Ruger Mark III 22/45
  • Ruger Mark III 22/45 LITE
  • Ruger Mark IV 22/45 Tactical
  • Ruger Mark IV 22/45 LITE
  • Ruger SR22
  • Ruger 10/22
  • Ruger 22 Charger pistol
  • Browning Buck Mark
  • GSG 1911-22
  • Savage Arms Mark II TRR-SR
  • Walther P22
  • SW22 Victory (2016)
  • Smith & Wesson M&P®22 Compact
  • Smith & Wesson M&P®15-22P pistol

What other aesthetic options or finishes are available?

Black, Branded (has TK Logo), Tandemized (#tandemized on side)

What others are saying?:

Keith @tandemkross.com: 3/5 stars

It's O.K.

Does help with speed of follow up shots. However leading causes accuracy to drop off rapidly.

Jason @E. Arthur Brown: 5/5 stars

Works great on my 22/45

Threaded on great, came down to the right amount of force to snug it on and sits flush with the ports lined up exactly straight up on the top. Definitely can hear the shots, almost louder than before. It seems to tame the already small recoil down even more.

Link to other reviews:

Spotter Up Review

Price point:

MSRP = $34.99

Retail = $34.99 at Brownells

I need it now! Availability:

TandemKross or Brownells

Our Rating:

Pros:

  • Reduces recoil

  • Reduces muzzle rise

  • O-ring seal

  • Price

  • Made in USA

Cons:

  • Diameter Size

  • Only Available in Black


Score: 8.0 Great


Chad’s Favorite Link:   Axelson Tactical

Smoke Composites Carbon Fiber Handguard

   As many of you know, carbon fiber seems to be popping up everywhere. Smoke Composites is one of those companies. They recently started making carbon fiber parts for AR style rifles and pistols. Their history of making parts for the defense industry, has had a definite benefit for those of us looking for lightweight AR parts. I will take a look at their 12" handguard. 

  Smoke composites sent me one of the 12" M-Lok handguards to review. The first thing I noticed was how spectacular this handguard looked. It has a cool, non-symetrical, look to it. Not the standard grid pattern one would expect. I also noticed the quality put into the handguard. But then I picked it up, and wow, it is light. 

  Now it's on to the tech specs. When I said it was light, well, it weighs in at 7.3 ounces complete with all the hardware. It might not be the lightest, but accessories can easily be added by using the M-Lok slots, something other manufacturers don't offer in carbon fiber. Speaking of M-Lok, it uses the standard 5 slot M-Lok rails. The handguard has 4 M-Lok slots on each of the 8 45 degree sides. The slots aren't evenly spaced, they are grouped by 2's and then a space between the 2 groups. Also the slots on the top, bottom, and sides are more toward the front of the rifle. With the 45 degree ones set back slightly from the front of the rifle. Construction is from 35-50 carbon fiber and 7075 aluminum, so as far as I could tell, good stuff. At 1.88 inches outside diameter, it felt really good in the hand. I thought maybe the smooth carbon fiber would be hard to grip, but my hand seemed to kind of dig into the slots to provide grip. Smoke Composites forms a ring at the front of the handguard, I would guess to protect the front from getting chipped, it would be quite thin otherwise. The inside of the ring measured 1.53 inches, so some suppressors will fit inside the handguard. Don't worry about heat when doing this, the carbon fiber mitigates heat great! 

  Installation of the handguard is pretty straight forward. Make sure the firearm is unloaded and safe. Once you have removed your old parts, take the supplied barrel nut and tighten it over the barrel to normal specifications. Line up one of the threaded holes of the barrel nut, with the top of the receiver. Now put your low profile gas block and gas tube on. Then slide the handguard over the barrel nut. Loosely install the 6 supplied screws into the holes. Line the handguard up, and tighten down the screws. Now your done with the installation.

  When using the handguard, I found it worked nicely. The rifle swings fast, but also stops pretty well. If you are looking at getting this type of handguard, I would recommend getting a lightweight stock also because just the handguard alone might throw the balance of the rifle off. I did try this upper on a rifle with a standard M4 style stock and one with a Smoke Composites' stock. The M4 didn't seem to swing as well as the carbon fiber stock did, at least for me. One option I would have liked to have seen is the addition of some QD mount holes built into the handguard. I may drill some myself. When shooting fast, I did notice that the carbon fiber did an excellent job of not heating up.

  Smoke Composites is doing some awesome stuff with carbon fiber. This handguard is just one of them. Plus, if you want a custom length, they can do that also. I think these guys are going to be a company to keep an eye on. Great service, great products, and made in the United States of America!

Firearms Insider Reviews - 8 Key Points

Claim to Fame:

Lightweight Carbon Fiber M-Lok handguard 

Target Market:

Lightweight AR builders, 3-gun, anyone wanting a superlight handguard for an AR style rifle

FNBs (Features & Benefits of this product):

  • Lightweight at 7.3 ounces complete for the 12" version 
  • 35-50 Carbon Fiber / 7075 Aluminum construction  
  • M-Lok slots
  • Rapid heat dissipation  
  • Custom lengths available ($75 extra) 
  • Thick ring at front of handguard
  • Easy installation 
  • 1.88" outer diameter 
  • 1.53" inside diameter
  • Made in U.S.A.

What other aesthetic options or finishes are available?

Also available in 7.25", 10", and 15.15"

What others are saying?:

Shawn on Facebook: 5 stars 

Had a minor issue with a handguard, contacted Smoke for advice-  They went above and beyond in getting me a replacement(which wasn't necessary, but they insisted). Phenomenal service! They really take pride in their work, it's obvious not only by their product, but their customer service.

Link to other reviews:

None found

Price point:

MSRP = $289.00 as tested

Retail = $249-299

I need it now! Availability:

Smoke Composites

Our Rating:

Pros:

  • 7.3 ounces
  • M-Lok slots
  • Easy install  
  • Large enough to fit over 1.5" diameter suppressors
  • Beautifully crafted
  • Not your typical carbon fiber look
  • Very strong
  • U.S.A. made

Cons:

  • Does not use standard AR barrel wrench for installation  
  • M-Lok rails, when mounted on the top,  sit higher than receiver
  • No QD mounts built in

Score: 8.0 Great


Chad’s Favorite Link: Axelson Tactical


GunTec AirLite Minimalist AR15 Stock

  A little bit ago I did a review of the GunTec Air Lite handguard. Well, they were also kind enough to send one of their AirLite stocks for review also. This is GunTec's minimalist AR15 stock.

  The first thing you will notice about the AirLite stock is how good it looks. It is basically a buffer tube, with spiral fluted cuts down the tube. Then it has a textured aluminum buttplate attached with a clamp system. Also supplied is a rubber buttpad that slips onto the buttplate, a nice touch if you don't like the textured plate, plus it adds another 1/4" of pull to the stock. The stock in only 9" long when attached, which is a little short for me, and thus gives the rifle about a 12" length of pull total. Guntec does offer another minimalist stock with a 1" longer length. I didn't have any trouble shooting the rifle with the shorter length, and since this is their "Lite" offering, I can only speculate that this is how it is suppose to be. The stock would be really nice on a SBR build if you wanted a fixed stock.

  I was really impressed by how sturdy the AirLite stock is. Once mounted, it doesn't flex at all, and gives a nice sturdy shooting platform. With adjustable stocks, I always seem to feel a little bit of movement under recoil. Being that this is a fixed stock, I don't get that "feel." The buttplate is also adjustable for cant. So once the stock is installed, loosen the clamp bolt and twist the buttplate to the desired location and tighten the screw back down to clamp it in place. I like this feature because you can set the stock to fit your shoulder pocket, not just straight up and down like most stocks.

  Now we can get onto some of the specs. The stock comes complete with a castle nut, an ambidextrous single point sling plate, 3 ounce carbine buffer, and chrome silicone recoil spring. The whole thing is made from 6061 aluminium. It weighs in at 9.3 ounces on my scale, without the spring and buffer. My mil-spec buffer tube and M4 style stock weigh 11.8 ounces on my scale. So your saving 2.5 ounces over a stock M4 by choosing the Guntec AirLite stock.

  As I said in the handguard review, If your looking for some good AR products, go check out GunTec. This Minimalist AirLite stock is a nice usable piece of equipment for your AR15.

Firearms Insider Reviews - 8 Key Points

Claim to Fame:

Lightweight Minimalist AR15 stock

Target Market:

AR15 users wanting a lightweight fixed stock

FNBs (Features & Benefits of this product):

  • Minimalist Design

  • Spiral Fluting

  • All 6061 Aluminum

  • Textured Buttplate

  • Additional rubber buttpad

  • Lightweight at 9.3 ounces

  • Includes buffer, spring, sling plate, and castle nut

  • Adjustable cant of end plate

  • Made in U.S.A.

What other aesthetic options or finishes are available?

O.D. Green

What others are saying?:

Bigdude @Guntecusa.com 5/5  stars

I purchased this stock for a lightweight .22lr build. The stock fit great, LOP is good and it looks great.The buffer tube and stock weigh 8.09 ounces by my measure (that does not include the weight of the end plate, castle nut, spring or buffer). This kit comes with buffer tube, stock, slip-on butt pad (use is optional), buffer, spring, castle nut, end plate and hardware. I would definitely purchase this kit again for other lightweight builds.

Link to other reviews:

None Found

Price point:

MSRP = $119.95

Retail = $84.95 @VTSupply.com

I need it now! Availability:

VTSupply.com

Our Rating:

Pros:

  • Lightweight

  • Comes complete

  • Adjustable end plate

  • Nice looking

Cons:

  • No Instructions

  • Short length of pull

Score: 8.0 Great


Chad’s Favorite Link:   Axelson Tactical


Black Iron "ALLY" IWB Holster

  Any one who has considered the idea of carrying a firearm for protection, has had to look into holsters. Almost always, this ends up with a drawer full of unused holsters. The people over at Black Iron Holsters have made the job of choosing a holster a little bit easier with their ALLY series of inside the waistband (IWB) holster.

  The Ally IWB holster is one of the most comfortable holsters I have worn. I am not sure exactly how to describe the ALLY, but think hybrid holster on steroids. The first thing you notice on the holster, is the padding on the back, or the side that rides against your body. This padding is an UnderArmor moisture wicking fabric sewn over perforated padding and then mounted on the flexible kydex core. The padded fabric is said to pull sweat away from the body and make for a cooler drier holster. I did notice that I didn't sweat as much on the holster backing when it was hot outside. But the holster did seem to feel warmer than some other types. The ALLY also doesn't seem to feel cold either, like some all kydex holsters do. 

  When they construct the holster, they use the above mentioned padding, but with some extras. They call it C-Pak. C-Pak adds in a flexible kydex core, 500 denier Cordura fabric, and the moisture wicking and padding mentioned above. All of this helps add to the comfort and usefulness of the holster. The whole holster, except the backing, has been wrapped in the Cordura nylon. This cordura wrapping actually reduces the effects of holster wear on the firearm by giving the firearm something besides the kydex to rub on. They also sew on a border around the whole holster. This border helps smooth the outer edges so that nothing can catch on the them.

  When I mentioned hybrid style on steroids, here is what I mean. The holster is constructed with a large backing plate and then the outer holster is attached to it. But all of this is wrapped as mentioned above. They also put in a tension adjustment screw so that you can adjust it to your preference. The backing on my supplied holster has 3 holes for each clip, it has a front and rear clip. These holes make it possible to adjust for ride height and cant. Also the supplied nylon clips have 2 mounting screw options for even more adjustment. Even with the clips mounted in the same holes on the backing plate, the cant of the firearm is pretty noticeable. I did have a problem with the screws, that the clips are mounted to, coming loose. I put thread locker on them, but got some on the nylon clips. DON'T get threadlocker on the clips, it might make them crack and break like in my case. I emailed Black Iron and told them what I did, within a few days they had sent me new clips. I was just going to use some others I had around here since it was my fault they broke. So a big +1 for customer service.

  Aside from this being a very comfortable holster, it is also very functional. This holster has a little bit of break in time associated with it, like 2-3 days. After that, I didn't really even notice it. One of the great features of the ALLY is that the holster mouth doesn't collapse when the pistol is removed. Thus making reholstering safer and easier. Holstering the pistol was a little strange at first, I kept wanting to here the audible click like most hybrid or kydex holsters. But it felt more like an all leather holster. Don't be worried about this holster printing either. It has a very smooth profile. I did notice that it is slightly thicker than some holster due to its padding and cordura, but the smooth profile made up for this. It is hard to notice this holster being worn. I usually only hide it under a T-shirt and that works well.

  Now, the ALLY comes in the four different fabric colors listed below. But don't fret, they seem to make this holster for just about every popular, and even other not so popular handguns. Also with options for various weapon lights. If they don't list your handgun, their website says to contact them, which makes me think they will do their best to help you out. So if your in the market for a nice IWB holster, give Black Iron Holsters a look. 

Firearms Insider Reviews - 8 Key Points

Claim to Fame:

Soft/Comfortable Inside the waistband kydex holster

Target Market:

Concealed Carriers

FNBs (Features & Benefits of this product):

  • C-Pak Backing
  • Cordura wrapped
  • Hand washable
  • Made for each individual firearm
  • 1.5" clips
  • Adjustable for ride height and cant
  • Tension adjustment
  • Breathable
  • Flexible
  • Cerakoted hardware
  • Made in U.S.A.

What other aesthetic options or finishes are available?

Coyote, Multicam, and Multicam Black

What others are saying?:

Great Holster, Buying More: Roger from BIH 5/5 Stars

I received my holster 2 weeks ago and this is by far hands down the greatest holster i have ever used. It fits like a glove both on myself and for my glock. It is everything described and more, i am a delivery driver and spend the majority of the time on the road getting in and out of my truck. I can honestly say by the end of the day it was so comfortable i completely forgot i was wearing it by the end of my shift. I will be swapping out my Alien Gear holsters for my other two guns and will be ordering everything from you guys from now own. Its well worth the few extra bucks for something that is of this quality.

Great Products and Service: Timothy from BIH 5/5 Stars

First of all let me say that my experience with customer service was exceptional, I had a lot of questions concerning which style of holster to purchase and what was going to work for me. The staff at Black Iron was very knowledgeable and evidently knew what questions to ask and how to explain things because this is the best fitting and most comfortable holster i have ever worn. If you have any doubts about buying one don't you will be blown away by these things.

Link to other reviews:

Nothing found while googling

Price point:

MSRP = $79.95

I need it now! Availability:

Black Iron Holsters

Our Rating:

Pros:

  • Comfortable

  • Holster mouth stays open

  • Flexible

  • Adjustable retention

  • Tuckable

  • Adjustable Cant and Ride height

  • Firearm options (lights, lasers, models)

Cons:

  • Sewing of fabric looked poor (Not straight)

  • Slightly thicker

  • Clip mounting screws come loose (Maybe supply pre-threadlocked screws)


Score: 7.5 Good


Chad’s Favorite Link: U.S. Tactical Supply  


ODIN Works O2 Lite KeyMod Handrail

  Back in Episode 136 of the Podcast, we discussed the Odin Works O2 Lite handrail. I was intrigued by it, so I contacted Odin Works to get one in for review. They responded quickly and sent me a 12.5" KeyMod O2 Lite rail. Odin Works makes a vast assortment of AR related products for you to choose from.

  The first thing I noticed about the O2 Lite handrail is how lightweight it really is. When I took it out of the box, it was really noticeable. It weighs in at 8.1 ounces complete with the barrel nut system. Odin did a really nice job of reducing the weight by putting in tons of scallop cuts on the forend. These cuts are kind of hex shaped, with some of them being elongated. I would guess the name "O2" comes from the cut outs looking like an Oxygen molecular drawing. And, of course, it free floats the barrel. If one were to hit the edge of one of these cutouts, you might be able to bend it down. It wouldn't bend far enough to cause any functionality problems, just cosmetic ones.

  Now I'll get on to some of the technical specs. The O2 rail is made from 6005-T6 aluminum that is then anodized black. Since they sent me the 12.5" rail, that is how long it is. It has an outside diameter of 1.8" wide and 2.16" high. The reason for it being taller is because it has a small rail section built into the top of the handrail, but only at the front and back. So I would call it a hybrid rail. The top, between the 2 rail sections, does not have any way to mount a rail section between the front and back rails. The inside diameter comes in at 1.6", so plenty of room. Along with the O2 having KeyMod slots along the 3,6, and 9 O'clock positions (MLok is an option also), there are QD attachment points, at the front and rear, at 3 and 9 O'clock. A 5 slot KeyMod picatinny rail also comes with the forend. It is not mounted, so one can use it as necessary. Of course, any Keymod accessory should work also.

  Mounting the handguard is really pretty easy. If you know anything about removing AR barrels, you shouldn't have any problems. Basically, remove the old barrel nut, gas tube, and gas block. Then, screw on Odin's forend adapter. align gas tube hole, insert gas tube alignment pin (supplied), put Vibra-Tite (reusable threadlocker) on barrel nut threads, screw on barrel nut, and tighten to 40-50 ft-lbs with a 1-1/4" crowfoot wrench. Odin Works sells a crowfoot wrench, I would recommend getting one with your order. Reinstall the gas tube and gas block. Slide on O2 Lite handrail, tighten on with 6 screws and supplied allen wrench. You now can go put some rounds down range.

  Immediately after installing the O2 Lite forend, I could tell a weight difference. I think this is probably my new favorite handguard. It is comfortable to hold on to. The looks are fantastic. It is really light. And it comes in various lengths. Odin Works did a fine job creating this piece of engineering! If you are looking for anything AR related, go visit Odin Works, I doubt you will be disappointed.

Firearms Insider Reviews - 8 Key Points

Claim to Fame:

Lightweight KeyMod FreeFloat handguard for AR 15 rifles

Target Market:

Those wanting a very light handguard

FNBs (Features & Benefits of this product):

  • Free Floats barrel

  • 12.5" long

  • Anodized aluminum

  • 8.1 ounces complete

  • 1.6" Inside Diameter

  • 1.8" Wide

  • 2.16" High

  • Built in QD attachment points

  • KeyMod attachment points at 3,6, & 9 O'Clock positions

  • Short built in rails at front and rear

What other aesthetic options or finishes are available?

9.5", 15.5", and available in MLok also.

What others are saying?:

Ken on Odinworks.com: 5/5 stars

These are a GREAT product. I use to use the Carbon Fiber ones I could get but after getting this one I am going to use them on all by rifles from now on. They feel great and the COOL fact is good also. All that aside they function well and are very lite which make them perfect for a carry rifle especially for hog hunting or any hunting for that matter. Great product you all have.  Thanks and thanks for your fast shipping too.

Anonymous on Odinworks.com: 5/5 stars

This rail is incredible. The rail itself is simply too light to believe. The thin cardboard packaging weighs more than the rail itself. Installation was a snap and everything went together perfectly.

Link to other reviews:

None found on the Googles

Price point:

MSRP = $200

Retail = $199.99 @ BMC-Tactical

I need it now! Availability:

Odin Works

Our Rating:

Pros:

  • Super Light

  • Easy Installation

  • QD points

  • Good Looking

  • Top Rail Sections

  • Free Float

  • Includes Allen Wrench

  • Includes gas tube alignment pin

  • Made in U.S.A.

Cons:

  • Only Available in Black

  • Easily damaged cut outs (If hit just right)

  • No mention of needing a semi special wrench for the barrel nut (My AR armorers tool didn't work)

Score: 8.50 Great


Chad's Favorite Link: Veterans FOB

Hexmag Advanced Tactical Grip

  The Hexmag grip comes from the same company that brought us Hexmags. All of the Hexmag products I have seen come with a hexagonal pattern in them, thus the name. The pattern also adds a degree of flare to the looks of their products. 

  With the Advanced Tactical grip, you get this hexagonal pattern on the sides of the grip. And some raised straight lines on the front and back. But the big advantage to the Hexmag grip is its adjustability. One can choose 3 different positions or angles in which the grip sits. These are 17, 25, and 33 degrees. The setting are set up to help with different uses. The 17 degree is stated to help with AR pistols or close duty work. While the 25 degree is your standard AR grip angle. Leaving the 33 degree for a more relaxed shooting position, giving it more of a standard rifle stock feel. I found that the 25 degree position worked best for me. I guess that is why it was designed that way. 

  Now onto installation and adjustment.  The installation is very much like any AR pistol grip. Except that the Advanced Tactical grip has 2 parts. The first part holds the safety selector detent spring. It slides on as normal. Now you are left with the grip and the mounting screw. Both the grip and the mounting piece have large gear style teeth on them. Just put the screw through the handle and start tightening it as normal. Before it gets tight, position it on one of the 3 angles.  There are 3 locator lines on the back of the grip by the beavertail. These select which angle, just line them up and tighten the screw.  

  After using the grip for a while, I found it to be extremely smooth. Meaning that it was hard to get a good grip, and this was with dry hands. Hexmag sells grip tape that is cut to fit into the hexes, I would highly recommend this. I took it one step farther and stippled inside some of the hexes and also the front and rear of the grip. Besides being slick, having the option of adjustability is pretty nice. After I installed the grip, I was curious how the mounting system would hold up. Well it held up to me beating on a 2x4 with it. It didn't slip to one of the other positions, which I thought could happen. 

  If you are in the market for a new grip to enhance your AR rifle, look into the Advanced Tactical grip by Hexmag. But if you do decide to get one, get their grip tape or have it stippled. I liked the adjustability,  and now that it has been stippled, it is a nice grip

Firearms Insider Reviews - 8 Key Points

Claim to Fame:

Adjustable AR grip with cool hex pattern 

Target Market:

AR users looking for an aftermarket grip

FNBs (Features & Benefits of this product):

  • Hex pattern
  • Adjustable angles
  • Beavertail
  • Sturdy  

What other aesthetic options or finishes are available?

Black or FDE

What others are saying?:

Nice Grip 

Monte at Wise Tactical 5/5 stars

This Pistol Grip fit on my AR with no problem. It has a great feel to it and I really like that you can adjust the angle of it. It looks awesome on the Rifle, especially with the Hexmags.

Link to other reviews:

The Firearm Blog

Shooting Illustrated 

Price point:

MSRP = $27.99

Retail = $23.99 on Amazon

I need it now! Availability:

Amazon or check your local retailer

Our Rating:

Pros: 

  • Adjustable grip angle
  • Sturdy mounting system
  • Beavertail
  • Price

Cons:

  • Poor grip (slick)  
  • Has no storage inside grip

Score: 7.0 Good


Chad's favorite link: Saddle Butte Machine Gun shoot May 21 & 22, 2016

Lone Wolf Dist Compact Timberwolf Frame Review

While attending the NRA Annual Meetings in April of 2015, I got to meet up with Zack, the marketing manager of Lone Wolf Distributors. I was really interested in their Compact Timberwolf Frame for Glock pistols. Through our conversation, Zack agreed to send me a fully built Timberwolf Compact pistol, which I have since purchased. This is part one of two, where I focus on the frame. Stay tuned for my review of the upper assembly, as well as a summary of the pistol as a whole.  20151024_180117-1
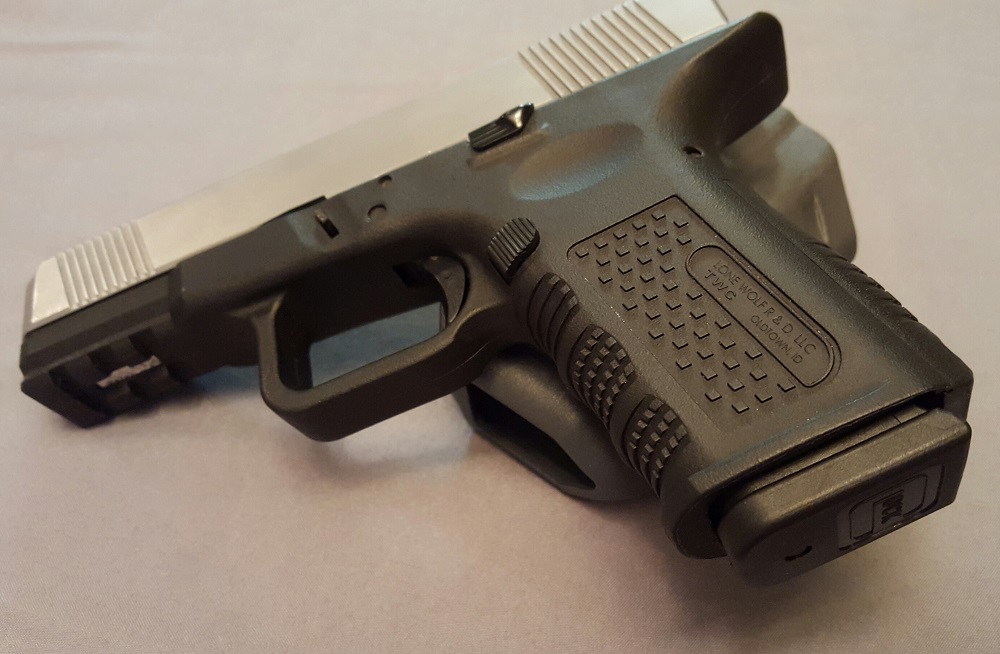
Lone Wolf Distributors has been manufacturing accessories and replacement parts for Glock handguns for many years. From slides, barrels, triggers, and more, you could almost build a custom Glock by just using Lone Wolf’s parts. The only thing missing was the frame, until somewhat recently. Lone Wolf saw the modifications that people generally made to their standard Glock frames, and decided to offer a lot of these modifications right out of the box, with their Timberwolf frame.

Common modifications made by end users to Generation 3 Glock pistols include backstrap reduction, frame texturing, adding extended magazine releases, and even removing material in key places to allow a higher grip on the handgun. Well, Lone Wolf Distributors took all of these modifications into consideration, when designing their Timberwolf frame. I will take a look at each of these aspects one-by-one.

Grip
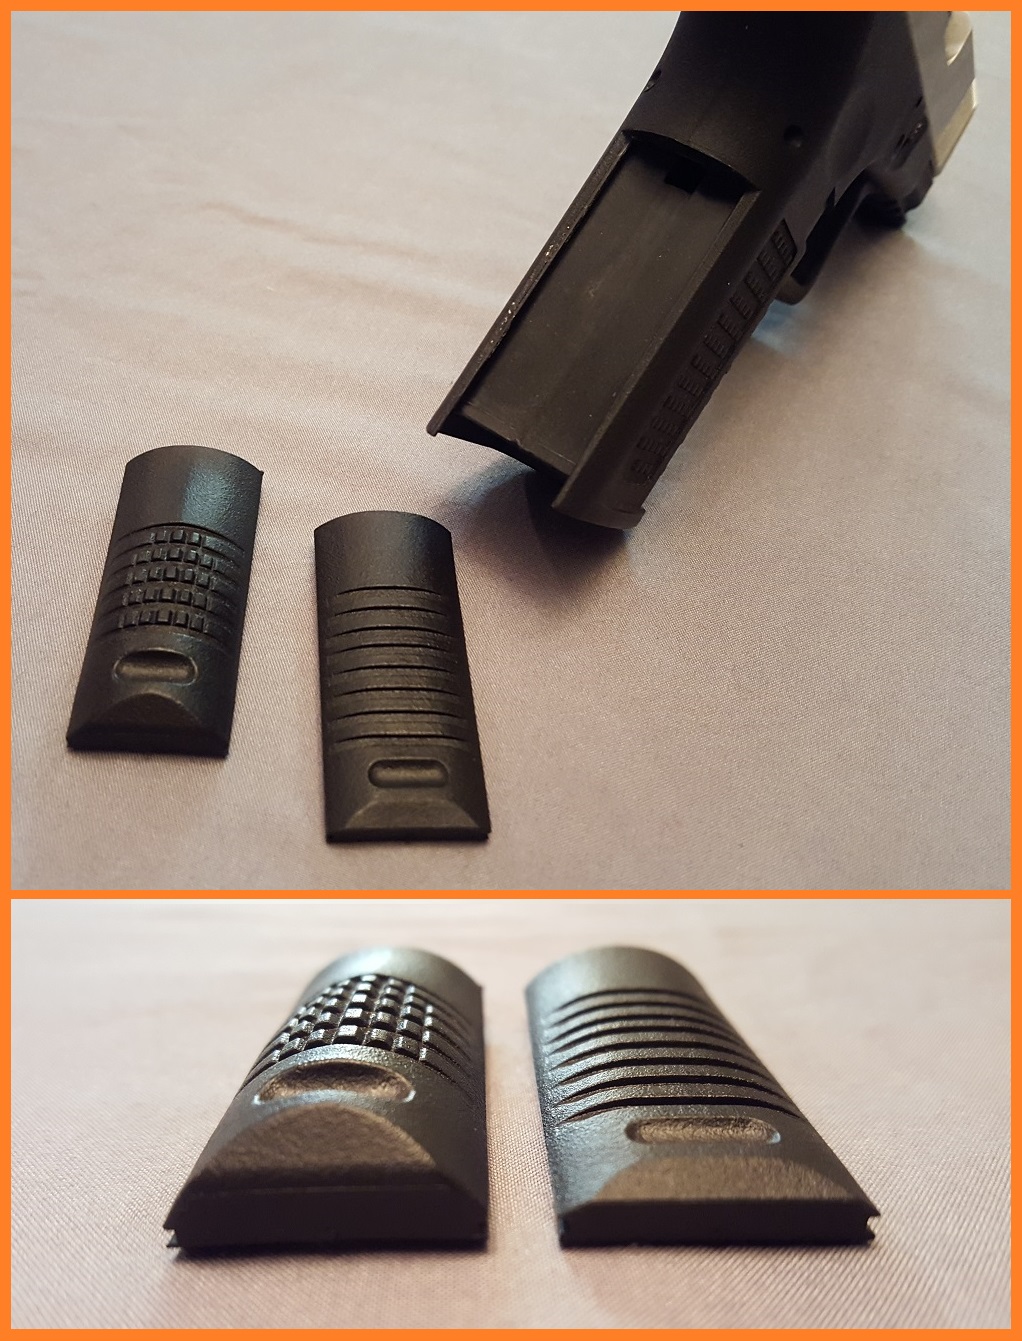
20151024_180401

One of the biggest benefits to this replacement frame would have to be the grip. The Timberwolf offers two choices of backstrap to the shooter. The first is the slim grip. It is an incredibly short (front-to-back) grip that more closely matches the grip angle of the classic 1911. The second is a swelled backstrap. It is a little smaller in the hand than the standard Glock swell, which will come as a welcomed feature to many Glock owners. This setup happens to be my favorite of the two. As good as it feels, the smaller grip leaves the meat of my palm really close to the magwell, and it can actually get pinched in between the magazine base plate and the frame, upon reloading. Do this a couple of times, and it starts to get on your nerves. Luckily, the swelled grip fit me just as well, if not better, and Lone Wolf engineered the swap very well. To make the change, all you have to do is, with an empty gun, insert a flat tool into a slot that can be accessed through the magwell, and gently pry downward.
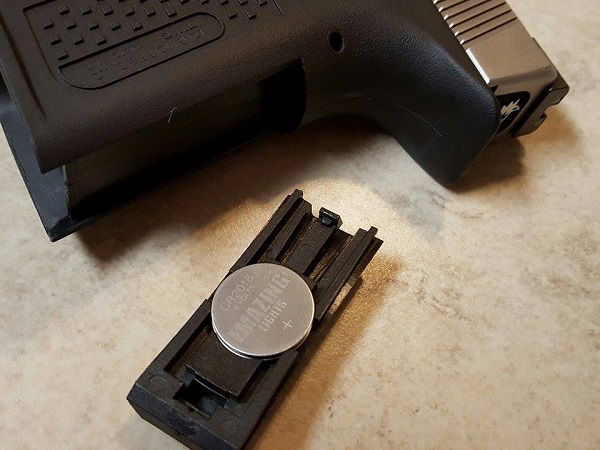
12170749_512874168870584_609558428_n

In my trials of the differing grips, I noticed an odd, but very well thought out (and well hidden) feature. Under the backstrap is actually a round recess that will hold one CR2032 battery, which is the somewhat industry standard for micro red dots. Alternatively, it can hold two CR2016s. This is a great feature if you’re building a race gun, or just want to carry a gun with a dot sight, and I am honestly a little shocked LWD doesn’t even list this in their feature literature.

The next part of the grip is the texture. Many people feel that the Gen 3 Glock grip is just too slick. I, for one, am in that boat. What the Timberwolf offers is a very aggressive square pattern, without being so harsh as to tear up your hands, with one exception. The edges of the frontstrap have slightly sharper corners than the rest. I suppose that is just a geometry issue of the curve meeting the corners of the texture, but it became very uncomfortable for the end of my pinky. That being said, it could easily be taken care of with a quick pass of some fine sandpaper, just to knock the edge off. Overall, the grip texture is very good at keeping the gun in your hands while firing. Speaking of the frontstrap, one feature many owners elect to remove on factory Glocks is the finger grooves. The factory finger grooves on a standard Glock 19 (Gen 4) actually happen to fit me perfectly, but I completely understand that there are so many different shapes and sizes of people. One good example for me was my Smith and Wesson Model 66. When I would attempt to get a high grip, the finger grooves would jam right into my knuckle, causing much discomfort, and forcing me to get a less that optimal hold on the gun. That is why it’s quite interesting that Lone Wolf decided to leave the finger grooves on their Timberwolf frame. But, to their credit, they reduced them down quite a bit, so if they don’t fit you well, it may not be the largest discomfort, when compared to a factory frame. I would still like to have seen them remove the grooves, though.

Moving up the grip, we have the undercut trigger guard. This is another common modification that allows you to get a much higher purchase on the pistol. To help with that, even further, they also designed the rear grip higher, and added a beaver tail, to remove the risk of slide bite. I have never personally had the web of my hand bitten by a Glock slide, but I have fairly small hands, and can see where it would be a problem to larger-handed shooters.

One last minor change I would like to see in the grip would be a slimmed down portion where the trigger finger rests on the frame, similar to that of the Walther P99. I feel like it would allow shooters with shorter fingers to more properly grip the handgun, and reach the trigger.

Magazine Release

For the longest time, people have been adding extended mag releases to guns, to make them easier to actuate. Lone Wolf, as well many other aftermarket parts manufacturers, offers extended releases. Lone Wolf even offers one that is wider than the factory, but it requires custom machining to make it work. When designing their frame, they decided to incorporate it right in, that way you don’t have to have it modified later. The wider release offers people with shorter fingers, like me, an easier to reach release without shifting the grip, as well as an easier to find release, which is good for everyone. As with the front strap, the corner of the magazine release can be a little sharp and annoying, if you’re performing repeated actuations, but, like I said previously, it’s not something a little swipe of sandpaper wouldn’t take care of.
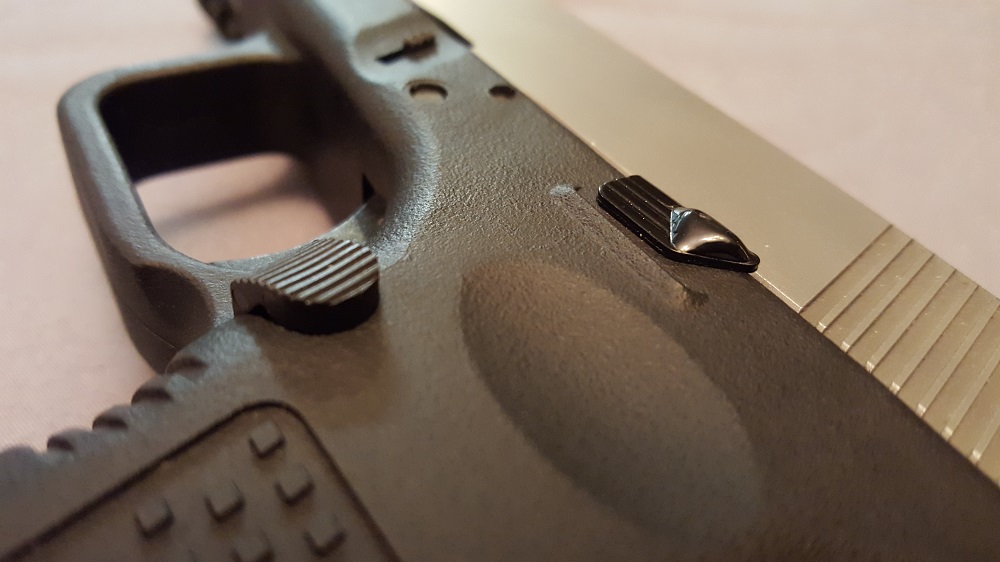
20151024_180545

Another curious note on the mag release is that Lone Wolf didn’t make it reversible, like the Gen 4 Glock. That would be a nice feature, but seeing as how it was designed before the Gen 4 was released, I can understand the oversight.

Rail
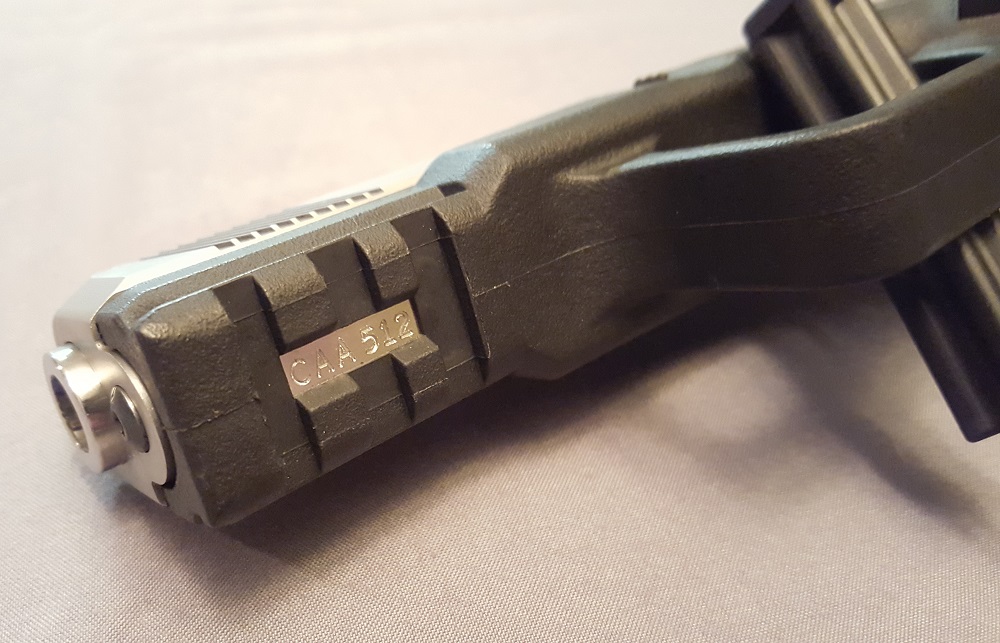
20151024_180227

The final feature of the Timberwolf frame is the rail. Rather than using Glock’s proprietary rail, Lone Wolf decided to go with a Mil-Standard, three-slot, Picatinny rail. This allows users to select from a wider array of rail-mounted accessories, as well as move the placement forward or rearward, as they see fit. I did not attach anything to the rail, though.


Overall

The Timberwolf frame is very a very well thought out replacement for anyone that owns a Generation 3 or older Glock handgun in 9 Luger, 40 S&W, 357 Sig, and even 45 GAP. It is available in either the full-size (17, 22, 31, 37) or the compact (19, 23, 32, 38) frame sizes. The improvements offered by a good grip modification company could run well into the $4-500+ dollar range, whereas Lone Wolf offers many of these features at a fraction of the cost. If replacing a Gen 3 frame for a gun you already own, you could buy just the bare frame and use most of your existing Glock parts to fill the replacement. That is, with the exception of the mag release, since the Timberwolf frame comes with their proprietary release pre-installed. The bare frame will cost you just shy of $200, which is a steal, compared to grip work. If you do build your own frame, you should be aware that you will need to buy either a LWD Gen4/Timberwolf Trigger housing, or LWD Ultimate Trigger Stop Gen4, to replace your Gen 3 housing, as the grip is slimmer in the front-to-back dimension.

If you’re planning to build a whole new gun, or just want multiple lowers, Lone Wolf offers a pre-assembled lower frame for $330, which is only about $30 more than buying every individual part and installing them yourself. To save the hassle and time of potentially forgetting or losing a part, I would recommend just buying the built frame. But, if you want to add your choice of custom trigger, you could easily purchase the parts separately from the frame. Lone wolf makes this easy by offering an interactive schematic.

Another benefit of buying the assembled frame is that Lone Wolf adds a few enhanced parts. These enhancements include: LWD 3.5# connector, LWD 6# trigger spring, LWD Extended slide stop, and LWD Extended slide lock. The 3.5# connector and 6# trigger spring makes for a very smooth, and pretty light, trigger pull. This is a great upgrade over the factory Glock parts that I am glad Lone Wolf includes in the assembled frame. It provides a good trigger feel, without being obscenely light, so I feel it would still be suitable for carry. On my example, they even installed the smooth trigger that usually only comes with the full-size Glock handguns. I much prefer the smooth trigger, as the serrated trigger begins to wear at my trigger finger, during firing sessions. I’m not sure if this is the standard feature for the assembled frame, but based on my invoice, it seems to be. The Extended slide stop is useful if you are the kind of shooter that uses it to release the slide. It provides a much larger purchase area than the standard, so it’s easier to manipulate, but it’s not so large that it gets inadvertently hit. As far as the Extended slide lock (the two tabs in front of the trigger guard that you pull downward to disassemble the gun), I really don’t get the purpose of it. The tabs are a little longer than standard, but I’ve never had a problem using the standard Glock part. It’s an upgrade that I could take it or leave it, and be satisfied either way. It did, though, scratch the inside of my holster. That’s not too much of an issue with a plastic holster, but with leather, I’d be afraid of it causing premature wear on the holster.

In summary, the Lone Wolf Distributers Compact Timberwolf Frame is a great upgrade to your Gen 3 or older Glock pistol, or for building your own custom pistol. It is a great value compared to the expense and wait for frame modification work. Some of the features are addressed on the newer Gen 4 Glocks, but with the Timberwolf, the grip is still slimmer (front-to-back) than the OEM. You also wouldn't get the undercut triggerguard, raised and lengthened beavertail, and reduced finger grooves.

At the time of writing, the assembled frame is available for only $234.95 (prices subject to change), and it even comes with Lone Wolf's excellent Ultimate Adjustable Trigger. This is a promotional price for the UAT, and I do not know the timeline for when it will go back to normal, so if you'd like an assembled Timberwolf frame, I would jump on it as soon as possible. The UAT is normally a $50 upgrade, so you are basically paying for the frame and the assembly labor cost, and getting all of the internals for free!

Firearms Insider Reviews - 8 Key Points

Claim to Fame: Replacement frame for generation 3 and older Glock handguns

Target Market: Concealed carriers and competitive shooters
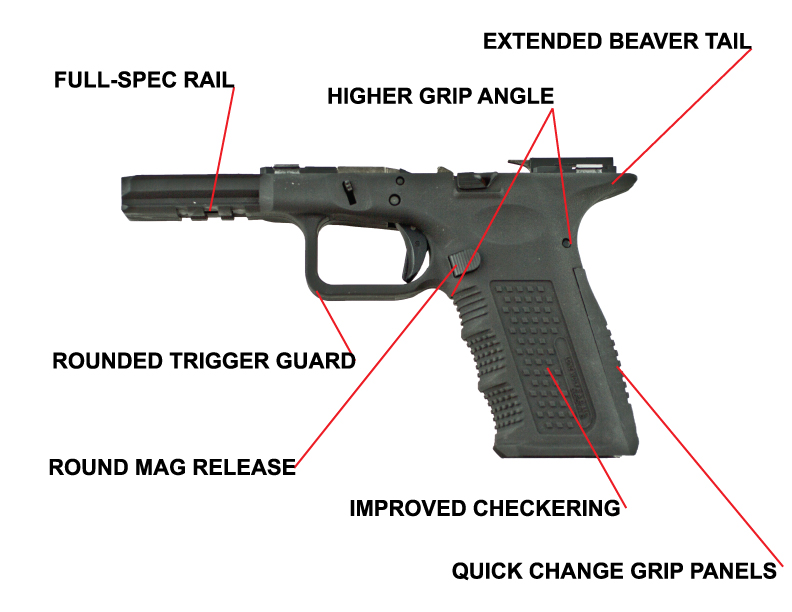
timber

FNBs (Features & Benefits of this product):

  • Improved ergonomics over Glock OEM frame
  • Full-spec 1913 accessory rail
  • Higher grip angle
  • Extended beaver tail
  • Rounded trigger guard
  • Round/extended mag release
  • Improved Checkering
  • Quick change grip panels (2 total)
  • Spare CR2016 battery storage in grip panel
  • Improved trigger over Glock OEM (standard in assembled frame)
  • Extended slide lock lever (standard in assembled frame)

What other aesthetic options or finishes are available?: Currently, the Timberwolf frame is only available in black.

What others are saying?:

“The Timberwolf pistol is of particular interest to the small-handed shooter, or to the user who says “I love everything about the Glock but the grip angle,” or the handgunner who just likes to be able to get lots of finger on the trigger and lots of flesh and bone around the “handle.” It’s definitely worth a look.” - Massad Ayoob, Daily Caller

“But the Not-A-GLOCK feels terrific in the hand. No really. Like many, but not all shooters, I find it difficult to come to a natural point of aim with a standard GLOCK. What’s more, the grip angle puts my hand and wrist out of the line that gives me stability. The Compact Timberwolf’s grip is, for me, vastly improved. I can get a high hold on the gun and put all of my fingers on the handle. It boasts a fairly small diameter grip, with good holding surface. I can get a natural point-of-aim and a solid one-hand grip, right or left.” - Jon Wayne Taylor, The Truth About Guns

Price Point:

  • Bare = $199.95
  • Built = $329.95
  • Built with UAT = 234.95 (Limited time offer)

I need it now! Availability: You can get the Timberwolf Compact Frame directly from Lone Wolf, and a few online retailers, but once you spend a few minutes on the LWD website, you’ll most definitely want to pick up some of their other great products, like their Glock Magazine Disassembly tool.

Our Rating:

Pros:

  • Greatly improves ergonomics
  • Interchangeable grip panels
  • Offers many common custom options
  • Improved grip texture to provide better traction
  • Available as a bare frame or built to LWD’s preferred specs
  • Built frame has improved trigger
  • The ability to build any caliber offered by Glock on this frame size (19, 23, 32, & 38)
  • You can even build it as a “Long-Slide Compact” by using a factory full-size upper (such as a G17), or Lone Wolf upper, and purchasing Lone Wolf’s Slide Adapter, which fills the gap between the front of the 17 slide and the 19’s dust cover.

Cons:

  • Still has finger grooves (though they are greatly reduced)
  • Mag release is not reversible to left-hand operation

Score: 9.090


Visit the Firearms Insider Facebook page for alerts on new reviews, and updates on the show.

Firing Line Review


Adaptive Tactical Venom-SE Magazine Conversion

AT1 The Adaptive Tactical Venom-SE is a magazine conversion kit for for Mossberg 500 and 590 shotguns in 12 guage.  The complete kit comes with a new forend with the magazine adapter, a pistol grip adjustable stock, and either a 10 round box magazine or a 10 round drum magazine.  Adaptive Tactical sent me the multi-cam kit with the "Wraptor" forend, 10 round magazine, and pistol grip adjustable stock. The offerings from them are available in a variety of patterns. The kit only works with 2 3/4" shells. Because the kit puts the magazine in front of the standard loading gate, it causes the user to have to put their support hand farther out, so some users may have trouble cycling the shotgun completely, especially those of smaller stature.

Installation of the Venom-SE kit wasn't extremely hard. If you know how to disassemble the 500, including the magazine tube, you should be able to complete the install. If not, Adaptive Tactical does offer installation.  After you have made sure the firearm is unloaded, remove the barrel, trigger group, left & right shell stops, bolt carrier, forend, shell lifter, and finally the magazine tube. The kit has decent instructions on this, so don't feel overwhelmed. Since the Venom-SE kit also comes with a new stock, the old one must also be removed. Now it is time to install the magazine tube adapter. To do this, screw the supplied tube into the receiver threads. It most likely will not line up with the magazine tube on the bottom. So one must sand the end of the tube down. This process takes a while, so be patient. After some sanding, try the tube again. Eventually the mag well will be parallel to the sides of the receiver, you are now done with the hardest part. Now it's time to reinstall all the parts with the new ones supplied. The only strange part in the installation is that the left side shell plate is not reinstalled. I tried it with both shell plates installed and the shotgun had problems feeding. When I removed it, the problems went away, so do follow this step. When installing the stock, you must choose one of 2 spacers that go between the receiver and the stock. One has a slot for a sling, and the other does not.

AT5The kit comes with one 10 round magazine, and a 5 round box magazine is also available. Adaptive Tactical also sent a 10 round drum magazine for me to try out, as well. I really liked the 10rd stick magazine as it functioned flawlessly in my tests.  The 10rd drum magazine, however, did not function nearly as well. The shotgun would sometimes fail to pick up a round out of it. At first, I thought maybe it was from me short stroking the slide, but I made a point to push forward and backward on the forend until it stopped, and the drum mag would still not always pick up a round, about 1-2 times every magazine. The drum magazine is shorter than the stick mag and the drum sits out to one side off of center. Because the drum is offset, they made it ambidextrous, which is a very nice feature. To insert the magazines, you must first put the front of the mag in, and then rock it back and up, very much like an AK mag.  To remove the magazine, you must push the magazine release lever behind the mag, and then rock it out, also like an AK.

AT4

My favorite part of the kit is the AR-15 style M-4 stock with a built in pistol grip. The stock is adjustable for length, and has built in cups for quick detach sling swivels. The pistol grip was very comfortable and has a storage compartment in it. The base to the storage compartment was extremely hard to get on and off, since Adaptive doesn't mention that it has storage, it makes me think that maybe they know this. On the stock is also one of the most comfortable butt pads I have ever used. It is about and inch thick and really cuts down on felt recoil. Because this is a pistol grip stock on a Mossberg, you can not get to the safety without removing your hand from the pistol grip (the safety is on top of the action.)

AT2

The Wraptor forend has 3 picatinny rails mounted on an elevated platform that sits above the barrel. 1 rail on top, and 1 on each side. The forend uses a sight tunnel through the rails. The tunnel is very large and may actually help one to find the front sight or bead quicker. It's kind of like looking through a red dot sight. The rail on the top of the Wraptor forend is too high to put a red dot on (I tried) and is probably best suited for some sort of flashlight. Also on the forend are some threaded holes to use the supplied kelly grip. The grip is basically like a vertical foregrip but attaches to the side of the forend. The kelly grip is stouter than I thought it would be. It worked fine also, but seemed a little awkward. The Wraptor also is designed in such a way that there is a lip on the backside to help from getting your hand pinched when cycling the shotgun.

If you are interested in getting a magazine conversion for your Mossberg, Check out the offerings from Adaptive Tactical. These kits are made from a polymer that is extremely rugged and feels almost like aluminum. They also offer different options than the kit I received. So if you just want the magazine conversion kit with a forend, or maybe just the stock, they have options available.

Firearms Insider Reviews - 8 Key Points

Claim to Fame: Magazine Conversion for Mossberg 500 shotguns

Target Market: Shooters wanting easier loading or maybe Heavy class 3-gun shooters

FNBs (Features & Benefits of this product):

  • Magazine conversion
  • 5 rd box, 10 rd,box or 10 rd drum magazines
  • Pistol grip adjustable stock
  • Forend with picatinny rails

What other aesthetic options or finishes are available? 

  • Black
  • Kryptek
  • A-TACS
  • Multicam
  • Desert Digital

Price point: 

MSRP = $339.99 (as received with Wraptor Forend, 10 rd box mag, and stock in multicam)

$299.99 (Wraptor Forend, 10 rd box mag, and stock in black)

$229.99 (Wraptor Forend with 10 rd box magazine)

$199.99 (Standard forend with 5 rd box magazine)

I need it now! Availability: You can readily purchse the Venom-SE magazine conversion directly from Adaptive Tactical.

Our Rating:

Pros:

  • Adjustable stock
  • Pistol grip
  • "Wraptor" forend
  • 10 round magazine
  • Pattern options
  • QD sockets built in
  • Ambidextrous drum magazine
  • It's now a Magazine fed shotgun!

Cons:

  • Installation
  • Safety isn't easily reached
  • Drum magazine didn't function as good
  • Price (though less expensive variants are available)

Score: 7.5 Good75


Chad's Favorite Link: U.S. Tactical Supply

Firing Line Review