Tandemkross 10/22 Ultimate trigger kit


 The rimfire experts over at Tandemkross have a new trigger for your Ruger 10/22. They released the “Ultimate” trigger kit on 10/22 of 2018 in collaboration with Brimstone Gunsmithing. I immediately contacted them to ask for a review trigger kit, well here we are with the trigger review! I was sent a red trigger, but black is also available.

 As mentioned, this trigger system comes in a “kit.” Of course there is the trigger. The trigger is made out of aluminum and anodized either red or black. It uses a wide flat faced design, with very sharp knurling on the face of the trigger. I loved the knurling. My finger immediately knew that I was on the trigger. Now I would maybe put a small chamfer, or angle, on each side of the trigger face. It felt a little sharp on the edges. There is also a over travel adjustment in the trigger shoe. The adjustment is just your standard set screw that butts up against the back of the trigger guard housing. A hex wrench is supplied for adjustment.

 Tandemkross’ Ultimate trigger also comes with a new hammer and sear. This is really what makes the trigger pull lighter. Tandemkross redesigned the sear and hammer. This leads to a reduction in pull weight and a boost in reliability. The reliability is increased, due to the fact that the hammer-sear still have strong engagement. It doesn’t say if the surfaces are polished, but it does mention they are EDM cut for precision. Either way, the trigger pull is fantastic.

 Last up in the Ultimate trigger kit, is the return spring. Why should you care, you ask? Well Tandemkross has ditched the spring and plunger system used on the stock Ruger 10/22. They have gone with a wire spring. This spring mounts to the side of the trigger shoe and rests on a shelf in the trigger housing. I found it gives a positive reset without adding anything to the trigger pull.

 I’m not going into installation. Tandemkross has some very good instructions. If you don’t think you can install the trigger, take it to your local gunsmith. I did have a small problem with the hammer, the hole was too small for one of my rifles hammer pin. Another of my 10/22’s hammer pin fit fine. I chalked this up to the one not fitting, having been built in the early 80’s.

 I am really impressed with the Ultimate trigger kit. It reduced my trigger pull from the factory 5 lb pull to an amazing 2 lb pull. Just by installing the kit and using factory springs. There is a tiny bit of pre-travel, but not even close to the factory trigger. I’d say the pull was smooth, but the travel is so short that it just breaks without being able to feel any creep. As mentioned, getting rid of that spring and plunger system is great also. It now looks like a trigger should. Having over-travel adjustment is nice also. The set screw supplied also has a rubberized tip to keep from marring the trigger housing. I also love the feel of the sharp textured WIDE trigger.

 Tandemkross did an excellent job, in my opinion, with this trigger kit. If you know anything about them, that probably doesn’t surprise you. At $145 for the Ultimate 10/22 trigger kit in red, it might be pricey for some. After using it, I feel it is worth the price. If you’re in the market for rimfire parts and accessories, do yourself a favor and go check out Tandemkross.


Firearms Insider Reviews - 8 Key Points

Claim to Fame:

Better trigger for your 10/22

Target Market:

Anyone wanting a better 10/22 trigger, but mainly competition shooters

FNBs (Features & Benefits of this product):

  • Wide flat trigger

  • Sharp texture on trigger shoe

  • Wire return spring

  • Redesigned Hammer and Sear

  • Reduced pull weight

  • EDM cut parts

What other aesthetic options or finishes are available?

Black

What others are saying?:

Essential Trigger! 5/5 stars on Tandemkross

Installs in minutes with YouTube help. And makes a scary big difference. 10/22 factory triggers are like Glock triggers. We usually just compare them with something worse. But this TK Ultimate Trigger is a whole different world of goodness. Silky smooth take-up right up until the glass-rod break. Even upgrades Ruger's own BX trigger upgrade. Mine breaks clean and reliably at about 3.2 pounds. And since the heavily textured flat shoe provides oversized purchase onto the pad of your trigger finger, the effect is even more dramatic. Dry firing with the Ultimate Trigger is impressive, but when out in the field whether poking targets or hunting small game, the TandemKross Ultimate Trigger immediately makes itself essential. I've upgraded a lot of 10/22s and I cannot name a better single upgrade than this trigger for better performance, increased accuracy, and most importantly just the sheer pleasure of shooting.


Link to other reviews:

GunsAmerica

Price point:

MSRP = $134.99-$144.99

I need it now! Availability:

Tandemkross

Our Rating:

Pros:

  • Textured trigger surface

  • Reduced pull weight

  • Crisp break

  • Over-travel adjustment

  • Trigger return spring

Cons:

  • Slight creep

  • Price (for some)

Score: 8.5 Great

85.jpg

Favorite Link:   Axelson Tactical
Nightstick USB-556xl

 Everyone should have a good flashlight, at least in my opinion. Nightstick is starting to be one of my favorites. Recently they introduced a new series of USB rechargeable tactical flashlights. After reading the press release, I asked if they would send one out. Nightstick sent the USB-556xl. The 556xl is a single cell LED flashlight with a max output of 750 lumens.

 The usb-556xl is packed with features. As one could guess, it is USB rechargeable. It comes with a little usb cord also, but not the charger. In today’s world, finding a usb charger is easy enough. Since I am on the usb, the 556xl has a built in micro-usb charging port. The port is hidden underneath part of the handle. One must unscrew the center section and then slide it down to reveal the usb port. It is not the easiest to unscrew because of the o-rings used to seal the flashlight charging port. There is also a tiny light above the charging port. The light is red when charging, and green when fully charged. Nightstick says it takes 4 hours to fully charge, and that seems correct, but I never actually timed it. While I like the usb charging function, the 556xl does use a proprietary lithium-ion battery. Once charged, just slide the cover back on, and screw it closed.

 Since the usb-556xl is a tactical light, it has options that are quite useful. For instance, it uses a push button tailcap. The light will automatically shine on high, momentarily, if you push the button part way down. Of course it then turns off when released. Also, if you push the button all the way in, it turns on, on the high setting. To get it into the medium or low setting, hold the tailcap down while the light is on, then release pressure when it gets to the setting you desire. Once the light is turned off, it defaults back to the high position. This is probably my favorite function. Because when I want the light on, or need it on, having it on the high setting is ideal. The light also has a strobe function. To access the strobe, you have to push the tailcap button all the way down, twice, quickly. It only strobes at the high output, but can be turned on from either low, med, or high while the light is on. I prefer lights without a strobe, but Nightstick doesn’t offer this light without a strobe function. I would like the button to be inset farther into the tailcap, that way one could set the flashlight down on a flat surface, and have it shine upward to illuminate a room or something.

 I seldom use a pocket clip, but the 556xl has one. Mainly the light just gets put in my pocket, but some people find the clip useful. The clip on the 556xl isn’t that great. It works, but is a little flimsy or thin. The clip is easily removed also. One advantage to the removable clip is that it can be turned around. By doing so, it can be clipped to things, letting light shine outward away from it. I actually did this and clipped it to a hat bill. So everywhere I looked, the light was shining. Kind of like a headlamp.

 Specs, everyone wants to know these. First up, the light is bright. On high it is rated at 750 lumens and 9350 candela. Medium is 250 lumens and 2950 candela. Low is 80 lumens and 1115 candela. You get a 1hr/2hr/5hr runtime at the above settings. So pretty good for a 750 lumen light. I loved these, the high setting lights up my backyard better than my porch light. On high the beam wasn’t too wide and the light shines pretty far. I do use the medium setting alot. It is useful for finding dropped screws and such. Not too bright, but not too dim. I hardly use the low setting, it is a little too bright for finding stuff in the car at night. But then again, the low setting works good if you need to see where you are going, especially if there isn’t much ambient light. The 556xl can be submerged up to 1 meter for 30 minutes before something bad might happen. At 4.7” in length, it is not too big for pocket carry. It also only weighs 4.4 ounces. The body on the 556xl is 1” wide, and the head is a little larger at 1.2”s. If you like black, your in luck, because you can have any color, as long as it’s black. But, it is a class III anodized aluminum body, so it should last a long time.

Low setting

Medium setting

High setting

 This light has been in my pocket, everyday for almost 6 months. It shows some wear, but not too bad. I really like how it can be charged just about anywhere. At 750 lumens, it is bright enough for anything I need. It doesn’t classify as “all the lumens,” but what can you expect for a single cell light. I’ve dropped it on concrete, in water, and it keeps on working, the lens isn’t even scratched up. Do I think this is a decent tactical light? The answer would be yes, even if it has some minor flaws.

 If you are looking for a decent flashlight, the Nightstick usb-556xl is worth looking into. I really like the usb charging feature. It has good runtime, especially if you don’t use it on the high setting. At around $100, it’s not cheap, but is in the same price range as competing models. Do yourself a favor and go checkout Nightstick, they manufacture all different types of lights.

Firearms Insider Reviews - 8 Key Points

Claim to Fame:

USB rechargeable tactical light

Target Market:

Anyone wanting a bright rechargeable tactical flashlight

FNBs (Features & Benefits of this product):

  • 750/250/80 lumen output

  • 1/2/5 hour runtimes

  • 4.7” long

  • 4.4 ounces

  • Rechargeable

  • IP-X7 waterproof (1m for 30 min)

  • 6061 anodized aluminum construction

  • Momentary, constant on, and strobe

  • LED

What other aesthetic options or finishes are available?

320 and 900 lumen models

Link to other reviews:

None found

Price point:

MSRP = $111.00

Retail = $83.25 on Amazon

I need it now! Availability:

Amazon or Here

Our Rating:

Pros:

  • Bright

  • Momentary (750 lumen only)

  • Low, Med, High settings

  • USB Rechargeable

  • Lightweight

Cons:

  • Pocket Clip

  • Proprietary battery

  • End cap (button recess)

  • Strobe function

Score: 7.00 Good

70.jpg
 

Work Sharp - Ken Onion Edition

 If you carry a knife, of any type, then you need a good knife sharpener. The people over at Work Sharp Outdoor have supplied me with just that. Welcome the Ken Onion edition knife and tool sharpener. I talked with them at the Blade show West and they kindly sent this out for review.

 The Work Shop Ken Onion Edition (WSKOE) is an electric sharpener. To sum it’s looks up, it resembles a handheld angle grinder. On the side is the belt/knife guide area, this is where all the magic happens. Then there is a handle with a trigger system. Then up front is the motor assembly. One can use this sharpener by holding it, but setting it down on a bench or table works best. The belt/sharpening assembly can also be rotated around to different angles by a spring loaded push button release.

 This little handy sharpener comes with everything you need. The excellent instructions give you an idea of what belt/belts to use for each task ,along with what angle might work best. The WSKOE comes with 5 belts. Basically they range from extra course to extra-extra fine. The extra course belt is basically for shaping metal. I used it to reshape a knife that the tip had broken off. It made fast work of it. The extra-extra fine belt is more of a polishing belt, used to give a mirror like edge. It is also super easy to change the belts. Just push up on the spring loaded tensioner, pop the belt off and slide a different one on. I may have tried polishing some fire control parts with it also, of which it worked quite well.

   To further enhance the sharpening abilities, the WSKOE has even more features. The trigger system uses variable speed and can be locked in whatever speed one wishes. There is also an edge guide that folds out for use with longer knife blades. I used the edge guide for big kitchen knives and hunting knives. Also on the belt head is an angle adjustable guide. This guide keeps the angle of the sharpening blade somewhat controlled. It is adjustable from 15-30 degrees. As mentioned earlier, the whole belt sharpening system can be rotated. I didn’t use this feature, but I can see where it would be useful for sharpening my lawnmower blade, or just general grinding on something larger.

 This sharpener works. I must have sharpened almost every knife we own, including kitchen knives. It is very quick once you get the hang of it. I only found one thing I didn’t like about it. The blade angle rest takes some getting use to. When you are sharpening the knife, you rest the cheek of the knife on the angle guide and pull the knife through. If you put too much pressure on the angle guide, you can overtake the spring and get a sharper angle. After a little use, this wasn’t a problem. Also when using the angle guide, the guide ends before the tip of the knife is guided in. This meant that I had to freehand the sharpening of the tip. Not a big deal, in fact I did take the angle guide off and sharpen some knives freehand, which also worked well.

 I really don’t even know how I sharpened knives the old way. I was actually looking for things to sharpen. The WSKOE does use a standard 110-120V wall plug in, so it isn’t cordless. Replacement belts are easily found, a couple of local sportsman stores have them. Other sharpening adapters are also available through Work Sharp Outdoors.

 The Ken Onion edition sharpener is top notch. Some might say it’s a little pricey at $130, but if you want sharp knives, it might not be. There is a small learning curve, but once mastered you will have sharp knives forever. Go check out Work Sharp Outdoors, they make all kinds of knife sharpening tool.

Firearms Insider Reviews - 8 Key Points

Claim to Fame:

Powered Knife Sharpener

Target Market:

Anyone who wants a fast knife sharpener

FNBs (Features & Benefits of this product):

  • 15-30 degree edge angle

  • 5 belts from 120-6000 grit

  • ¾” wide belts

  • Variable speed (1200-2800 SFM)

  • Speed lock

  • Adjustable head

What other aesthetic options or finishes are available?

NA

What others are saying?:

⅘ stars on Amazon

Great little sharpener. Beautiful convex edges. Tape the sides of your blades to avoid scratches.

I really like the Ken Onion Work Sharp. I purchased it because I wanted to try convex edges on my knives without the risk of ruining them while learning to do it freehand. My first attempt on the Work Sharp involved a brand new Ontario Knives Rat-1, an inexpensive, well-made knife with a pretty AUS-8 satin finished blade. In just a few minutes, I was able to produce a razor-sharp, beautifully mirrored edge. I also produced a LOT of UGLY scratches on that pretty AUS-8 satin finish because the metal particles that come off the edge during sharpening build up on the angle guides. When you pull the knife through as instructed, you get scratches. I honestly don't mind if my knives get banged up during use but I just can't see defacing them during sharpening. It's just not necessary. A quick search of Blade Forums confirmed others have experienced the same problem, especially with highly polished finishes. After reading a bit further, I decided to use painters tape on a different knife to protect the blade. Problem solved, a perfectly sharp convex edge in minutes and not a scratch to be seen. Other sharpeners like the Apex Edge Pro actually suggest this method. It would have been nice if the Work Sharp folks had done the same. Despite that issue, if you want to try convex edges, (they really are better), the Work Sharp is a great little machine at a fair price. I highly suggest reading the instructions carefully and taping the sides of your blades. Cheers and thanks for taking the time to read my review.

Link to other reviews:

The Truth About Knives

Price point:

MSRP = $129.95

Retail = $129.95 on Amazon

I need it now! Availability:

Work Sharp or Amazon

Our Rating:

Pros:

  • Quickly sharpens knives

  • Adjustable grinding angle

  • Mirror cutting edge

  • Edge guide

Cons:

  • Angle guide

  • Learning curve

Score: 8.5 Great

85.jpg


Favorite Link:   AR-15 Podcast

Fowler Industries Gen 5 Glock Trigger

Written by Zane M.

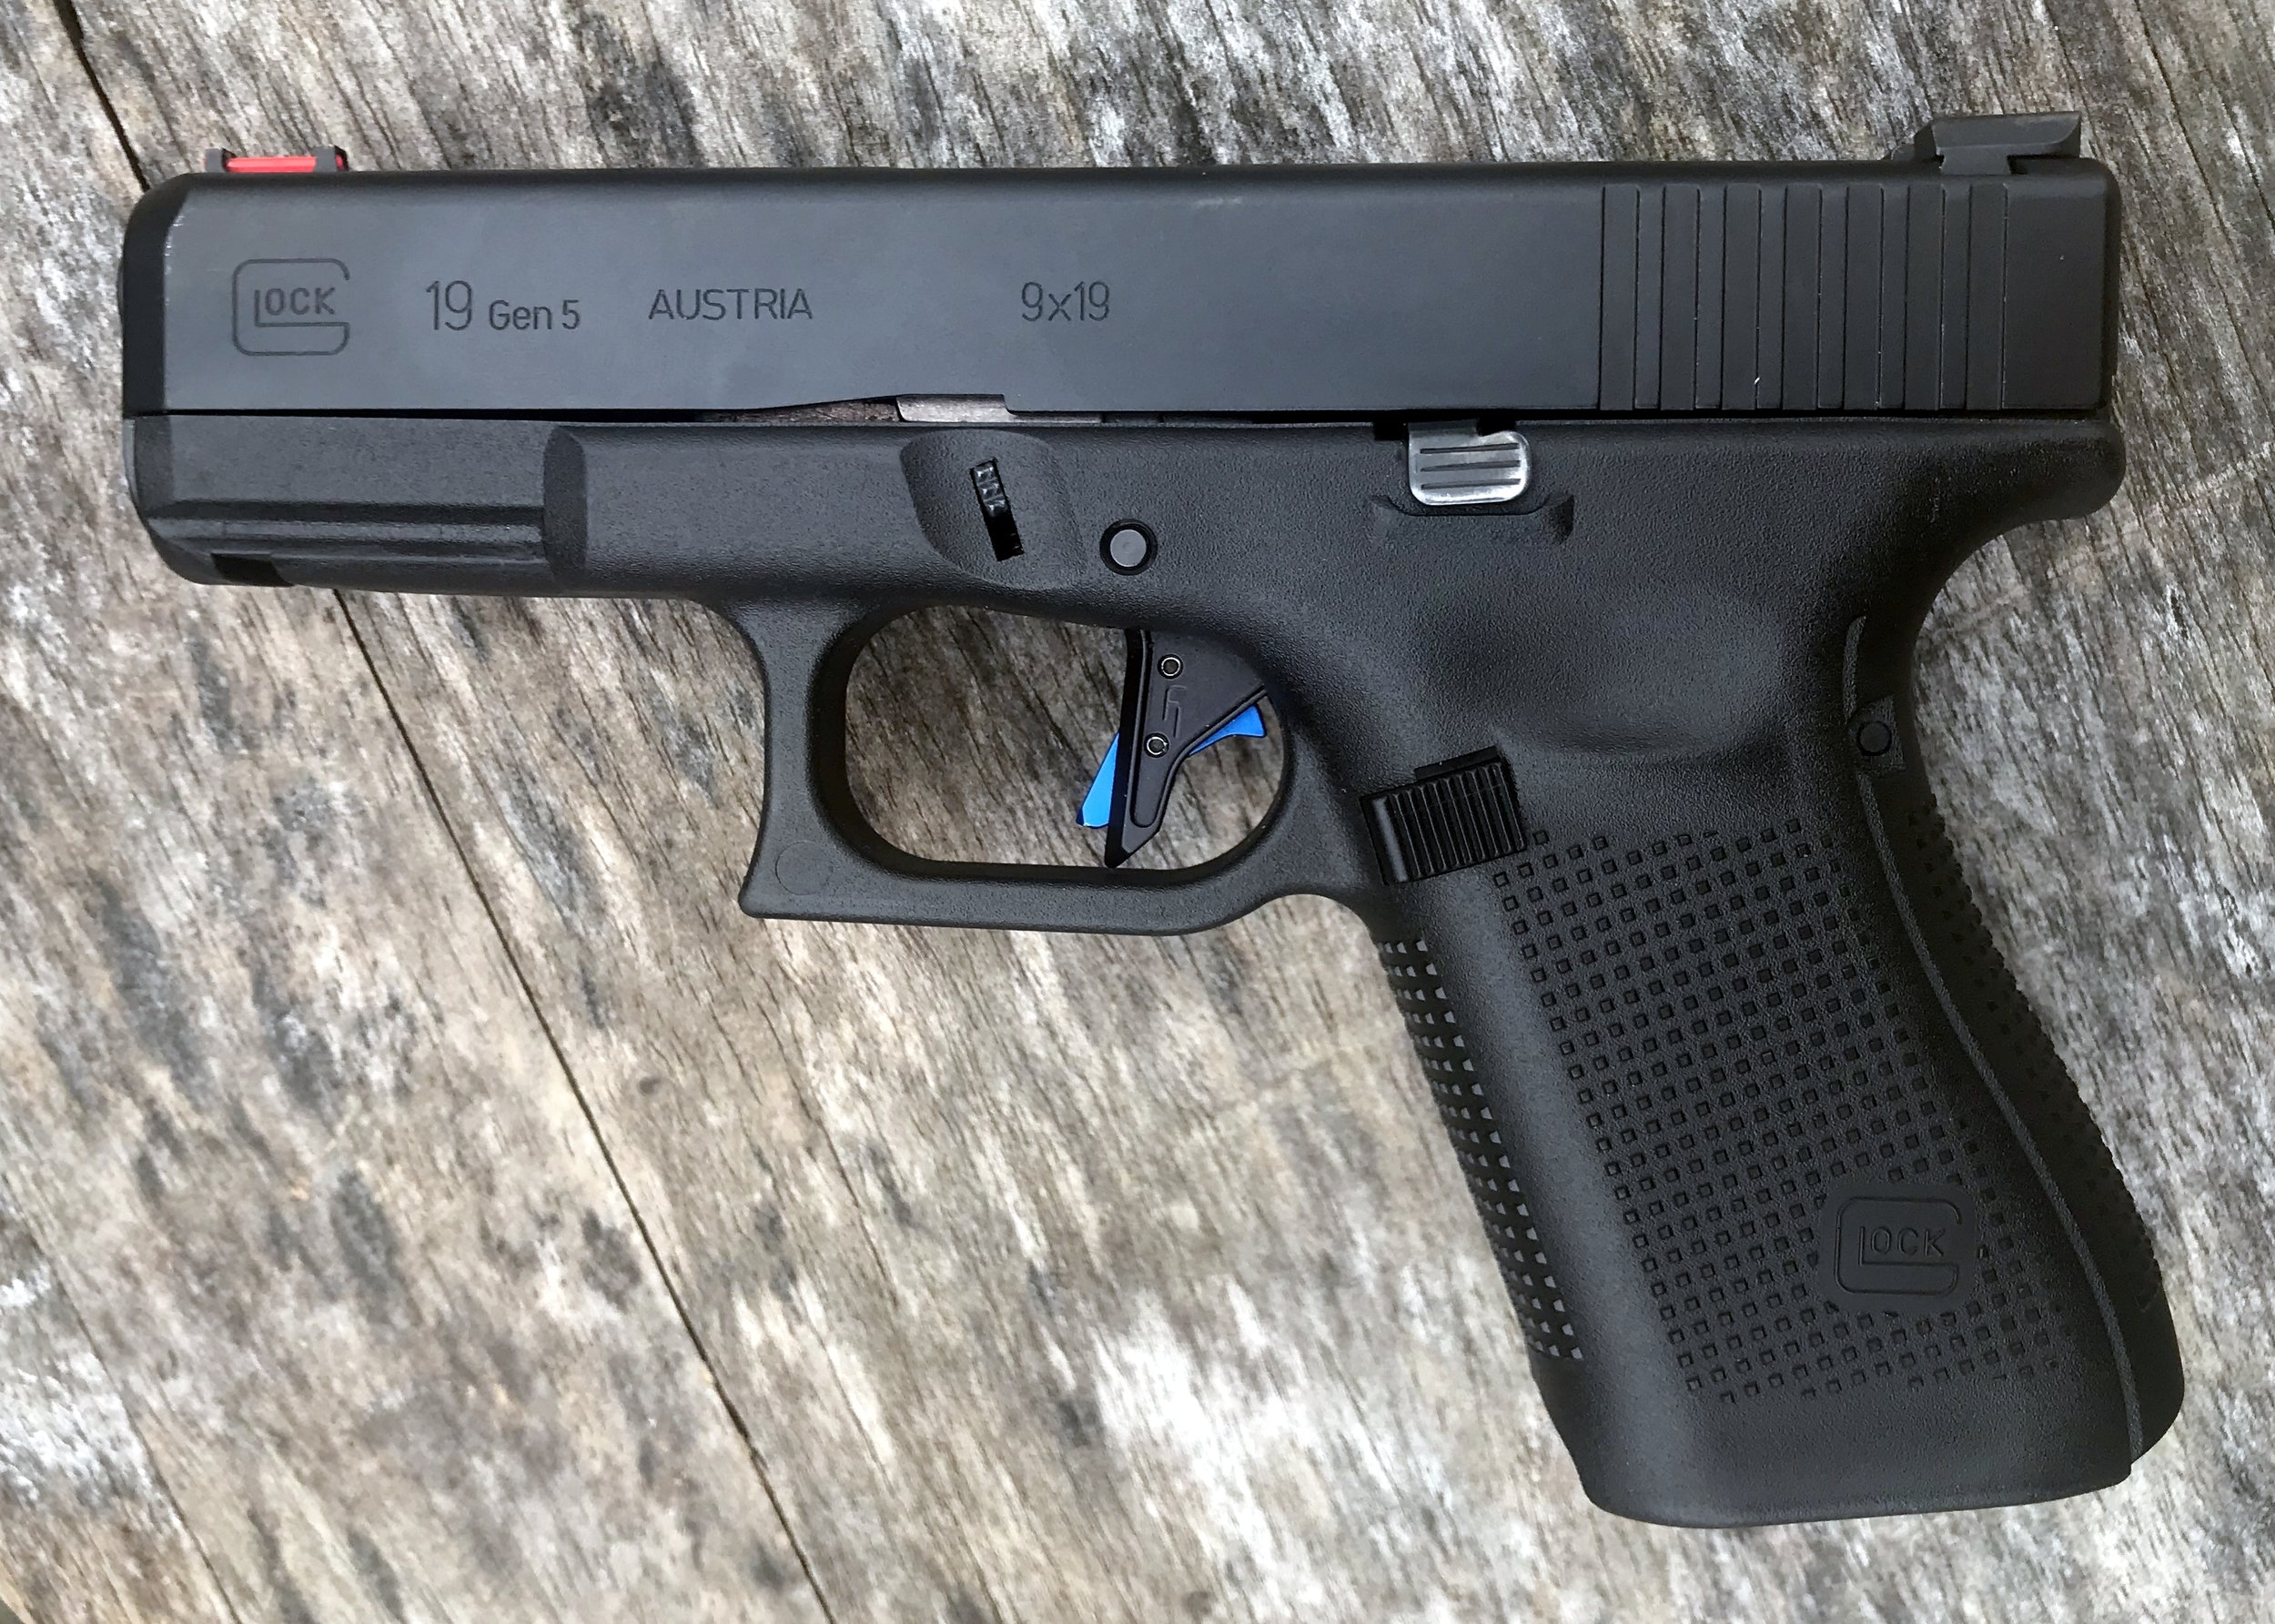
If you listen to the podcast then you probably are aware that I’m a fan of flat faced triggers in my glocks. You also are probably aware that I think the stock gen5 triggers are much better than previous generations of Glock triggers. So much so that I had no intention of replacing my oem trigger in my gen5 Glock 19.

FI-2.jpg

Then Fowler industries sent me their zero trigger. With low expectations and little enthusiasm I installed the trigger in my g19, as I’m the only reviewer with a gen5 glock apparently. I was pleasantly surprised.

Installation was simple, like all Glock drop in triggers, and took just a few seconds to get it in there. The first thing I did was check that the trigger didn’t compromise safety. After checking the ledge and cruciform engagement (technical terms?) everything appeared to be good so I dropped it and hammered it a few times to see if I could get the trigger to trip. I could not. So it passed test one.

FI-4.jpg

Next up is feel, the trigger feels great and as a fan of flat faces triggers I really like this one. The sides are cut at angels so the trigger feels rounded and is comfortable for a variety of finger placements. Despite popular belief there isn’t a single spot everyone should place their finger on the trigger. While all flat faced triggers work fine when using the pad of your finger, they can be less comfortable with less or more finger on the trigger. Depending on your hand size and reach this could be important.  While it’s hard to convey over text it really feels good.

FI-3.jpg

On to the trigger pull. The trigger is just slightly more smooth than the oem trigger. This is to be expected since they use an oem trigger bar that’s been polished. They recommend using an oem -connector and stock all other parts and springs. I ran the trigger with a few different connectors and I always (like all my other triggers) come back to the stock 5.5lbs connector. You could get the same smoothness but putting several thousands rounds through the gun but you’d still have a plastic curved shoe.

If you want a 1911 like trigger, this isn’t the trigger for you but none of the drop safe options I’ve tried are either. If your looking for an better feel on the trigger, this might be it.

FIREARMS INSIDER REVIEWS - 8 KEY POINTS

CLAIM TO FAME:

Flat faced aluminum gen 5 trigger

TARGET MARKET:

Anyone looking for a better trigger show for glock

FNBS (FEATURES & BENEFITS OF THIS PRODUCT):

  • Provides a better contact surface for the trigger finger

  • Smooths out the trigger travel.

  • Removes unnecessary take up or pre travel without compromising safety.

  • Looks cool(if that matters to you)

WHAT OTHER AESTHETIC OPTIONS OR FINISHES ARE AVAILABLE?

  • “Spider-Man edition”

  • Red

  • Blue

  • Green

Website isn’t super easy to navigate, most of these are options I found on other companies’ sites

What others are saying:

They seem to like it but I only found video reviews

Price point:

MSRP - $145.00

I need it now availability:

Shootingsurplus

Fowler Industries

Our Rating:

    Pros:

  • Improved feel

  • Pre-travel removed

  • Smooth

    Cons:

  • Price

Score 8.5 Great

85.jpg

Write here…


MantisX

 If you haven’t heard about the MantisX shooting system, you are missing out. If you are interested in improving your shooting, MantisX could be the help you need. This is the easiest training system I have used. Mantis did send this out for review, and I was pleasantly surprised at what it can do. All you need is a smartphone or tablet and the control module to get started.

 The MantisX is a novel concept in the shooting world. The smart sensor, which attaches to your rail, is only half of the training system. The other half being the app, which I’ll discuss later. At just under 2” long, 1.375” wide, and 1” tall, it doesn’t add much size to the firearm. It also only weighs 1 ounce. So you really don’t even notice it’s on the firearm. The smart sensor comes with a charging cord and a nice little carrying case. I just use my phone’s charger and cord and it works fine. I never use the carrying case since I seem to always have it mounted on a firearm. On the bottom of the sensor is also an on/off button and led to show when it’s on. The smart sensor basically senses tiny amounts of movement in the firearm. Then it relays that, via bluetooth, to the MantixX app. Then all the magic happens.

 I said the app was half of the system, it is probably more like 90%. The MantisX app does so much, that I will likely forget something about it. First up, it has training courses, with the first one being an introduction. The intro course basically take you through how the app works along with some training shots. The other courses are Basic marksmanship and a FBI Qualification course. The FBI course has to be done with live fire, but the others can be done with dry fire.

 The other part of the app is the “train” section. In this Train section it has: Open training, Shot timer, MantixX Benchmark, Timed Benchmark, Surprise Break, Reload in Battery, Reload out of Battery, Reload Tactical, Primary hand only, Support hand only, and Cadence of 0.5, 1.0, & 2.0 seconds. Once you have used these, there is a history tab that keeps track of them. I like the history tab because it lets me see how I am doing over time. It also tracks how many shots you have completed on each “train” tab. The History tab at the bottom of the app will also show total number of shots fired. A really nice bonus to keep track of how many rounds have been fired through a particular gun.

 If you are into competing with your friends, or even people you don’t know, the MantisX has a “groups” tab. In the groups, you can enter a friends name to compete or compare with. The tab also has groups that you can add. All of this helps you to compare how you are doing with others. It can help you improve your skills by making you accountable. But you don’t have to use this feature if you don’t want to.

 Last up is the “settings” tab. It is not all that one would think. In it, it has rifle or pistol selection. Right or Left hand. Live fire, Dry fire, and CO2. I don’t have a CO2 pistol to try it on, but I have used Mantis’ at a shooting event, using the CO2, and it worked fine. There is also a sensor mounting direction and location. I actually mount the sensor on the bottom and backwards on my pistol. With it mounted backwards, I have access to the charging port without having to remove the sensor. When you select rifle or pistol, it has a very long list of manufacturers to choose from. I usually use mine on a Polymer80, so I chose the Glock 19 and it works great. If your firearm doesn’t have a mounting rail, Mantis offers adapters for certain pistols. Of course there are also the normal app settings along with an instruction guide.

 I’ve been using the Mantisx since I received it. Mostly with dry fire practice, but some live fire. I even mounted it to a rifle for testing. Within the sections, for instance in the “Open Training,” The app gives you a list of scores, time between shots, etc. If you swipe left, a round chart comes up with an average score. Around the center circle are red areas. When you touch one of the red areas, it brings up what was possibly wrong during that shot and then how to correct the issue. If you swipe left again, it brings up a graph with trigger press movement and stability. Swipe left again and see an actual movement display for each shot.

 Now that I went through a lot of the functions, here are my thoughts. The MantisX is a really useful training tool. If nothing else, it gets you to dry fire more. I even got my family to try it out. Once in awhile during dry practice, the MantisX didn’t seem to want to pick up every shot. What I thought was weird about it, was that the phone was only a foot away. I just reconnected the sensor and it worked fine. I did notice that during range time, if I was too far away from my phone, it wouldn’t register shots either, so just keep your phone in your pocket and it will work fine. The sensor worked good no matter where, or how, it was mounted. I mounted it at the end of a 15” handguard, as well as right up on the receiver, without any problems. I really like all the charts, graphs, etc in the app. You will need a holster for a light if you want to do draw and fire practice. I really liked how the app accesses what you did wrong. This was especially helpful during live fire when recoil can offer up more challenges.

 If you’re in the market for some sort of training app, I would go check out the MantisX. If nothing else, it is fun to see what is going on with your shooting. At a price of $150, it won’t break the bank either.


Firearms Insider Reviews - 8 Key Points

Claim to Fame:

App based firearms training system

Target Market:

Anyone wanting to improve their shooting skills

FNBs (Features & Benefits of this product):

  • Rail mounted sensor

  • USB charging

  • Bluetooth connectivity

  • Small and lightweight

  • Carrying case

What other aesthetic options or finishes are available?

Adapters for magazines and other firearms without a rail to mount the Mantis X on

What others are saying?:

R.King on Amazon 4/5 stars

It works as advertised - a must have tool for both students and instructors

I think this tool is great for both instructors and students of marksmanship. Not only does it save you plenty of money on ammo, it lets you see exactly how you are pulling the trigger visually. This has helped me alone better understand how my trigger pull has been affecting my shots. I already knew this. However being able to SEE it made a nice difference.

I have yet to try it at the range. I have been dry firing daily trying to improve my trigger control. I will be going this week likely and see how much I have improved.

Pros: Works great, many settings to choose from, visually appealing, visually educational. I plan on using this tool with my students if they are having trouble with trigger control.

Cons: This is a very very small con, as MantisX explains, they are continually updating the software. However, there are times when it does not detect dry fires. However it is NOT a deal breaker at all. Just shoot again. Where it becomes a problem though is when you are doing timed shots. Other than that, I really have nothing bad to say about this product. Also, mine didn't come with a "pelican case." It was just a zipper case. Still good quality.

Suggestion: It would be very helpful if it came with a quick release rail mount or something. It is a little pain in the ass to have to remove it every time I want to carry or holster. Granted, it isn't difficult to remove, more of an inconvenience. However, if you already have a holster cut for tac light or something, this might not be a problem for you.

Link to other reviews:

The Truth About Guns

Price point:

MSRP = $149.99

Retail = $149.99 at MidwayUSA

I need it now! Availability:

MantisX

Our Rating:

Pros:

  • Easy set up

  • USB charging

  • Lightweight

  • Diagnostics of shooting

  • Fun

  • Shot number tracking

  • Movement graph

Cons:

  • Sometimes it didn’t want to read shots

Score: 8.5 Great

85.jpg


Favorite Link:   Axelson Tactical


Boyds At-One Shotgun stock


 As mentioned in the previous Boyds At-One review, Boyds has been making laminate wood stocks for a long time. So you most likely have heard of them. They have since come out with the At-One for pump action shotguns. So they asked me if I would like to review it, and here we are.

 Boyds gunstocks history goes back to 1981. But they have definitely kept up with the times. The stocks are inletted with CNC machines. Only US grown hardwoods are used for the laminate process. Boyds’ stocks are also hand sanded so that the smoothness is just right. I’m told the factory is even temperature controlled to maintain consistency. All of this, and finished off in a special hard finish that seals the stock, including the inlet portion, to protect it from the weather and make it last for years

 As of right now, they only make the shotgun At-One for two models. Those models are the Remington 870 and the Mossberg 500. I chose the Mossberg 500 version in “Sky,” which is a blue/grey/black laminate. Now, when the marketing rep and I ordered this, we did not look at everything, so the forearm was the wrong one. I now know that there are two different action slide lengths for the forearms. I have the shorter one. So when ordering, please read the fine print at the bottom. This was by no way Boyds’ fault, it was mine. But as the saying goes “the more you know.”

 On to installation. The stock and forearm go on pretty easy. Take the buttplate of your old stock and unscrew the bolt holding it on. It should come right off. Then you need to install the included metal adaptor to your receiver. The stock comes with all the hardware needed and really good instructions. Pretty easy so far. Now you have to install the stock to the adaptor with more supplied hardware. First you have to remove the bottom cap off of the stock so that you can have access to the screw hole. Then you can install the stock itself. This is where I ran into a little bit of a problem. The hole and supplied screw are at an odd angle, so getting a long enough allen wrench in the hole is key. My universal nut driver, with allen head bits, was just too large in diameter to fit down in the recessed hole. Because of this, I took out a tiny chunk of wood where the bottom cap meets the stock. I should have just ordered a long allen allen wrench, which fits fine. Once that’s done, screw the bottom cap back on and the stock is good to go. The forearm went on easy. Just loosen the odd nut (I’m sure it has a name) that holds on the forearm. A special tool works best, but I just used a big chisel as a huge screwdriver (not recommended). I did remove the forearm from the shotgun first. Then I just lightly tapped the new Bantam forend on, installed the odd nut, and reinstalled the forend and rails onto the shotgun. It was really fairly easy.

 Now that the At-One is installed, it’s time for my experiences with it. As with the other At-One I reviewed, it is very comfortable to shoot. All of those adjustments really give the shotgun shooter an edge. Finally a stock that can be adjusted for the individual user. My Mossberg 500 has never really fit me correctly, until now. Since the comb on the At-One is adjustable, I was able to raise it up a little more than the fixed factory stock. This improved my shooting some. The length of pull on the Mossberg was fine, but with the At-One, I could fine tune it just a little more. However, I wasn’t real keen on the sharpness of the pistol grip. I liked it on the rifle, but prefer a more rounded one on the shotgun. If you want a larger pistol grip, they make the target one, which adds more meat to the grip and also changes the angle slightly. Another advantage to the length of pull, is how short the Boyds stock can go. One can shorten it up to 12.5” and out to 14.25”. If you want to make a more maneuverable shotgun, say for moving through a house, you can adjust the stock all the way in. It also works good for shorter armed shooters. The buttons to adjust the buttpad and comb have a very stout spring in them making them hard to push. This is done on purpose to keep any accidental adjustments from happening. Now I will say that the buttpad on the At-One is nice, but on a shotgun, a softer one would be nicer. It is the same buttpad as on the At-One rifle stocks. Now If you are really into adjustments, Boyds does offer a vertical adjustable buttpad system.  

 Boyds makes some really nice products. The At-One for shotguns is another one. It is available in a standard walnut also, in case you don’t like the laminate look. I personally like the laminate’s. The adjustability gives these stocks an edge in the field or on the range. Now, if they only made them for semi-auto shotguns. Take a look at Boyds gunstocks, they make a nice product.

Firearms Insider Reviews - 8 Key Points

Claim to Fame:

Adjustable laminate wood shotgun stock

Target Market:

Those wanting adjustability and/or different looks from their shotgun

FNBs (Features & Benefits of this product):

  • Laminate Hardwood

  • Adjustable Butt pad

  • Adjustable Cheek rest (Comb)

  • Interchangeable Grip

  • 12.5" to 14.25" Length of pull

  • .75” of comb adjustment

  • Made in USA

What other aesthetic options or finishes are available?

Too many to list, go check them out HERE

Vertical adjustable buttpad

What others are saying?:

Couldn’t find anything on the shotgun stocks, only rifle stocks

Link to other reviews:

Could only find “new release” articles

Price point:

MSRP: Stock = $175.00

           Forend = $67.00

Retail = Same as above

I need it now! Availability:

Boyds Gunstocks

Our Rating:

Pros:

  • Adjustable comb

  • Adjustable length of pull

  • Optional pistol grip

  • Stable Laminate

  • Great installation instructions

  • All US made

Cons:

  • Tough to get stock screw tightened

  • Buttpad could be softer

Score: 8.00 Great

80.jpg


Favorite Link:  Tony’s Diversityshoot.com


SentryShield Level IIIA backpack insert

 SentryShield is making a IIIA ballistic panel intended for backpacks. I noticed the press release a while back and inquired about it. Sentry Shield then sent me a panel to review. Having a teenage daughter that attends high school, any bit of extra protection for her is a good thing. Plus, I get the advantage of using it also.

 I am going to not actually shoot at this ballistic panel. Having a NIJ (National Institute of Justice) certified level IIIA rating tells me what I need to know about its protection level. I have shot level IIIA vests, so I understand what this level of protection does. This rating is for handguns only, as rifles and fast moving projectiles will pass right through the armor. Click on the picture wheel to see what level IIIA is. Remember level IIIA covers the previous levels also.

 Now that that's out if the way. The SentryShield panel is made of UHMWPE (ultra-high-molecular-weight polyethylene) thread woven together. It then has a nylon shell around the UHMWPE. UHMWPE does have its pros and cons. One big pro is its weight. The 16.25×11.75” panel only weighs 1.74 pounds. So putting it in a pack is barely noticeable. Another pro is its slim size. At less than ½ inch thick, it doesn't take up much of the useful space in your pack. Now a downside to UHMWPE is temperature. Basically you want to keep it between -15°F and 150°F. Anything above or below this specification and the material will start to degrade. And no one wants that in a ballistic panel.

 Some of you might be wondering why anyone would want or need this. Well, we live in an unpredictable society. A backpack or laptop bag is basically a man purse. Anyone seen wearing or carrying one is not really noticed. Now you can blend in and still have some ballistic protection, if needed. With a backpack, if the need arises, one can just put the backpack on backward, and have a front level IIIA protection while keeping your hands free to do other work. As mentioned earlier, you can equip a child with a ballistic panel, without adding huge amounts of weight. It may not be rated for rifle rounds, but level IIIA is better than nothing to keep a loved one safe.

 Gun fire is also not the only use for ballistic panels. As we have seen, explosives can be a hazard also. Just look at the Boston marathon bombing. Panel's, like the Sentry Shield, may also protect you from shrapnel or flying metal produced by an explosion.

 I know we are talking about just one single ballistic panel. But, what about the use of it against blunt objects. Every body armor I've tried, seemed to also help with spreading out the force, of say, a bat, or even a fist. So a backpack panel might also help you out of other situations.

 When I used the backpack panel, I really didn’t even notice it. The panel slides nicely into most packs. I happen to slide it in the laptop section of my pack. The Sentry Shield panel does goes have a front and back side, just remember to put the side labelled “strike face” outward, away from your body. I really did not even notice the panel when carrying the backpack. If you want a smaller panel, they make one for a handbag, so it is slightly smaller.

 The SentryShield ballistic panel is pretty nice. It fits into just about anything, even a plate carrier, if one wanted to do so. The price is excellent at $90. It’s rated for most handgun and shotgun rounds. So if you’re in the market for something like this, go check out SentryShield.

Firearms Insider Reviews - 8 Key Points

Claim to Fame:

Level IIIA ballistic panel for backpacks

Target Market:

Travelers, children, those wanting ballistic protection without the typical “vest”

FNBs (Features & Benefits of this product):

  • NIJ level IIIA

  • 16.25×11.75”

  • Less than ½” thick

  • 1.74 lbs

  • -15 to 150 F temperature range

  • Made in China

What other aesthetic options or finishes are available?

Handbag version

What others are saying?:

Kerry 5/5 stars at Sentry Shield
Fit great and actually comfortable
I have a backpack that I really like because it has a weird kinda design that I haven’t been able to find anywhere else so I didn’t want to replace it, even though everyone’s talking about bulletproof backpacks nowadays. I can’t afford a bulletproof tactical backpack and a kevlar vest is uncomfortable. My friend told me about inserts and then I saw that SentryShield makes them. It came to me in about 2 days (business) and it’s made nice. it fits the weird inner slot of my backpack perfectly. I’m hoping I never have to use it, but I’m glad I got it. I did have some questions about the product and I called customer service. They were nice!

Link to other reviews:

Best Travel Gear

Price point:

MSRP = $120.00

Retail = $89.99

I need it now! Availability:

SentryShield

Our Rating:

Pros:

  • Lightweight

  • Fits into most packs well

  • Price

  • Slim

Cons:

  • Made in China

  • Temperature range

Score: 8.00 Great

80.jpg

Favorite Link:   Medford Knife & Tool

Guntec 9mm Micro-Comp

 The Guntec USA crew has introduced a new little micro-comp for 9mm rifles. I personally like mini compensators on PCC style rifles. As I mentioned in the 9mm bolt review, Guntec sent this out for review at the same time as the bolt.

 One of the reasons I went with the micro-comp is the small size. It is 2 ⅝” long and has an outside diameter of 0.95”. On a rifle length 9mm carbine, almost all of the powder, or all of it, is burned up before the bullet leaves the barrel. This makes a large compensator not as efficient. Plus I like the mini look.

 Even though it is called a comp, it is actually more. I would call it a hybrid brake/compensator. The compensator portion of the micro-comp comes from the 3 holes the face upward. This vents gas up to push the barrel down. The next part is the brake, which is meant to reduce recoil. A huge single rectangular cut, from side to side, facilitates the brake function. One disadvantage to the micro-comp, as in almost all hybrid comps, is the increase in muzzle blast sound.

 I could definitely tell a big difference in this micro-comp over the 9mm A1 flash hider. Muzzle control from target to target is way faster. Felt recoil seems about the same, at least on my shoulder. I have a red dot on my PCC. Finding the target after recoil is also faster. Sometimes the dot stays on target, depending on the target size and distance. So the compensator portion works well.

 The Micro-comp is threaded ½-36. The thread pitch is part of the reason I chose the micro-comp. My 16” barrel is threaded ½-36, not ½-28 used on many of today’s barrels. Most of Guntec’s 9mm muzzle accessories are threaded the ½-36, but they do have some in ½-28 also..

 Do I like this micro-comp? Yes. Do I think there might be a more efficient one on the market? Yes, but Guntec does a good job in their micro-comp. It works well for what it is and at $39.95, the price is good also. Go take a look at Guntec USA and all of their AR accessories. I have been pleased with most of their products.

Firearms Insider Reviews - 8 Key Points

Claim to Fame:

Micro compensator for 9mm carbines

Target Market:

Those wanting a smaller effective compensator/muzzle brake for a 9mm carbine

FNBs (Features & Benefits of this product):

  • Multi Port Compensator

  • Micro Design, Very Compact

  • 3 Top Porting Holes To Reduce Muzzle Climb

  • Side Slot Cut Reduces Pressure During Rapid Fire

  • All Steel Construction

  • 1/2 x 36 Thread Pitch

  • 2 ⅝” long

  • 0.94” Diameter

  • Comes with crush washer

  • Made in USA

What other aesthetic options or finishes are available?

None

What others are saying?:

Too new at this time

Link to other reviews:

Too new at this time

Price point:

MSRP = $39.95

Retail = same

I need it now! Availability:

Guntec USA

Our Rating:

Pros:

  • Small size

  • Effective

  • Price

  • Made in USA

Cons:

  • Loud

  • Not available in ½-28 for 9mm

Score: 7.50 Good

75.jpg


Favorite Link:   AR 15 podcast


Guntec 9mm Bolt Carrier Group

 I was in the process of putting together a pistol caliber carbine or PCC for short. So of course I needed a bolt. I contacted GunTec USA since they had recently come out with a 9mm bolt. They were kind enough to send one out for review, along with a 9mm compensator for the same build. I have reviewed other GunTec products in the past with good results.

 This review will probably be on the shorter side, after all it is a bolt carrier group (BCG). The GunTec 9mm BCG has a very nice QPQ Nitride finish. This makes cleaning a little easier than a standard run of the mill Mil-Spec BCG, plus it looks nice. Another function of the Nitride finish is it’s smoothness, if that’s a word. When I installed the GunTec BCG, it cycled very smoothly. This could also be due to the fact that the exterior machining on the bolt is top notch.

 The GunTec bolt has pretty much all the features one would need for this type of BCG. It has a roll pinned in weight to add mass. This makes it possible to run a standard weight buffer in your recoil system. The bolt is heavy at almost 15 ounces, but this is needed for the straight blowback style action used in most 9mm PCC’s. I did run into a small problem that was probably my OCD. Where the gas key block is located, right behind it on the bolt, was a little raised area. When I cycled the upper by hand, you could feel it drag against the buffer tube, but only right at full extension of the charging handle. It however did not cause any wear or problems during use. I smoothed them out so I felt better. Other than my OCD, the bolt has ran flawlessly using the Stern Defense mag block and all different types of glock magazines. The gas key bolts are staked in. They could be a little more, but since it is really only there to manually cycle the firearm, I didn’t pay much attention to them. The BCG also uses an external extractor. A big plus if you actually shoot enough to wear it out.

You can see here where I polished off the small lip.

Same lip on bottom of bolt. Neither top or bottom lip actually affected function.

 I am not sure how many round that I have out through the BCG. But it has not failed me so far. I would estimate around 700-800 round through it at the time of this review. I have ran it with three different AR15 triggers. A mil-spec, a KE arms, and a Velocity. All worked well. The Velocity was on the light side of the trigger pull weight, so I took it out and am currently running the KE arms trigger with good luck.

 If you are in the market to assemble a pistol caliber carbine, take a look at GunTec. PCC’s are an economical way to practice. This 9mm BCG will do both styles of receivers. It has given me no problems and is made right here in the U.S.A. Go take a look at GunTec USA, they probably have everything needed for a PCC.


Firearms Insider Reviews - 8 Key Points

Claim to Fame:

9mm AR bolt for Glock or Colt style magazines

Target Market:

Those building a pistol caliber carbine

FNBs (Features & Benefits of this product):

  • Compatible With Glock & Colt Style Lower Receivers

  • MIL-SPEC 8620 Steel

  • External Extractor

  • Dust Cover Compatible

  • Total Weight : 14.9 Ounces

  • USA Made

  • Fully Heat Treated

  • QPQ Salt Bath Nitride Finish

  • 1 Year Warranty

What other aesthetic options or finishes are available?

In Nickel Boron

What others are saying?:

None found at time of writing

Link to other reviews:

None Found

Price point:

MSRP = $159.00

Retail = $135.99 at OpticsPlanet

I need it now! Availability:

GunTec USA or OpticsPLanet

Our Rating:

Pros:

  • Drop in installation

  • External extractor

  • Nitride coated

  • Works with Colt and Glock style magazines

  • Works with standard AR15 hammers/triggers

  • Made in USA

Cons:

  • Slight raised lip by gas key

Score: 8.00 Great

80.jpg

Favorite Link:   Brothers & Arms


Stern Defense Mag-AD9


 Stern Defense has introduced a magazine block for standard AR-15 style rifles. 9mm converted AR’s are excellent for cheaper practice. Stern Defense was kind enough to send their AD9 magazine block. This product converts a regular AR-15 lower to accept Glock 9mm and 40 cal magazines. One will still need a complete 9mm AR upper, with a Glock style bolt, to work with the magazine block.

 The Stern Defense AD9 is probably one of the nicest magazine blocks around. It is beautifully machined and engineered. Made from 6061 aluminum, hard coat anodized, with some steel and plastic parts where needed, it should last a lifetime. The built in feed ramp is also NiB coated to help smooth out the transfer of the round from the magazine into the chamber. I also noticed this makes the feed ramp easier to clean. I ran various types and weights of 9mm through the AD9. All of them fed reliably, even my 124gr Gold dot hollow points.

 Installation of the magazine adapter is super easy. I used a standard forged mil-spec receiver. First, if new, just insert the adapter into the magwell, like you would any standard AR magazine. Push it until the standard magazine release clicks back out, just like the standard AR magazine. Now, on the bottom of the Stern Defense magazine block, are 3 screws. Take the supplied allen wrench and tighten up the gib screw, while pulling down on the adapter. The gib screw is the larger set screw toward the front of the adapter. What this does is force the gib (plastic piece at the front of the adapter) against the lower receiver’s magazine well. Then lightly tighten the other 2 smaller set screws until they touch the lower receiver. Now you are done with the hard part.

 This AD9 insert is great. I am using a Guntec USA BCG, which is cut for both the Glock style and Colt style, just for your info. Every magazine I have tried fed reliably. All the magazines drop free with a press of the magazine release. Now, the magazine release on the AD9 is a push forward type. Located if front of the trigger guard. All you have to do is push it forward with your trigger finger, and the magazines drop free. It took me a little bit to get the hang of this, but once I did, it works very nicely. If you try and hit the regular magazine release, it does absolutely nothing because of the mag block being wedged in with the gib. I used Glock, Magpul, ETS, and Amend2 magazines, all worked great, as mentioned above. Since the magazine release is only on the right side, left handed people will have to find a different way of releasing the magazines. I did find that if you push the magazine release with your left hand thumb, you can kind of strip the mag out, similar to an AK. I would love the magazine release to be ambidextrous and larger so that I don’t miss it when reloading quickly. Speaking of quick reloads, the magwell is also slightly beveled to help with the insertion of magazines.

Left hand using magazine release

 Some people may not see the purpose in a magazine block. I must admit, this thought has gone through my head before also. But, if you have a SBR, and want to run a short 9mm setup, a mag block allows someone to do this without having to pay another $200 tax stamp on a dedicated 9mm lower. Or if you are fortunate enough to have a full auto m16, you can convert it to 9mm with the AD9!

 I almost forgot to mention. The Stern Defense AD9 has last round bolt hold open. And it worked with all my magazines. It pushes up on the regular AR bolt release. So there is no need to learn any new aspects to your training, at least as far as the bolt release goes. The ejector is also part of the magazine adapter. Replacement ejectors are also available from Stern Defense.

 Stern Defense has made a great product. It is expensive, but worth it in my opinion. So if you think a magazine block might be for you, go check out Stern Defense.

Firearms Insider Reviews - 8 Key Points

Claim to Fame:

Magazine block to convert standard AR-15 lowers to 9mm Glock magazines

Target Market:

Those wanting a 9mm carbine on a standard AR-15 lower receiver

FNBs (Features & Benefits of this product):

  • Made in the U.S.A.
  • Constructed from 6061 T6 aircraft grade aluminum.
  • NiB coated feed ramp.
  • Hard coat anodized type 3.
  • Sturdy Construction.
  • Ergonomic mag release.
  • Works with all generations of Glock magazines.
  • Works with any mil spec ar15 lower receiver.
  • All gun components besides the Bolt and Barrel remain stock

What other aesthetic options or finishes are available?

Beretta 92, M&P, and M&P .45ACP

What others are saying?:

4 / 5 stars at Brownells

RELIABLE
Building a 9mm AR Carbine on a budget can quickly become an expensive endeavor if you buy unreliable parts. The AR-15 9mm Conversion Adapter for Glock® Magazines by STERN DEFENSE Is a reliable way to use Glock magazines in a Mil-spec lower. I use it for USPSA PCC division and Steel Challenge matches to keep the feel of an M-4 and for training. I’ve personally tried other methods and this system is far superior. The feed ramp angle on 9mm is critical for proper function and reliability, with the vast array of projectile profiles. So far I’ve had luck with multiple types of 9mm projectiles I.E. Winchester 124gr FMJ, 145gr RN Bayou, and 147gr FP/HP Berry’s. The last round Bolt hold open is somewhat unnecessary for PCC, however, is great to feel the weight transfer of the bolt carrier group and buffer and have it lock on the last round. The only feature that I dislike is the magazine release is located at the bottom of the unit which is not a big deal if your state allows “standard capacity” magazines. However, I’d like index the same magazine release in the same configuration of an AR series firearm, which would be difficult without permanently modifying the magazine. Overall a great product the moment you open the package you can see that a lot of thought went into its development and manufacturer.

Link to other reviews:

OutlivetheOutbreak.com

Price point:

MSRP = $179.99

Retail = $179.99 at Brownells

I need it now! Availability:

Stern Defense or Brownells

Our Rating:

Pros:

  • Easy Installation

  • Last round bolt hold-open

  • Beautifully made

  • Magazines drop free

  • Bevelled magwell

Cons:

  • Price

  • Magazine Release is not in the standard location

Score: 8.50 GREAT

85.jpg


Favorite Link:   GunTec USA

9mm MagPump

 If you shoot enough, you probably have looked into magazine loaders. MagPump has introduced a 9mm magazine loader. Their first adventure into the market was their AR-15 magazine loader. They went one step farther with the 9mm version. This was sent to me for review, but it will still get my honest review.

 When I first received the MagPump, I had to try it out. So I assembled it. To assemble it, all you have to do is pull the 2 pins from the hopper, set in on the pumping system, then push the pins in to hold it together. But of course, there is more to it then that. One has to select the magazine adapter and install it. I first chose the Glock adapter. It comes with adapters for: Glock, Sig, Smith & Wesson, Springfield, CZ, and Ruger. They also have other adapters for sale. As with all the magazine adapters, it has two raised circles that slide into the MagPump. Just squeeze them gently, and slide the adapter in place. Now you are ready to install the magazine. I found that if you angle the magazine at about 45 degrees, it makes this step easier. See the pictures, it helps explain these steps. Then push the magazine down as it slides into the adapter. Once down, push the magazine and adapter forward until it clicks in. There is a trigger looking mechanism that catches the magazine/adapter in place. Make sure it clicks in, or the magazine will get pushed out when trying to load it up. Now dump some rounds in the hopper, and start “pumping” the handle! When done, pull the trigger mechanism to unlatch the magazine, and now you have a loaded magazine.

 The MagPump is something used for high volume loading. Because of the size, it is not something you would probably take to the range with you. It does come with a base that can be mounted to a table or workbench. The base is basically a picatinny rail and then the MagPump mounts on it with two large thumbscrews. Because of this feature, the loaded can also be mounted to any picatinny rail that is long enough. The MagPump is pretty stable when mounted to a bench. In the video, you will see I had to hold the base, that is because it wasn’t mounted. I could see a range having some of these for their members to use. All of the MagPumps use the same style of mounting base. So if you have limited space, and more than one style of MagPump, they are easily swapped onto a mounted base.

 I mentioned the hopper system. This system allows you to literally just dump a box of 50 rounds into it, and start loading. There is a little spring loaded latch on the hopper. You can push this to help start loading the rounds into the feed slot, if needed. I would really like the hopper to hold more rounds. Somehow the mechanism that flips the rounds to the proper direction, doesn’t care for hollow points. It does work fine with round nose bullets. MagPump does state that it is optimized for FMJ/Round nose bullets, so I wasn’t surprised.

 After using the MagPump for thousands of rounds, here is what else I found. The pumping handle feels a little flimsy, but it has held up fine. Even when trying to force it. The loader does take a few tries until you get the hang of it. Loading practice ammo has never been easier. It handles all different capacity magazines, from 10 rounders up to the 33’s. So if you are looking for a bench style magazine loader, you may want to go try one of these out. Now, if I could just motorize it.


Firearms Insider Reviews - 8 Key Points

Claim to Fame:

Easy, fast magazine loader

Target Market:

Those wanting quick and easy loading of magazines

FNBs (Features & Benefits of this product):

  • Fast magazine loading
  • Picatinny mounting
  • Bench mountable
  • 50 round hopper
  • 6 different magazine retainers included

What other aesthetic options or finishes are available?

9mm Elite loader

What others are saying?:

4 / 5 stars from Midway

Limited usage

I purchased this product thinking it would be a useful tool. Basically what it does is saves your fingers if you do a lot of target shooting. It will not load hollow point cartridges or any flat nose cartridge. It will load round nose practice ammo very well, although in my experience, one cannot go quite as fast loading rounds as the ad videos purport. Slow and steady loading works best for me. My recommendation is based on this information.

Link to other reviews:

Pistol Forum Review

Price point:

MSRP = $149.99

Retail =$124.95 on Amazon

I need it now! Availability:

MagPump or Amazon

Our Rating:

Pros:

  • Hopper system
  • Mountable base
  • Ease of use
  • Comes with more than one magazine adapter
  • Loads magazine quickly

Cons:

  • Doesn't work well with hollow points
  • Hopper only holds 50 rounds
  • Handle feels flimsy

Score: 7.00 Good

70.jpg


Favorite Link:   Nevada Cerakote


5.11 Defender Flex jeans and Hunter Plaid Shirt


 It doesn't really matter who you are, you need clothes. Even though 5.11 is mainly known for tactical clothing, they also offer a wide array of “not so tactical” clothing. For instance, they sent me a pair of their defender flex jeans and a hunter plaid shirt to try out.

 I have literally been wearing these clothes for 6 months. They both have worn extremely well. The fabrics 5.11 uses are as comfortable as any of my other jeans or shirts. As you can probably guess, I am not a clothes reviewer, but I will tell you what I like and dislike about these.

 First up is the jeans. These have worn very well for me. They pretty much look the same as the day I received them. The defender jeans did bleed some color the first 4 or 5 washes, after that I could wash them with other clothes. The fit is as advertised. I ordered the size I wear, and they fit great. One huge dislike, about the jeans, is the front pockets are way too short. For being advertised as “tactical clothing”, you can't hardly put a 2 cell tactical flashlight in them, yet alone a small pistol or revolver. The back pockets are fine. Now one of my favorite features is the extra pockets. These pockets are just rear of the center line on each side. These extra pockets also blend in with the seams of the jeans. So unless you know they are there, no one will ever be the wiser. These pockets are excellent for carrying a tourniquet or extra magazine, or both. Since the extra pockets are somewhat wide, an AR magazine will also fit, but it will stick out the top. The defender flex jeans also are made with a blend of stretchy material, hence the “flex” in the name. This makes them very comfortable to move around in. 5.11 also did a nice job putting enough, but not too many, belt loops on them. The belt loops will accept a 1.75” wide belts. Last up is the YKK zipper, which should keep stuff closed up until you decide otherwise.

 Now that I have bored you with the Defender jeans, it's time to get your shirt on. 5.11 also sent one of their Hunter plaid shirts. This is a short sleeve, button up style. As said about the jeans, the sizing on the website is spot on. When I say button up style, what 5.11 has done, is to use snaps that appear to be buttons. What does this do for the concealed carrier? Well, since this style of shirt doesn't stretch. When you yank up the shirt to draw your defensive firearm, the snaps will undo and make it possible for the shirt to get out of the way of your draw stroke. Pretty smart on 5.11’s behalf. The shirt is lightweight. Has a nice pocket in the front. It even looks good tucked in or just hanging out. Plus, the plaid design helps break up shapes that might be hiding under the shirt.

 I really like these 5.11 clothes. They fit well. Serve a functional purpose. And are designed to make you blend in with your surroundings. Go check them out if your in the need for some “non tactical”, tactical clothing.

Insider Reviews - 8 Key Points

Claim to Fame:

Tactical wear that blends in with society

Target Market:

Anyone wanting clothes that do not look tactical

FNBs (Features & Benefits of this product):

Defender Flex Jeans

  • Button top fly with locking YKK® zipper
  • Dual back patch pockets
  • 10 oz. mechanical stretch denim (76% cotton / 24% polyester with Lycra® T400 Tough Max™)
  • Five pocket styling plus two rear hip pockets
  • Double needle construction with bar tacks in high-stress areas

Hunter Plaid Shirt

  • RAPIDraw™ placket
  • Branded metal ring snaps & neck tape
  • 60% cotton / 40% polyester 3.1 oz
  • Regular fit

What other aesthetic options or finishes are available?

Too many to list

What others are saying?:

From Midway

Will buy a few more

The most comfortable pair of jeans I own. Look great. I have two as of now. Belt loops work with all my tac belts. Extra deep "Coin" pocket is perfect for my knife. The low vis mag pockets in the back were handy when I went to the range to work re-loads with my AR and forgot my mag pouch! Still got my reps in! Negatives: Front pockets could be a bit deeper. Having had these for a few months now, the seem to shrink faster than normal jeans, even washing in cold. My 34 lengths now feel like 33/32 length. Might go up in length on the next pair and see how that goes. Neutral: The blue will run for a while. They say that and they are right. Wash three or four times by themselves to mitigate this. If not, you will get blue on your hands or other clothes. I'm okay with this as there is a warning on the tag.


Link to other reviews:

OffGridWeb

Price point:

MSRP = $69.99 Defender Flex Jeans

              $39.99 Hunter Plaid Shirt

Retail = Same as MSRP at Midway

I need it now! Availability:

5.11 Tactical

Our Rating:

Pros:

  • Extra pockets in jeans

  • Comfortable

  • Look like everyday clothes

  • True sizing

  • Snaps on shirt

  • Plaid design on shirt

  • Lightweight

Cons:

  • Front jean pockets too short

  • Jean color bleeds a lot

70.jpg

Score:

7.00 jeans - Good


75.jpg


7.50 shirt - Good


Favorite Link:   Thor Targets

Stngr 15" Rptr handguard

Written by: Zane M.

  There are hundreds if not thousands of choices for Handguards and rails for the ar15. Everyone has their own opinion as to what a rail should offer. Personally I like to have as much rail as I can in relation to barrel length, so for a 16” gun that means a 15” rail.

  A few months ago I had a STNGR (pronounced “stinger”) RPTR sent to me to take a look at. At first glance, it looks good. Seems a bit heavy but considering it has quad at the muzzle end not overly so. In the box is the handguard, the barrel nut, and proprietary “wrench” or installation tool.

  Installation was simple. The low pro barrel nut required no timing, a welcomed feature and the provided tool was adequate. The barrel nut is made from aluminum, while I encountered no issues I would much rather have a steel barrel nut. Luckily, they offer one as an upgrade and I will most likely replace mine should I decide to stay with this hand guard.  I feel this should be standard but i understand the need to keep the price and weight down for the casual plinker. It’s worth noting that the anti rotational wings that “lock” the rail in place could need removing for use with a billet upper but I installed it on a forged receiver so I encountered none of that. But more on those wings later.

  The 15” officially licensed Mlok rail comes in at 11.64 oz not including the barrel nut and is made from 6065 aluminum. It will require a low profile gas block or in my case a cut down a2 front site base. At 1.35 inner diameter not too many silencers are going to fit under it if that’s your thing but for people with small hands that don’t like vertical foregrips it’s quite comfortable to grab.  Two QD sling points at the either side towards the receiver end don’t offer much flexibility in using QD slings. Since I don’t use a QD sling this wasn’t a concern for me.

The gun, a colt 6920, still points good, this rail is much thinner than the previous one I had and, as mentioned earlier, makes for a much more comfortable grip. After a day of shooting I noticed two things: 1, the rail has quite a bit of flex and 2, it heats up quick. Then as the day went on I found I had a tendency to oversteer the gun. Let’s address these one by one.

  Flex, the rail flexes. It’s a 15” free-float so that’s to be expected. From the prone at 25yds using only sling tension I was able to move the backup irons enough to shift the strike of the round 5-6” That’s a concern of you’re going to use rail mounted aiming devices like irons or lasers.  If your primary optic is receiver mounted, this is obviously much less of a concern.

  Now let’s talk about heat, after two quick mag dumps, the rail was almost too hot to hold. Midway through the third mag I put a glove on. I definitely wouldn’t put this on a full auto or bumpstocked lower but since I don’t have either and magdumps aren’t really my thing, this is less of an issue. I don’t know how it would hold up on a full day class as I didn’t have opportunity to run it in a class.

  My last minor concern is the weight towards the end. In all fairness I requested the rail with quad at the muzzle, this obviously increases the weight a bit at the muzzle end causing me to ever so slightly oversteer the gun. They offer rails that don’t have the quad rail portion and if I did this over again I would  forgo it.

  The next range trip I brought some range barrels (55gal drums), barricades and a homemade notch wall along to purposely try to break the little bitty anti rotational wings off. After several hundred rounds and several dozen overly aggressive slams into different positions, I was unable to do so. I’m sure if I beat it as hard as I could on the concrete I could bend or break it but I don’t know much that I couldn’t break at that point. My concerns with the wings seem unfounded judging by the last several months of range trips and they’re still holding up just fine. However, they do seem to have about 1/32” extra space so take care in lining the rail up before wrenching it down. And at some point in the testing process I was able to twist it every so slightly. I am chalking this up to user error since I didn’t use a torque wrench to tighten the clam screws to the recommended 20-30 inch lbs. why? You ask, because I don’t have an inch lbs torque wrench. I realigned it and went hand tight-er and didn’t rencounter this problem.

  At $135 it’s hard to beat for a made in America, aluminum handguard. While I’m not sure I would recommend it for duty use, for the hobbyist or for a home defense rifle it seems like a fine choice.

FIREARMS INSIDER REVIEWS - 8 KEY POINTS


CLAIM TO FAME:

Made in America aluminum freefloat handguard/Rail

TARGET MARKET:

Anyone with an AR-15

FNBS (FEATURES & BENEFITS OF THIS PRODUCT):

  • Free floated
  • Mlok
  • 2 QD attachments
  • Full length
  • Quad rail at muzzle end
  • Lifetime warranty

WHAT OTHER AESTHETIC OPTIONS OR FINISHES ARE AVAILABLE?

They make rails from 7”-15” in Mlok or keymod, with or without a 3slot quad picrail at the muzzle end

What others are saying:

From STNGR’s website

08/07/2018

Jeremy Koop

First AR build

I’m building my first AR, and want everything on this one to be good quality. I’m enjoying seeing it come together, but now that I got this handguard on, it looks amazing. I did a lot of research and was going to spend 300 dollars on a handguard, before stumbling on to STNGR, that being said, it was a perfect fit, everything is so clean, A++.


Price point:

MSRP  - $134.99

At time of writing blemish rails are available for $119.99

Other rails and lengths vary in price

I need it now availability:

STNGRUSA.com

Our Rating:

    Pros:

  • Does the job
  • Price
  • Made in America (if that matters to you)
  • Freefloat
  • Easy installation

   Cons:

  • Has a lot of flex
  • Gets hot fast
  • Very small tolerance issue on the wings


Score: 7.5 Good

75.jpg


NightStick TWM-850XL Weapon mounted light

  NightStick lighting products are fairly new at weapon mounted lights. Don’t let that fool you, these lights are robust and powerful. Nightstick is a division of Bayco products, who have been doing portable lighting products for over 30 years. I saw them at SHOT 2018 and they were gracious enough to send out one of their new TWM-850XL weapon mounted lights for review.

 The TWM-850XL is a full size light. Not the mini’s that are made to fit the smaller handguns. Being that it is full size, it is a comparable size to the common TLR-1 HL. So much so, that many holsters made for a pistol with the TLR-1 will fit the Nightstick. The TWM-850XL does not have the strobe option, but they do make the same light with a strobe option.

 Let’s get into what makes the Nightstick weapon light shine. As with pretty much all high output lights, it uses a CREE LED rated at 850 lumens and 15000 candela. Bright enough to go 245 meters, or so they say. But identifying something at that distance is not something I would try. The house at the end of the street, about 125 yds away, probably hates me now. Even with street lights on, the 850XL did a decent job of lighting up their house. Could I identify someone? No, but make out figures and trees, yes. As with most lights, they appear to work better at distance without much ambient light. In the pictures you can see the spill pattern to some extent and also how the different distances affect detail.The light wasn’t on a firearm when I shined it down the street or at the shady person on the side of the road.

Approximately 75yds Dark

Approximately 75yds. This also does a decent job of showing the beam pattern

Approximately 25yds

Approximately 50yds

Approximately 35yds

 Nightstick did a pretty good job putting in lots of useable features. The first one that comes to mind is their switch mechanism. The switches are made from a glass filled nylon to give them strength and are ambidextrous. Probably my favorite feature, is how the switches operate. Pushing down on either side operates the momentary on. Yes, down on either side, unlike the TLR-1. Pushing up on either side turns the light on. To turn the light off, just push down on either side of the switches and it turns off. When turning the light from constant on to off, It will go to momentary on the opposite side from which it was flipped to on, then just let up and it is off. If you switch it off on the side that it was turned to “on”, it will go to the off position. I found that, in this case, the switch just passed off and went to momentary also. Not a big deal, just something to mention. Once I got use to the way the switching worked, I really liked it.

 I’ll try not to bore you to death with the specifications, because most are listed below. The 850XL does use a hardcoat anodized aluminum housing. For now, it is only available in black. It is water resistant. It also uses 2 of the CR123 batteries, which are supplied. One must take the light off of a handgun to replace the batteries. If you have it mounted on a rifle, it is possible to replace them with the light still mounted. The battery door flips down once the screw is loosened that holds it on. The lens is made out of polycarbonate, the same material many safety glasses are made from. Nightstick also adds an anti scratch coating to the lens. Battery life is specified at 1.75 hrs. After about 1.5 hrs, the output started dying off for me. Yes, it does get hot if left on. Each weapon light is also has its own serial number.

 When mounting to a pistol, or rifle, the 850-XL came with 2 cross rail inserts. These cross rails allow the user to mount the light on different types of rails. On the top of the light, where it mounts to a rail, are 4 tiny slots. The slots are used to position the light onto the rail by installing 1 or both of the cross rail inserts. Depending on who’s rail you are using. I just held the light up to the rail and lined it up with the appropriate cross rail slot. The instruction tell you what handgun to use with what slot, but that’s no fun. I put a tiny amount of threadlocker on the screws holding the cross rail in, just for added protection.

 I have tried the 850XL on a few firearms. Typically I use it on my Polymer80 compact. The light does extend out about an inch past the muzzle. But I have had zero problems with it at all. I did mount it on an AR to try out. It wasn’t as weird as one might think. I just put my support hand right behind it and was able to operate the light with my thumb. I didn’t put many rounds downrange with the light mounted on the rifle, but I did run around the house with it mounted up. Nightstick does make a rifle version that uses a push button end cap.

 I think it is good to have another weapon mounted light in the market. The Nightstick TWM-850XL has worked well for me. I think it is on par with the TLR-1. The quality is nice, it won’t break the bank, and it’s bright. Go take a look at the Nightstick line, they might have something worth using.


Firearms Insider Reviews - 8 Key Points

Claim to Fame:

High output weapon mounted light

Target Market:

Those wanting a high output weapon mounted light

FNBs (Features & Benefits of this product):

  • 850 Lumens

  • 15000 Candela

  • 2 m drop rating

  • IP-X7 Waterproof (1m for 30 min)

  • Flashlight Runtime: 1.75 hours

  • Length: 3.75 in (95 mm)

  • Width: 1.5 in (38 mm)

  • Depth: 1.5 in (38 mm)

  • Weight: 5.4 oz (155 g)

  • Head Diameter: 1.2 in (30 mm)

  • Ambidextrous toggle switch

  • Momentary or constant-on flashlight

  • Aircraft-grade 6061-T6 aluminum housing

  • Glass-filled nylon polymer toggle switch

  • Type III hard anodized finish

  • Beam distance rated at 245 meters

  • Impact & chemical resistant

  • Serialized for personal identification

  • 2 CR123 batteries (included)

What other aesthetic options or finishes are available?

With Strobe option

What others are saying:

Chris K. at Bayco Products: 5/5 stars
Absolutely AWESOME FELLAS!

  This thing feels SOLID as a rock, and the light output is INSANE...I can see why Police/First Responders would use this - because the controls are ingenious and easy, and the amount of "light 'em up" it produces is, well, GREAT!!! 

When I'm out with my dog at night, I've got this on my M&P Pro 9mm and if a coyote pack is lurking, simply point and hit the light and it's almost like a car's headlight on high!

  Thanks for making an excellent product! ABSOLUTELY WORTH $100 - NO DOUBT! I now want this in a flashlight form, and the light for my long guns! 100% endorse - get this bad boy if you do ANYTHING REQUIRING LIGHTING AND GUNS!!

Link to other reviews:

Ammoland TWM-850XLS review

Price point:

MSRP = $150.96

Retail = $85.87 on Amazon

I need it now! Availability:

Amazon 

Our Rating:

Pros:

  • Bright

  • TLR-1 size

  • Adjustable cross rail inserts

Cons:

  • Must take off to replace batteries

  • Size

Score: 8.00 Great

80.jpg


Favorite Link:   Polymer 80

Grey Ghost Precision Glock 19 Slide

Written by: Kenny Ortega
 

It seems like everyone is making Glock slides these days. Walking the aisles at the 2018 NRAAM and exhibits this year, glock slides were plentiful. As I was perusing the wares at the Tactical Tailor booth, I saw that their sister company, Grey Ghost Precision, was sharing the booth with them and had slides and barrels on display. I happened to get the opportunity to chat with the Marketing Guru at the Grey Ghost Precision, GGP, side of the booth as I ogled some of the slides available there.

At first glance, I noticed that the slides were not overly adorned with features that didn't offer any benefit other than aesthetics. Unlike most slides at the show, they were made to perform and look good, not just look good. There is an elegance to a product that is made to perform first and look good second. Who cares how good it looks if it doesn’t do what it’s supposed to do? At first glance, it appears that Grey Ghost got both areas right.

I had a number of questions for the marketing guru and after some discussion back and forth, he offered to send me a unit for review. Of course I said yes, their products were impressive. When the slide arrived, I was pleasantly surprised to find that he included one of their threaded barrels as well. That was a bonus that I had not expected. The slide that I chose was the Version 1 as it offered a bit more traction for slide manipulation. That factor became very important to me after another slide that I used to carry failed miserably in that area.

Some time ago, I purchased this slide from Zev and it had great visual appeal albeit it at a high price tag. Although, after running the slide on my gun under tough conditions, I reverted back to the factory slide as it proved more functional under real world conditions. The real test with the GGP slide would be whether it can overcome the shortcomings of a more well known and higher priced race gun slide. The only area that the GGP slide didn't surpass the race gun slide was in the flashy looks department. This comparison is a bit unfair though, it’s like comparing a Corvette to a Jaguar. Both are good looking cars but the Jaguar has a reputation for failure and requires expensive maintenance. GGP made a Corvette. It runs and looks good, at a fraction of the cost.

First Impressions

Upon opening the box, I noticed that the slide was packaged nicely and came with assembly and RMR installation instructions. Also included were the proper length screws for use with an RMR. Closer inspection showed a slide that was well machined, all the lines were crisp and sharp, there were no tool marks that I could see. The finish was deep and even. Overall, the slide had the look of a quality product and not something that was slapped together and rushed to market like many others. I felt that this slide was something I could trust and have complete confidence in. The slide did come stripped so I had to order some parts to complete the slide.

A couple of credit card number entries later and I was just waiting for parts to arrive. I kept all the parts stock to most closely mimic what the average builder might use. While race gun parts might have made the slide more desirable to some, I wanted to keep the budget minded builder as the target audience. The one item that I would highly recommend to complete the slide assembly is  a channel liner installation tool. Trying to install a channel liner without one is like trying to put on your socks without holding them. You might be able to do it but it’s a lot more work than it needs to be. Just spend the few bucks on the tool. You’ll be happy you did.

All the parts installed in the slide without any fitting or modification. To me, that speaks volumes. It means that the tolerances are held close to specifications on the slide, a sign of quality and attention to detail. I was glad to see that. When I went to mate the slide to the frame, I noticed that the fit was tighter than that of the factory slide and the alignment of the two had to be more precise. The slide to frame fit, while tighter than factory, moved freely and smoothly once the parts were mated. The barrel to slide fit was also tight and inspired confidence in the accuracy potential of this parts combination.

Checking the fit of the RMR cover plate, I found it to be snug and well fitted to the cutout for the sight. There did not appear to be any hand fitting of either the plate or the slide to mate the two parts. These items are obviously held to tight manufacturing tolerances with machines that have repeatable accuracy. Their friction fit was impressive. As someone who has been around machinists for decades, I know that tolerances like these are no small task without talent and expensive, well maintained, equipment. GGP obviously has both and it shows.

Range Testing

I was skeptical about how the slide would perform on my normally flawless Glock 19 frame and I was right to be skeptical, initially. The tighter than normal slide to frame fit did result in some failures to go fully into battery and failures to fire. To be honest though, I did do a sort of a torture test on the slide, I ran it dry to try and get it to fail. Using Winchester white box 115 grain 9mm ammo, not known for its reliability, and running the slide to frame interface dry initially, the slide did much better than other slides I have seen. The hiccups did cease after about 100 rounds and, with proper lubrication after that, the slide has yet to malfunction after several hundred more rounds.

In order to try and induce malfunctions, I added a TBRCI micro comp to the barrel. The slide just kept on performing flawlessly. I haven’t been able to induce a stoppage regardless of how hard I try. I have shot the slide in strong hand supported, strong hand only, weak hand supported, weak hand only, and had less experienced shooters shoot it as well. It performs with the notorious reliability of a Glock. They certainly go well together. If I had to find fault anywhere, it would have to be with the RMR. I am not a red dot shooter so I don’t shoot as well with one as I do with iron sights. That’s no fault of the slide though except that it gives me the ability to use a sight that I need more practice with. I’m an old iron sight guy and that’s a hard habit to break.

The slide/ barrel combo shot equally as well as the factory slide does with the aftermarket Silencerco barrel that I normally shoot. Having turned 50 last year, my eyes are not what they used to be and focusing on the front sight is difficult. You would think that a red dot would work better for me but I guess old habits die hard. Even with my old eyes, and other physical compensations I have to make, I was able to shoot 1” groups at 10 yards with ease. More importantly, when I ran ball and dummy exercises to simulate failures, the well defined, sharp edged serrations on both the front and rear of the slide allowed me to easily and effectively manipulate the slide. This was the biggest issue I had with the Zev slide that I ran in a recent class. That slide did not give me enough traction on the slide to clear simulated failures. The GGP slide traction was excellent and allowed me to clear the malfunctions with ease.

After discovering that this whiz bang slide that I bought, for almost twice what the GGP slide cost, would probably get me killed if I ever needed to clear a malfunction, I went back to the factory slide. Running the GGP slide in the same manner, I found that I could count on it to provide the necessary traction needed in an emergency and, even when my hands were sweaty, I could still manipulate it. The GGP slide restored my faith in aftermarket components on a carry gun. The V1 version of the slide has more aggressive texturing in my opinion while the V2 has a more aesthetic design. Either way, at a price point of $418.95 to $449.99, you can’t go wrong with either option.

Conclusion

GGP components are well made, aesthetically pleasing,  and reliable. The cost is on par with several other lesser known slide manufacturers on the market that try to compete solely on price. The prices are well below several other vendors that can easily venture into the $700 price range and beyond. Their threaded barrel with an MSRP of $189.99 is also a good deal. Their products, barrels included, are quality offerings and are priced well for the quality they provide. I am so impressed with their offerings that I am considering buying a Glock 43 just so I can modify it with one of their slides.

If you’re looking for a slide and/or barrel for your Glock, look to Grey Ghost Precision, you won’t be disappointed.

Rating: 8.75 Great


For a rating, I would say an 8.75. If it had been just a tad more reliable initially, I would have rated it higher.

85.jpg

Blacklist Glock Ultra Match Barrel

 If you’ve been around the aftermarket Glock seen for awhile, then you probably have heard the name Blacklist Industries. They make barrels and a few other parts. Blacklist sent me a G19 drop in Ultra Match barrel for review. I opted for the Chameleon color.

 First things first. This Blacklist barrel is great looking. Almost enough to just set it around and look at it. Blacklist has a great attention to detail. So much, that the barrel comes in its own little padded hard case. With a patch and some stickers. The “Blacklist” logo is engraved on the outside of the chamber area. The caliber and model are marked on the hood of the barrel. All of the barrels have column fluting, which are straight cut flutes down the length of the barrel.

 The barrel fit in my Grey Ghost slide was a little bit tight. Not enough that the firearm doesn’t function. But tight enough to cause some finish wear around the hood area. This of course is good because a tighter barrel fit gives better accuracy. It is bad because the pretty chameleon finish wears off some. Since the barrel is made from 416R Stainless Steel, the wear is only cosmetic.

 The Blacklist barrel has the normal features. It is “drop in” and runs a full supported SAAMI spec chamber. This allows it to run any 9mm load, including +P. I really like how Blacklist uses broach cut rifling in these barrels. Besides being an accurate way to rifle barrels, it allows the use of all the common bullet materials including lead. The muzzle end has a recessed crown to help protect that rifling. The 9mm version is a 1 in 10 twist rate to better stabilize the heavier bullets like the 147 grain ones.

 Let’s get into how it shot for me. All of the ammunition used was your run of the mill target variety. All targets were shot at 15 yards with the pistol rested on a bag. They are 5 round groups. So probably not a perfect test, but useful for real accuracy. My best group was 1.75” with Aguila 115gr. The worst was around 2.75”. I really was impressed with how well the Blacklist barrel shot most of the ammo I ran through it. There were a bunch of groups right around 2” as you can see in the pictures.

Aguila 115gr

Remington 115gr

Sellier & Bellot 115gr

Buffalo 115gr

Sig 115gr

Speer Lawman 124gr

  If you are thinking about getting a replacement pistol barrel, check out Blacklist Industries. This is a really nice barrel. Now, if you are in a hurry, don’t be. These take around 6-9 weeks to get after ordering. Are they worth the wait? That is a personal decision, but I would say so. Plus sometimes, online retailers have them in stock. This barrel shoots just as good now as the day I received it.

Firearms Insider Reviews - 8 Key Points

Claim to Fame:

Match grade Glock barrel

Target Market:

Shooters wanting better accuracy or builders of Glock style pistols

FNBs (Features & Benefits of this product):

  • 416R Stainless Steel

  • 1 in 10 twist

  • 9mm

  • Drop in

  • Pulled Broach rifling

  • Full supported SAAMI chamber

  • Column flutes

  • Gen 1-4 compatible

What other aesthetic options or finishes are available?

Stainless Steel, TiN (Gold), Armor (Black)

What others are saying?:

From Blacklist Ind. 5/5 stars

WORTH THE WAIT.
Serious attention to detail, presentation, packaging and build quality. Customer service is second to none (also, hilarious). Getting better groups at the range. And the presence it brings to my G19 is well noticed. I learned that the barrel travels to several states around the country for each phase of manufacturing, I like that; shows the research behind finding out who does what best. You can feel/see the American pride, that is so lacking in the industry lately

Link to other reviews:

Brian Enos’s Forum

Price point:

MSRP = $219.99

Retail = $209.99 at AIM Surplus

I need it now! Availability:

Blacklist Industries or AIM Surplus

Our Rating:

Pros:

  • Drop-in

  • 1 in 10 twist rate

  • Broached rifling

  • Accuracy

Cons:

  • Delivery time

  • Finish wear

Score: 8.50 Great

85.jpg


Favorite Link: US Tactical Supply

Peltor Tactical 500

 Peltor has been making hearing protection for many years. The Peltor Tactical 500’s are one of their newest releases. They sent me these after talking with them at SHOT show. As we all know, hearing protection is very important. Especially if you do a lot of shooting. The Tac 500’s will help with that and even give you some bonus features.

 I am not new to electronic noise cancelling hearing protection. I’ve used a set of Peltor tactical 6-S’ for almost 20 years, as well as other manufacturers also. These new Tac 500’s have way more features than my old trusty 6-s pair. They have a noise reduction rating of 26 dB while reducing any sound above 82 dB. In order to reduce the sound of loud noises, the tac 500’s use what Peltor calls “Dynamic Suppression Time” technology. What this means to you, is that the electronics monitor the harsh sounds and echoes to determine how quickly and how much to mute the volume. This feature works outstandingly well. I really liked how it only cut the gunshots or loud noises to a manageable level. While still being able to hear them. They do not cut out the sound completely like my 6-s or some of the less expensive hearing protection.

 Another feature that somewhat resembles the Dynamic Suppression, is the “Clear Voice Tracking.” The Clear Voice tracking also appears to work very well. What it does is sense voice levels getting input from the microphones. It then enhances them so that you can clearly hear what others are saying. Ant time I was wearing the Tac 500’s at the range, I had zero problems understanding or hearing people talk. It sound almost as if I didn’t have the hearing protection on at all.

 The Tactical 500’s were comfortable when worn. Except the headband can press in the top of your head some and cause discomfort. I noticed this a little when wearing them without a baseball hat. But when wearing them over the hat, they were comfortable to me for long periods of time (6+ hours). The headband is vented some, it has three vent squares in the top. One of these vent squares is made to clear the button on top of a hat, so that the button doesn’t press into your head and start hurting. The ear cups were also comfortable for me. They also sealed over my glasses pretty well. I believe the gel cups that 3m sells will fit on the Tac 500’s also.

 Hearing protection that rides up, or opens up, when shooting rifles can be a real problem. Peltor has made the Tac 500’s with a cut-out, or scoop, on the bottom of the ear cups. This cut-out help them sit lower when putting your cheek on a rifle. The 500’s worked well for me when shooting rifles and shotguns. They didn’t try to lift up like my Howard Leights do. Even though the 500’s are larger, size wise, then my 6-s’, I didn’t notice any differences in comfort.

 Possibly one of the coolest features of the Tactical 500’s is the built in BlueTooth. This allows you to pair your smartphone to the hearing protection. I think most people have missed a phone call or text while at the range. Having the bluetooth feature allows for you to hear incoming notifications from your phone. You can even answer a phone call by pushing the center of the right ear cup. Because of the dual microphones in the headset, people can actually hear you talk, within reason, you are still at a shooting range. This particular ear protection has an annoying whine or static when turned on. It happens with the bluetooth on or off. If you up the volume, it just gets louder. If these didn’t have that whine, I’d give them a much better rating. Having the bluetooth also allow me to listen to music when I wear these around the house, lawn mowing and the like. These are not music headphones, so the sound quality of music is pretty blah. Another feature with the bluetooth, is being able to use it with a shooting app on the smartphone. It makes it super easy to hear the tones, or beeps. If you want to use them without bluetooth, they have a 3.5mm audio jack and come with a cable.

 The Tactical 500’s also fold up into themselves. Of course this is for storage. But they also include a nice bag for putting them in. A rechargeable battery pack is also available and can be charged with a micro usb plugged into the right ear cup. Otherwise it uses 2 AA batteries. But don’t worry, it has an auto off feature for people like me that forget to turn stuff off. The Tac 500’s will also alert you, by talking, that your batteries are low or when you “power on” and “power off” the hearing protection.

 I probably missed something that the Tactical 500’s do. I have a love / hate relationship with them. I love all the features, but hate the annoying static sound when they are turned up. Go check them out if your in the market for some electronic hearing protection.

Firearms Insider Reviews - 8 Key Points

Claim to Fame:

Noise cancelling over ear hearing protectors

Target Market:

Shooters, Hunters, anyone needing hearing protection

FNBs (Features & Benefits of this product):

  • 26 dB NRR

  • Dynamic Suppression

  • Clear Voice Tracking

  • Bluetooth

  • Auto shut-off

  • Recessed Microphones

  • Cheek cutouts for rifle stocks

  • Vented Headband

  • 3.5mm Audio Jack - Cable Included

  • Carrying bag

What other aesthetic options or finishes are available?

None - You get Black

What others are saying?:

From 3M -  ⅘ stars.

ToddInTexas
  
Dynamic supression great, but odd interference

I bought these a few months ago and use them at indoor and outdoor ranges and also while I'm woodworking (both handtool for chopping mortises and dovetail waste) and when using power tools. It is great to be able to hear sounds and voices. In fact, these have an uncanny way of amplifying low level sounds, which is kind of cool. As to ear protection, these work well for both indoor and outdoor ranges as well as in woodworking. As others note, the headband can be uncomfortable. It appears that 3M simply didn't user test these, which is very odd. If I am careful about positioning I can usually wear them for hours, but if they are slightly off the top of my head starts hurting. For me though, the main issue is the strange audio signal that I hear. I'm not sure what it is from, perhaps bluetooth, but it is almost always there and detracts from the experience. As to music quality, these are only OK. My Bose QC35s blow them away. Listening to music through the Peltors is not a great experience--it all sounds flat and compressed. But I didn't really buy them for music--that's just an extra for me.

From Amazon - ⅗ stars

Mychajloon

A lot of unnecessary feedback and buzzing in the headsets

Bought so my kids could go hunting with me. A lot of unnecessary feedback and buzzing in the headsets. Any solutions to this would be appreciated.

Link to other reviews:

Gun Holsters & Gear

Price point:

MSRP = $199.99

Retail = $119.99 on Amazon

I need it now! Availability:

Amazon

Our Rating:

Pros:

  • Excellent Noise cancellation

  • Uses AA batteries

  • Bluetooth

  • Auto Shut-off

  • Fits over hat button

Cons:

  • Static sound

  • Headband comfort

Score: 7.50 Good

75.jpg


Favorite Link:   ABC House Benefit Match


Werkz M2 holster for Polymer80

 Werkz holsters is a small kydex company located in Princeton Idaho. I first heard of them on the Handgun Radio podcast. Werkz makes of variety of formed holsters and accessories. From custom to off the shelf, they have you covered. Werkz sent me one of their M2 IWB holsters for a Polymer 80 PF940c and a M2 magazine carrier for this review.

 The M2 holster is a taco style design with some other features. A taco style holster is one that is made out of one piece of material, then folded over a mold, hence the taco name. A feature that I didn’t think I would use was the ability to convert it to an outside the waistband (OWB) holster. I found this actually quit useful when I realized that this was the only holster I had for my Polymer 80 and needed it OWB. I switched the clip to the other side. To do this, one just removes the two screws holding the clip on, and moves it to the other side. The M2 has clip locations at two heights and an angled location also. I ran the holster IWB with it angled or canted forward. This resulted in the main dislike of the holster. The clip doesn’t completely rest against the holster. It hangs about halfway off. When wearing it in this config, I felt as if it didn’t have as much surface area holding onto my belt and was also easier to take the holster off of the belt. When using the M2 in the straight upright position, this was not a factor.

 I must admit, this is one of the nicest finished holsters I have used. The edges are smooth, and I mean real smooth. It has some sort of texture on the outside. The Werkz logo is etched or laser engraved into the kydex. There are bosses where the clip is screwed on. It is open at the bottom so that a longer, or threaded barrel, will fit. The sight channel is really tall to clear suppressor height sights. It is even clearanced for a micro red dot sight.

 I’ve worn the M2 on and off since receiving it. It holds the pistol very nicely with good retention. One can adjust the retention somewhat by tightening or loosening the tension screws. The M2 does seem to print some under a T-shirt, or any thinner shirt. That is why I only wore it off and on. If I had a jacket on, no problem, but I usually just wear a T-shirt as a cover garment. I mainly wore it at the 2:30 to 3 o’clock position. Angling the pistol/holster combo forward didn’t seem to make it print any less. After about 3 days of wearing the M2, my body adjusted and it was comfortable, at least somewhat. I like how the M2 only has one wide clip, it makes it easier to locate exactly where it is the most comfortable. The M2 is a small holster, Werkz even calls it minimalist, and I’d have to agree.

 As I also mentioned, I wore the M2 as an OWB holster also. This is also when I mainly used the M2 mag carrier. I wore the M2 at a local Steel Challenge match. I was concerned using it with just the single clip. After 25 draws and reholsters, I am no longer concerned at all. It performed well as an OWB rig.

 Now a little about the M2 magazine carrier. The mag carrier is also a taco style and holds the magazine vertically. It is currently only offered for 9mm/40 Glock style magazines. As with the holster, the mag carrier clip is also reversible for IWB/OWB. I never reversed the clip, I just turned the magazine around and it worked fine. The M2 mag carrier is of the same high quality as the M2 holster.

 If you are looking for a good quality, and inexpensive holster, give Werkz a look. If the M2 is in stock, it is one of the “quick ship” holsters. So you can have it quickly also. They will also do custom holsters, if that’s what you’re looking for.

Firearms Insider Reviews - 8 Key Points

Claim to Fame:

Minimalist Kydex Holster

Target Market:

Those needing a decent holster

FNBs (Features & Benefits of this product):

  • IWB - OWB convertible

  • Kydex

  • Adjustable clip height

  • 1.5” belt clip

  • Straight or canted

  • Adjustable retention

  • Useable with slide mounted optics

What other aesthetic options or finishes are available?

With or Without some rail mounted lights and colors

What others are saying?:

One holster to do it all. 5/5 stars on Amazon
By Dan S
Awesome holster. Ambidextrous carry options for every situation and adjustable retention. So far this is the only holster I could find that can AWIB and strong side OWB carry without replacing any parts, just moving some screws and bushings. Comfortable and has minimal printing. Also, you can't beat this price. Nearest comparable product from a reputable source is going to cost more for less features.

Link to other reviews:

None for this particular holster

Price point:

MSRP holster = $42.50

MSRP mag carrier = $30.00

Retail = $50.00 on Amazon

I need it now! Availability:

Werkz or Amazon

Our Rating:

Pros:

  • Great construction

  • Adjustable retention

  • Adjustable cant

  • Convertible between IWB and OWB

  • Price

Cons:

  • Holster prints

  • Clip

Score: 7.5 Good

75.jpg


Favorite Link:   Triggrcon


Werkz M2 w/TLR-1 Holster

Written by: Zane Mungillo

     Finding a good holster can be hard.  It’s such a personally dependent thing. There is a reason I have two large drawers full of them.  What is a great choice for me may be entirely wrong for you. It’s for that reason I approach holster reviews a little differently than other products. All holsters, in my opinion, should have the following qualities to even be considered for concealed carry:
•completely cover the trigger/guard
•allow for a full firing “master” grip on the gun while holstered
• have positive retention of some kind
•be made of either leather or kydex (not both) 
•allow for one handed reholstering. 
•firmly attach to the belt or pants
    
 Had the Werkz not “passed” these requirements, I would not have continued the review. 

     The Werkz holster took me on an emotional roller coaster if you will. A variation on their m2 iwb (customized for my gun and light) the holster, at first glance, appears to be very well crafted. All edges were buffed and perfectly smooth. It’s comes with a 1.5” injection molded clip that can be mounted at two different ride heights, straight draw or canted forward or backwards. It also has two tension screws for adjusting how much passive retention is on the gun/light combo. Retention is good when set to my preferred stiffness and a solid audible and tactile click is present when the gun is inserted, I knew I was going to love this holster. 

     That is, until I put it on, while extremely comfortable I couldn’t conceal the gun. The grip printed horribly in my typical dress, shorts and a t-shirt. Standing a boring 5’10” and weighing in at around 150 lbs I realize that I’m asking a lot of a holster to conceal a g17 in my extra medium t-shirts.  To give the holster a fair shake, I wore a slightly larger shirt a few days a week and carried around the house and at the range where I’m much less concerned with printing. 

     After about 2 months, when taking the gun and holster off I noticed the two tension screws had completely backed out and where nowhere to be found. The gun still had plenty of retention while in the waistband but this was concerning to me. To be fair I didn’t apply loctite after setting the desired retention so I chalk this up to that.  Since I used to make holsters in my shed, I have plenty of Chicago screws and such laying around so I replaced them and applied loctite this time (like I should have as soon as I got the holster).

     I decided to “modify” the holster at this point to make it more concealable so I superglued a pair of Dr. Scholls pads  to the inside portion and glue a furniture slide pad to the front inline with the belt clip. This both tilted the grip into my stomach but rotated the grip around. Werkz now offers a claw to accomplish the rotation of the grip and a quick google search of “the aiwb holster hack, Limatunes” will show you how to do the Dr. Scholls hack. I in no way removed material or heated the holster as to compromise the function of it. I simply added a wedge and a claw. 

     The holster now works fine with my typical dress and I’m very pleased with it.  I have over a thousand drawstrokes from it over the course of much dryfire and many range trips as well as about six months worth of  carry. I’m carrying it everyday for now until the next new hotness comes around that I have to try. 

FIREARMS INSIDER REVIEWS - 8 KEY POINTS

CLAIM TO FAME:  

Holsters made with little extra bulk and fast turnaround time, even on custom orders

TARGET MARKET:  

Concealed carriers 

FNBS (FEATURES & BENEFITS OF THIS PRODUCT):  

  • Meets my requirements for a good holster
  • Well made

WHAT OTHER AESTHETIC OPTIONS OR FINISHES ARE AVAILABLE?

Black, Blue, coyote brown, dark gray, FDE, olive drab, carbon fiber black, carbon fiber blood red, carbon fiber coyote, carbon fiber fde. 
Firearm and light options
1.5” or 1.75” clip 

What others are saying:  

Couldn’t find anything for this particular setup (g17w/trl-1) 
The only other reviews I found were on amazon and they tend to be hit or miss. 

Price point:  

MSRP - $42-80 depending model and options.

Retail - Same

I need it now availability: 

Werkz.com - Ships next day on in stock, 2-5 days for quick ship customs and 10 business days on completely custom orders.

Our Ratings:

Pros: 

  • Works as advertised
  • Holds gun securely


Cons: 

  • Not as concealable as other holsters I’ve tried 


Score: 7.50 Good

6.5 before modifying 8.5 after for an average or 7.5

75.jpg