Review

Official Qube Compensator

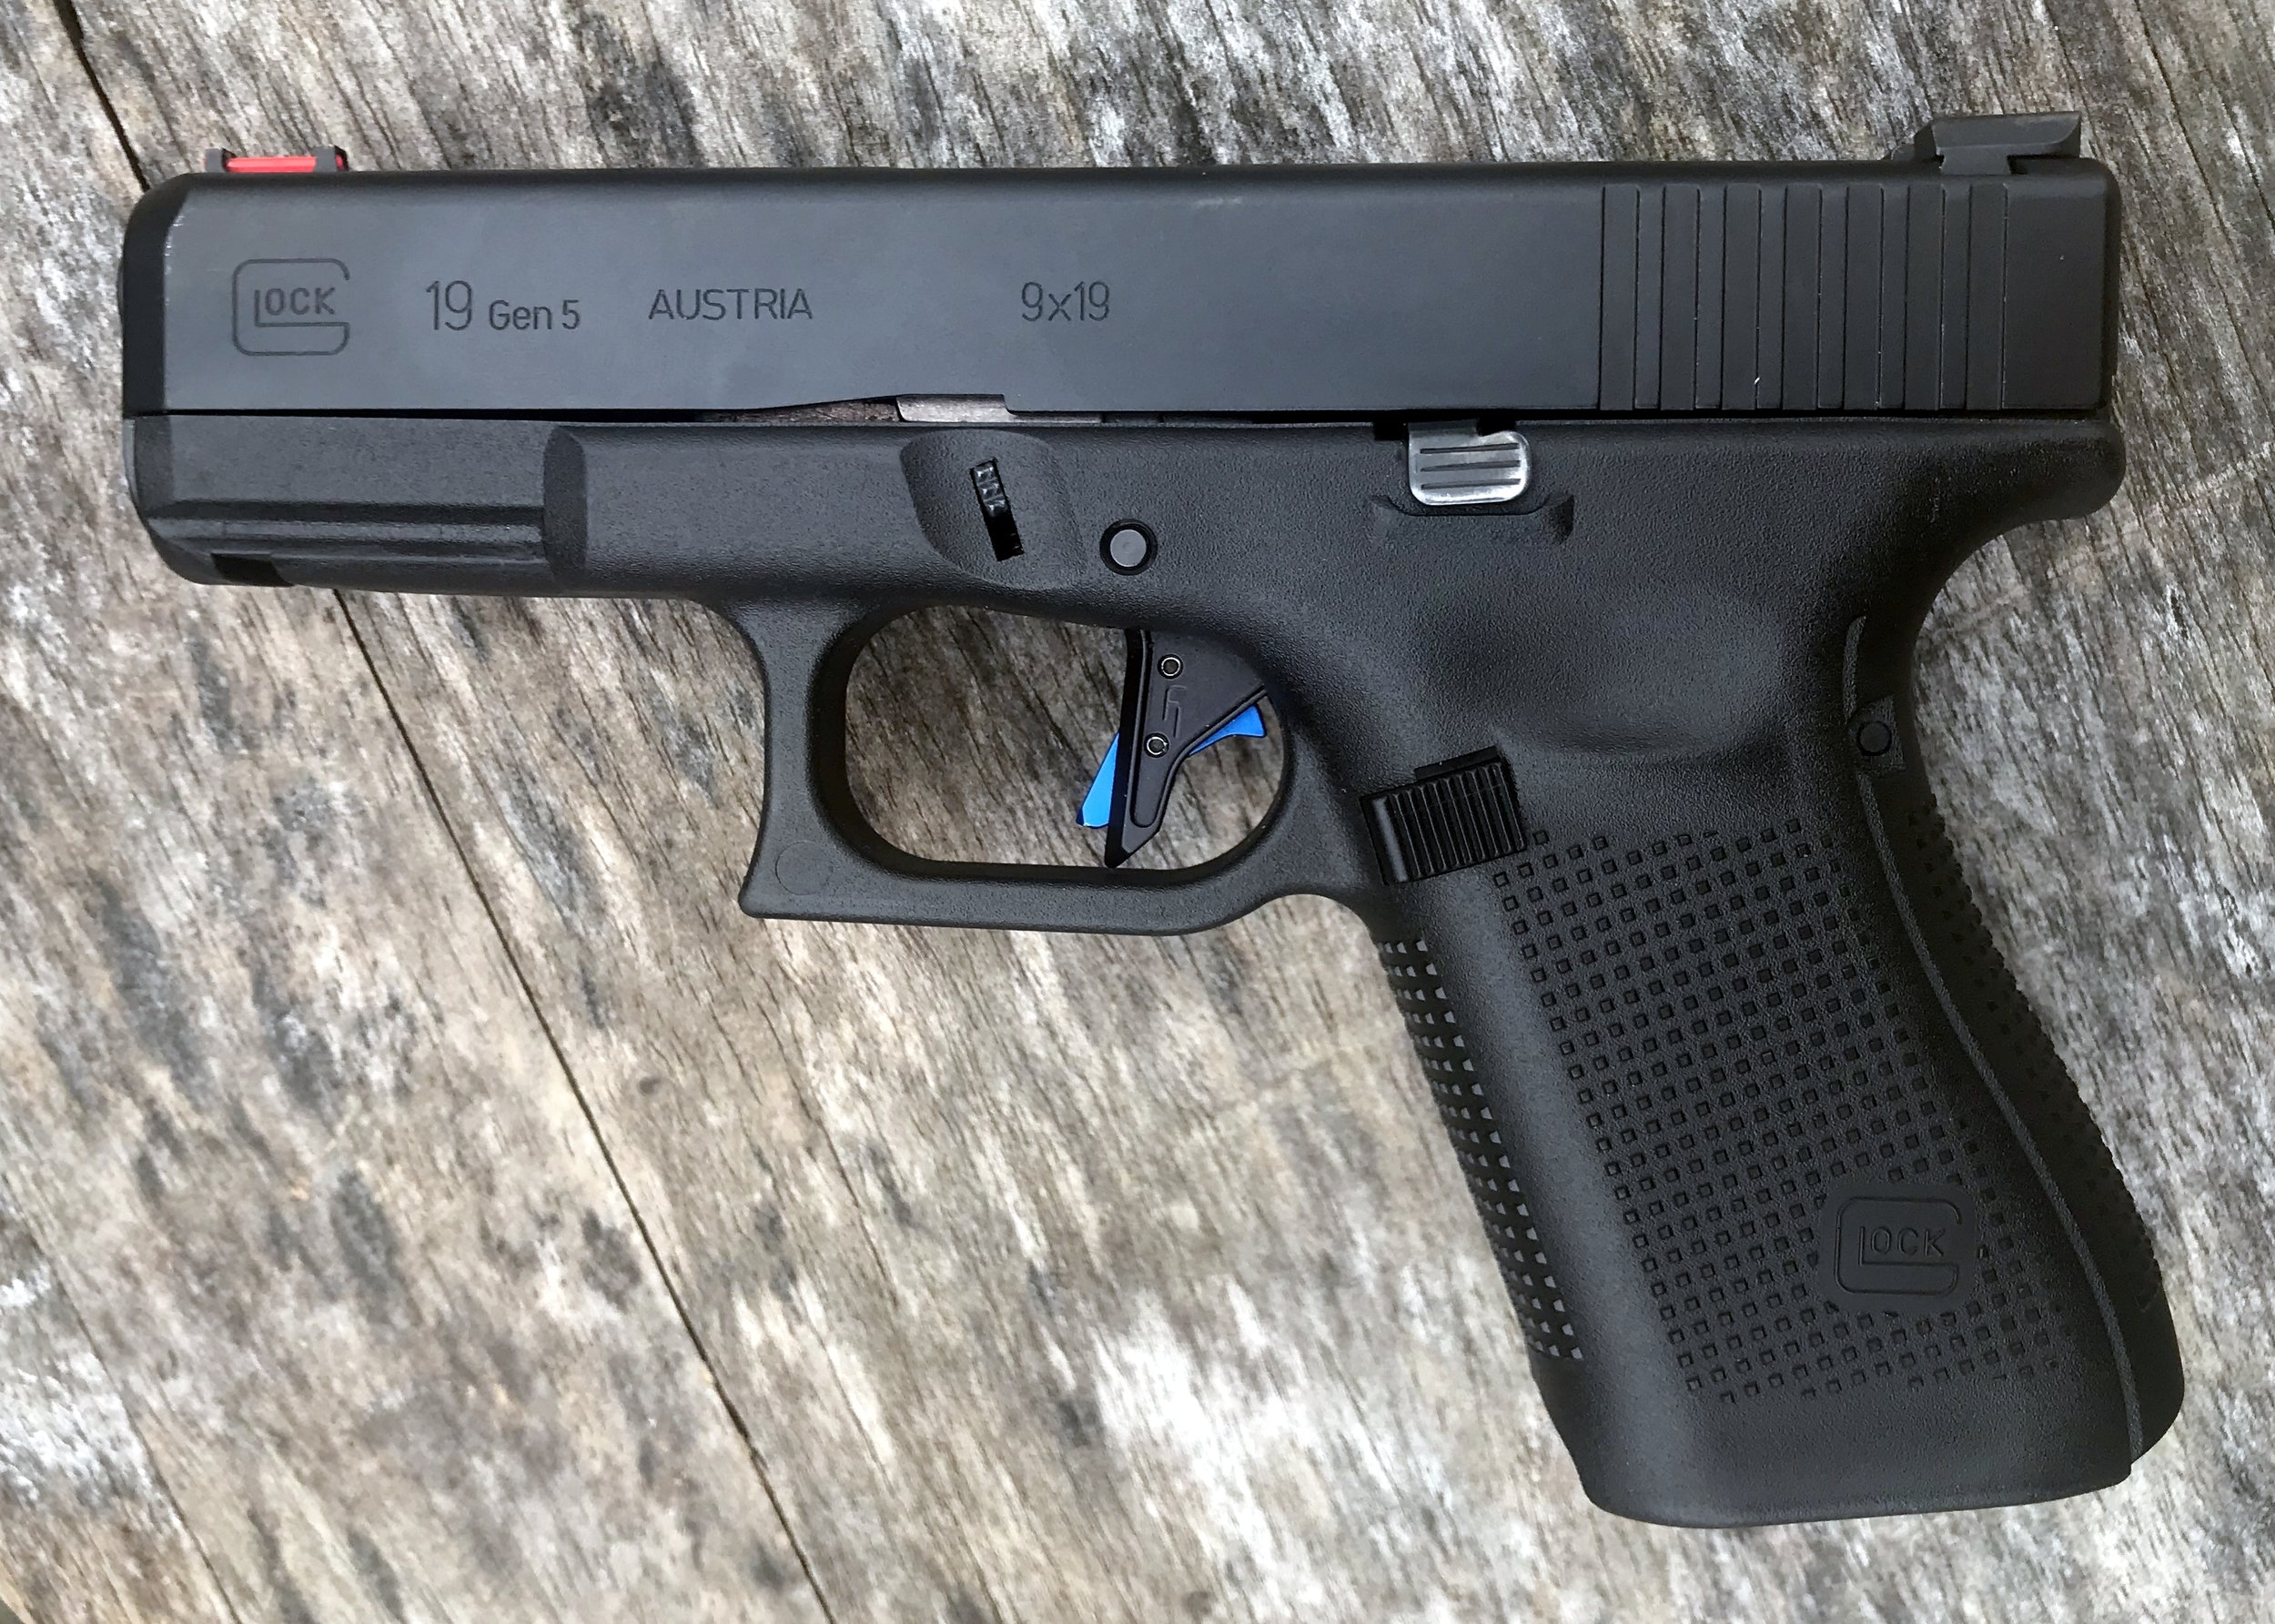
  If you haven’t heard about CGS Group, well now is the time. CGS has been making custom rifle and suppressors for a few years. They recently ventured into the pistol compensator market. The “Qube” compensator is touted as the first pistol comp that doesn’t need set screws, more on that later. Because of the “no set screw” design, I asked if I could get one for review, and here we are.

  The CGS Group Qube compensator is called that for a good reason. The Qube looks essentially square, like a cube. It really isn’t square, as one can see in the FNB’s below. It has been designed for 9mm pistols. The squarish look makes it ideal for square slided pistols, like a Glock, but is at home on other pistol designs also.

  I really wanted to try the Qube out because of it’s set-screwless design. I was not disappointed either. Lots of other compensators use set screws to keep the thing on and indexed. These screws press against the threads on the barrel and can damage them. The Qube uses a 2 part system, with tapers and a nut, to mount it. Those 2 parts consist of an inner round piece and the outer square part. The inner piece has a bunch of tiny holes in it. This is what screw onto the threads of the barrel. It has 2 flats also, so you can snug it up tight. Then you slide the outer piece on. The outer cube sits on a taper at the rear, and has a taper on the front. A special tapered nut then screws on to tighten everything together. The instructions have you put your slide in a vice, with the Qube, to tighten it on. Please use leather or some other non damaging jaws. The vice then squares up the Qube to the slide. Then you can tighten the nut. Tighten it tight, I had it loosen up the first time I did it. 

  If you have ever shot a pistol with a compensator, then you know what a difference they make. The Qube is no different, possibly even better. I put the Qube on a Polymer 80 compact framed pistol. I immediately noticed the reduction in recoil. No, I don’t have any factual recoil data, but it was definitely noticeable. The Qube also lets the pistol shoot flatter, meaning the muzzle does not rise as much under recoil. All of this makes for a much faster follow up shot or shots. I definitely can shoot much faster on steel targets with the compensator on the pistol. When the Qube came loose, completely my fault, I did shoot it with just the inner part. It even helped reduce recoil without the cube part on. Of course, this didn’t surprise me, as the inner piece has all those holes. It just doesn’t direct the gases up.

  The Qube’s design is very well thought out. From the taper design to the ease of use. Once you install the comp, you’ll notice it has a large top port, and two side ports. The side ports are also angled upward. The gases escape from the inner small ports and then are directed around and out the large ports. Whatever they did with the design allowed me to shoot all but very light 9mm loads. Light reloads and some light factory 115 grain were the only loads that didn’t always want to cycle the slide. Compensators are pretty well known for this. All other factory ammo worked flawlessly. This is from 115-165 grain bullet weights. You could always install a lighter recoil spring if wanting to shoot light loads, but I didn’t find a need for this. About the only problem you’ll find with the Qube, is not having a holster that fits it. The Qube does add 1.25” to the front of the pistol. If your holster is open at the bottom, it might fit. If not, I guess you’ll need a new holster. On a Glock 19, it makes it about the same length as a Glock 34.

  If you are one who likes compensators on pistols, go check out CGS Group. The Qube is an awesome little compensator. It would work great on a carry gun. Plus the hotter self-defense loads will make the comp work even better. You also get to choose from a vast color pallet to match your gun, or not. I really like the Qube.

Firearms Insider Reviews - 8 Key Points

Claim to Fame:

Pistol compensator that doesn’t use set screws for mounting

Target Market:

Anyone wanting the added benefits of a compensator

FNBs (Features & Benefits of this product):

  • Comes in 1/2 x 28 or M13.5 x 1LH threads to match the host firearm.

  • OUNCES: 2.4

  • LENGTH: 1.25″

  • HEIGHT: 0.825”

  • WIDTH: 1″

  • MATERIAL: 17-4 Stainless Steel

What other aesthetic options or finishes are available?

13.5x1LH, also in Black, FDE, Gold, & Rainbow

What others are saying?:

None found

Link to other reviews:

NFA Review Channel

Price point:

MSRP = $159.00

I need it now! Availability:

CGS Group

Our Rating:

Pros:

  • Reduced recoil

  • Reduced muzzle flip

  • Uses standard ammunition

  • Looks awesome

  • Tapered locking nut

Cons:

  • May not fit in some holsters

  • Makes firearm longer

  • Lighter loaded ammo may not function properly

Score: 8.00 Great

80.jpg

Favorite Link:  Thor Targets and gun shop


DM1 Wallet

 When you think of EDC (every day carry), one usually doesn’t always think about wallets. Decadent Minimalist has a small compact solution, called the DM1, for carrying cards and/or cash. I talked with them at Blade Show West last year. Eventually they persuaded me to try them out. So as you can guess, Decadent Minimalist did supply these for review.

 I had looked into other minimalist style wallets before. The style of the DM1 caught my eye. It doesn’t use elastic or spacers like some of the other minimalist wallets out there. There is an option for a money/carry clip. It comes in a number of “card” quantities. Plus you can get it in a number of colors!

 This DM1 EDC wallet is really small. The wallet is only slightly bigger than a credit card. Actual size is 3.53 inches by 2.38 inches. It is open at one end also, so the dimensions are a little misleading. The thickness depends on how many cards it can hold. A 4 card is 0.23 inches thick, while the 12 card is 0.51” thick. They also weigh in at 0.46-0.89 ounces. Even if you carry a normal wallet most of the time, there are places where the Minimalist wallet fits in. It is so small that it works great if you are going to the gym, or just running to the store late at night. Just pick it up and go.

 Using the Decadent Minimalist is one of it’s shining features. All one has to do is just take a card, slide it into the open end, and listen or feel for the “click”. The cards do actually make an audible click when inserting them. You can also feel this click. To sort through the card in the wallet, just move the top one out of the way with your thumb. If that is the one you want, just continue sliding it out. However, if you want one of the cards in the middle, just slide the top card out enough until you can slide the card or cards under it out. You may actually find yourself doing this just because it is kind of cool. I may or may not know from experience.

 Decadent Minimalist sent me two different wallets. One is a 5 card in purple anodizing. It looks blue in the photo’s, but it really is purple. The other one is a 8 card in O.D. green cerakote. The O.D. one also has a matching money clip. The money clip also slides in like a card, therefore it will take up 1 of your card slots. So essentially, it turns it into a 7 card wallet. The money clip is a separately purchased item, so you can get it later if you want. I’ve used the money clip for cash money, and it works okay. But where the money clip shines, is when one uses it as a pocket clip. You can just clip the wallet over a pocket, like you would a pocket knife or something. This frees you up from having to rummage around in your pocket to find it. I personally didn’t use the clip for money, even though I did try it out. I do use the clip as a pocket clip though.

 The Decadent Minimalist DM1 is nicely constructed. Decadent starts with a billet of 6061-T6 aluminum, and then CNC machines the wallet out. It isn’t the cheapest way, but it sure makes a nice wallet. My only complaint about the wallet, is where I bent it. It is very minor. The bend happened near the front of the wallet. There is what I call a “key hole” cut out. It bent down slightly and now puts more pressure on the top card. These are also not RFID blocking wallets. Decadent Minimalist does however offer RFID blocking cards. These cards do however take up 2 card slots.

 One neat feature that Decadent Minimalist offers is custom engraving. It looks to be laser engraved, but don’t quote me on that. Either way, the wallets they sent were both engraved with “Gun & Gear Review Podcast” and the “www.firearmsinsider.tv”. These engravings added a nice touch that I was not expecting. So if you are giving a DM1 as a gift for something special, have it engraved.

 I now carry the 5 card DM1 everyday. It makes carrying and using cards really easy. Decadent Minimalist has really done a nice job with the DM1. It may be more expensive than some others, but small lightweight things seem to always cost more. It is also made in USA. Go give the DM1 a look.

Firearms Insider Reviews - 8 Key Points

Claim to Fame:

Minimalist credit card wallet

Target Market:

Those wanting a wallet that doesn’t take up much space

FNBs (Features & Benefits of this product):

  • Small credit card style wallet

  • 6061-T6 aluminum construction

  • Anodized or Cerakoted for durability

  • 0.46-0.89 ounces

  • Optional money/pocket clip

  • Optional engraving

  • Audible “click” when card is inserted

  • Made in USA

What other aesthetic options or finishes are available?

Way too many to list, click HERE

What others are saying?:

4 out 5 stars on Amazon

Some unaddressed criticisms...

 I've been using this for about a week now so I think I'm ready to give my first impressions on it. Honestly, I flip flop between this being a really hated wallet and a really loved wallet, but I think I love it more often than not plus I am extremely picky so I'll give it the benefit of the doubt and rate it 4 stars. So besides the obvious stuff that's gone over in the descriptions, advertisements, and other comments, I'll address some other things.

 I purchased the 8 card holder and started testing it's capacity. I tried used cards that do not have any embossed numbers on them (the numbers that pop out). I was pleasantly surprised to find that I was able to fit 10 cards! However realistically it's probably unlikely that you have no cards with any embossing on them since most credit cards do.

 Next I tried the same capacity test using only embossed cards. If I place them in, all upright and in the same direction, I found I could fit no more than 7 cards into the wallet. That's a bit of a disappointment since it goes directly against the item's description, but again it is unlikely you would do this (for example ID cards have no embossing and you'll probably carry that with you). When I rearranged the cards, placing the embossed sides facing each other, as well as upside down so the numbers don't hit each other, I was able to fit in 8 cards. This method made it really hard to recognize the individual cards, let alone get to them. Again, this is an extreme scenario that you will unlikely encounter.

 Personally I carry 5 embossed cards and 3 non embossed, including one very very thin card, for a total of 8 cards and it fits very well for my needs. I place all my "money" cards (credit, debit, gift, etc) on one side of the wallet. Then I flip it upside down and insert my various ID cards. This way I have two "front" sides to the wallet and I can access my ID and my most used credit card without searching beyond the first card.

 Next, this wallet is super light! There have been many times I panicked when I thought I forgot my wallet only to find it in my jacket's pocket when I searched for it. If you put the wallet in your pants you won't feel the weight but it'll at least hit your leg when you walk so you remember it's there.

 The lightness of the wallet can also make it difficult to operate the wallet one handed. You don't have gravity to assist you since the wallet is so light and it locks on to your cards so tightly. It is possible, but requires some practice. I still end up using both hands most of the time - this is compared to my previous minimalist wallet that allowed access to most cards one handed but was also much larger/heavier.

 Last, I want to note that the wallet will make noise if you do not pack it tight. Even if you only put one card in, the wallet will definitely not accidentally let go. It is very secure. However that card will bounce around inside the wallet making noises. This is very annoying to me, YMMV. The noise gets less and less as you put more in the wallet, but even at 7 cards, the wallet will still make some noise. I imagine all 'hard case' wallets suffer from this so I can't blame the product too much, it's just that I'm used to 'soft case' wallets and I'm very easily annoyed.

 In any case I'll continue using it and will update if I find any other issues with it. That said, I still really like the wallet. For the 'pros' of the wallet, just read everyone else's comments!

Link to other reviews:

EveryDay Carry

Price point:

MSRP = $67 and up

Retail = $39 and up on Amazon

I need it now! Availability:

Decadent Minimalist or Amazon

Our Rating:

Pros:

  • Lightweight

  • Small

  • Comes in various sizes

  • Multiple colors

  • Optional money/pocket clip

  • Custom engraving

  • Made in USA

Cons:

  • Price

  • Bends easily on end (see picture)

Score: 8.00 Great

80.jpg

Favorite Link:  Thor Targets


Thor Targets - Steel "A" zone set

 If you have done any type of shooting before, you know that reactive targets are great. Steel targets are probably one of the best bang for your buck targets. They give a distinctive tone when shot. That feedback goes a long way with new shooters, as well as old ones. Thor Targets kindly gave me a steel target and stand to review, and I love shooting steel.

 Steel targets are a joy to shoot. If you’re a new shooter, they give you feedback that can be heard and seen. If you are a seasoned shooter, they can just be fun, or give excellent practice. Thor targets does not disappoint here. The steel is easily heard. Plus you can just spray over the hits with some new paint and basically have a brand new target.

 Thor uses “better than AR500” steel. AR500 is pretty much the industry standard for steel targets as it is highly impact resistant. Thor uses an armor grade steel that has a higher Brinell strength. The Brinell scale characterizes the indentation hardness of a material. What does this mean to you. Well, the Thor steel should pit less and last longer. All good things when it comes to something being shot at. Thor also rates their targets for 3000 feet per second of velocity, at the impact point. So the velocity needs to be less than 3000 fps when it strikes the target. They also recommend a 100 yard distance for rifle rounds and a 25 yard distance for pistol rounds. These are for safety measures and to prevent being hit with back splatter.

 I received the “A”-zone set. The set consists of the target, a stand, and a hanger. It also uses a 2x4 which is not included. One great part about the 2x4 is the ability to adjust the targets height. Depending on what length the 2x4 is cut at, determines the height of the target. If you have more than one set up, you can vary the heights for different targets. Thor’s target stand is really nice also. It is shaped like an “H” with one length being longer than the other. The stand is made to have the longer feet forward to offset the weight of the target. I found that sometimes one needs to put the longer feet toward the back. I may have tipped the target over doing a mag dump of 9mm. On the stand is a place to insert your 2x4. Then on top of the 2x4, you place the hanger. The hanger slides over the 2x4 and has a hook extending out from it. This hook is where the target rests. There is a slot in the target on which to hang it. Once you have the “set” you can just purchase the steel targets to hang from the base and hanger

 Thor’s “A” zone target is meant to replicate the “A” zone in USPSA. It is a little different in shape, but the size is about the same. One nice aspect to a steel plate target is that it has two sides. All of Thor’s targets come painted white. Since the target is reversible, one could paint the other side a different color, this could be for training or just fun. Thor uses ⅜” thick targets, so the larger the size, the heavier it can be.

30 yard 223 hit

 One can see the quality in Thor’s products. The steel plate has no sharp edges (at least when new.) The stand and hanger are expertly welded together. I even shot the steel at 30yds with a 5.56 55gr and it only put a very small pit in the steel (Do not do this yourself, it is not recommended by Thor, myself, or the Firearms Radio Network.) Everything else I have shot it with has only knocked the paint off. This is from .22lr up to 12 gauge buckshot!

 If you are in the market for some steel targets, check Thor Targets out. Their steel targets and stands will not let you down. They are rated by speed, not caliber. Just don’t shoot armor piercing rounds at them, unless you like holes in them. They will even ship them to you. So go check Thor Targets, or their new store “Thor Armory”.

Firearms Insider Reviews - 8 Key Points

Claim to Fame:

Quality Steel Targets

Target Market:

Shooters wanting a reusable target

FNBs (Features & Benefits of this product):

  • Impact rating of 3000fps at target, 100yds rifle, 25yds pistol

  • Harder than AR500 steel

  • Use of cheap 2x4

  • Steel base

  • Steel Hanger

  • Shaped like USPSA “A” zone

What other aesthetic options or finishes are available?

Other sizes and shapes available

What others are saying?:

Facebook

I purchased the dueling tree with 6, 6 inch targets and loved it. I hit it at relatively close range with a hard .308 shot, and it barely made a mark in it. The AR 556 just took paint off, and the .40 didn't make a mark. I will never have to replace these targets, so the cost up front more than pays for itself in the long run. Thanks Thor Targets. Great product and service!

Link to other reviews:

Johnsons Customs on Youtube

Price point:

MSRP = $150 complete

I need it now! Availability:

Thor Targets - use code “4eats” to save some money

Our Rating:

Pros:

  • Durable

  • Brakes down for easy transport

  • Uses cheap 2x4 lumber

  • Size (A zone)

Cons:

  • Shipping price

Score: 8.75 Somewhere between Great and Amazing

85.jpg

Favorite Link:   Medford Knife & Tool

Medford Proxima

 Medford Knife & Tool is a semi-custom knife shop in Arizona. I say semi-custom because every knife leaving the factory is ground by hand. These knives are not what you find at the local sporting goods store. I talked with them at Blade Show West last year. A few weeks later they said they would send something to review. I was really happy when the “Proxima” showed up.

 Wow, what a knife the Proxima is. The first thing I noticed was the heft. It really isn’t too heavy at 8.2 ounces on my scale, but it is stout. Medford shipped this knife in a plastic, reusable, waterproof case also. Along with it came care, maintenance, and break in instructions.

 The Medford Proxima is a flipper style knife. So on the back of the handle sits the flipper. The flipper is attached (built on) the blade. By pulling it backwards, it “flips” the knife open. Medford designed the proxima to be smooth, but still have resistance. So I have to flick the flipper pretty noticeably to kick the knife open. They don’t want the blade so loose that it just falls open or closed. There is also a a recess cut into each side of the blade so you can open it with your thumb, or as one would with a regular folding knife. The flipper also has grooves on it to give your finger some traction while “flipping.” Once the knife is open, the flipper doubles as a guard to keep your hand from sliding forward during stabbing motions.

 Construction of the Proxima starts with the blade. Medford uses S35VN Stainless steel as blade material. The S35VN steel gives the Proxima excellent strength, edge retention, and wear resistance. This does make the blade a little harder to sharpen, but it is well worth it. I have not sharpened my blade, and it is still very sharp after 6 months of use. The blade is of the drop point style with a false tip. But even more important, is that the blade is 3/16” thick and almost 4” long! The false tip gives the blade a nice point. Every blade at Medford is ground by hand and the Proxima is no different. The hollow grind looks beautiful and allows years of sharpening before the blade edge gets really thick. I am also impressed with how the tumbled blade looks. It is not polished, but not dull either, just good looking.

 Now onto the Proxima’s frame. The frame is the other part in what makes a knife, a knife. Starting with titanium as material, this particular knife has some faded anodizing. The non-locking side has a purplish-blue fade to a bronzish color on the inside. On the locking side, which is a standard style frame lock, it has a solid purplish/bronze color. Both sides are also tumbled, and not polished. This makes for a really nice looking knife. The non-locking side also has some grooves and a finger cut-out for a good grip. The locking side also has some grooves on the lock, both for increased grip, and too help with unlocking the blade. There is also a hole for attaching a lanyard, if that’s your thing.

 This particular Proxima uses Stainless Steel hardware. Other options (colors, materials) are also available. The hardware is basically the spacers and screws that hold the knife together. It’s functional, and that is all that really matters. The pocket clip could also be included as hardware, but the standard clip is brushed titanium and held on with 2 screws. This clip is probably the stiffest clip I have ever used, and I love the amount of tension it has. This is where I have a slight flaw with the knife. The clip can not be moved, it comes in a tip-up position. I would have at least liked another option for if you carry it on your right side. The only problem I have had with the knife also includes the clip, it came loose on me after about a month. I put medium strength thread locker on the screws and have not had a problem since.

 When I go to use the Proxima, it just works. I just flip the blade out, it opens smoothly, and start cutting. The handle shape and size let me get an excellent grip if I need to do some real work. The spine of the blade also has some gimping that helps me get good downward force with my thumb. The flipper does stick out a bit, but that’s what makes it useful for me. I’ve cut everything from packing tape to pallet strapping (the plastic type) and the knife still cuts great. I expect the Proxima to last me around 5 life times, it is built that stout.

 So, if you are the type to use or buy $500 knives, definitely go check out Medford Knife & Tool. This Proxima is built like a tank. It is all US made and built by actual people, not just machines. I am not one to spend this kind of money on a knife, but after seeing and using the Proxima, I see why someone would. Go check MKT out, they have some really cool and functional knives.

Firearms Insider Reviews - 8 Key Points

Claim to Fame:

Heavy use, semi custom knife

Target Market:

Knife collectors, Military, Law enforcement. Anyone wanting a tough knife

FNBs (Features & Benefits of this product):

  • Large Flipper

  • Overall Length - 8.75"

  • Blade Length - 3.875"

  • Cutting Edge - 3.625"

  • Blade Width - 1.25"

  • Blade Thickness - 0.19"

  • Blade Material - CPM-S35VN

  • Handle Length - 4.875"

  • Handle Width - 1.25"

  • Handle Thickness (total) - 0.62"

  • Handle Material - Titanium

  • Weight - 8.40 oz.

  • Thumb groove for optional opening

  • Gimping on top of blade and on Flipper

  • Titanium Pocket Clip

  • Individual serial number

  • Lanyard slot

  • Frame lock

  • False tip

  • 100% made in USA

What other aesthetic options or finishes are available?

Many, go look for yourself

What others are saying?:

Nothing really found

Link to other reviews:

Texas Knives on YouTube

Price point:

MSRP = $575.00

Retail = $575 at BladeHQ

I need it now! Availability:

Medford Knife & Tool

Our Rating:

Pros:

  • 100% made in USA

  • Smooth function

  • Flipper

  • False tip

  • S35VN Stainless

  • Large useful blade

  • Good ergonomics

  • No blade movement when locked open

Cons:

  • Price (for some)

  • Pocket clip came loose

  • Pocket clip has only one location

Score: 8.50 Great

85.jpg

Favorite Link:   Axelson Tactical


Rock Slide USA - RS2

 Rock Slide USA has come on the market with some pretty nice products. Of which is their Glock slides. The slides come in two different versions, with options available for both models. The model I received for review is their RS2, with a RMR cut, in black, for a Glock 17. This was a stripped slide, meaning it had no parts in it.

 When I first opened the box, I was impressed. The machining was beautiful. As was the black coating. Rock Slide Cerakotes all of their slides, so this RS2 is black Cerakote. I immediately installed my Glock parts kit. All the parts went in like they should. Since this slide has a cut-out for an RMR, I proceeded to install my Holosun 507 as it uses a RMR mounting platform. I did notice that the 507 moved a tiny bit back and forth on the slide’s studs. The RS2 has studs that the red dot sight goes over and then the sight screws go into the studs. This movement was minor and didn’t cause any problems. The stud option allows for a tight fit without having to have a custom milled slide. So, I tightened down the Holosun. Rock slide also sent me a cover plate. I did put it on just to see how it fit. As expected, it fit and lined up great. They also make this slide with a Vortex Venom cut, for those wanting a less expensive sight.

 Rock Slide did a nice job with the aesthetics also. Being that this is the RS2, it has vents cut out on the front of the slide. The RS1 does not have these. The vents are cut at an angle toward the rear. I also found that these vents are large enough to act as front slide serrations. Speaking of serrations, the ones on the rear are angled and sharp enough to give good grip. The slide is also beveled on top from the ejection port forward. It gives a distinct appearance and makes it not look so Glock like.

 I mounted up the Rock Slide to a Polymer 80 frame. The slide was a nice snug fit without hardly any side to side or up/down play. It is also using a Faxon Firearms barrel which it also mated very nicely too. For the record, I did not install any iron sights on the RS2, but it does have the rear dovetail and front oval hole for standard Glock sights. This slide makes the handgun shoot great! Better than another slide I have used. So Rock Slide’s claim of better performance are spot on.

 Ever since receiving the slide, I have shot this handgun more than any other. The RS2 runs smooth. I have shot it in a Speed Steel match with zero problems. Not counting the other times I have shot it at the range. I am very impressed with the accuracy and functionality of this slide. Plus I think it looks good.

 Please go take a look at Rock Slide USA. This RS2 slide is great. Rock slide also manufactures barrels for these slides. The slides start at $200, with options to basically have a complete slide with sights and an optic! Different color options too. They are also made in the USA with a lifetime warranty.

Firearms Insider Reviews - 8 Key Points

Claim to Fame:

Precision machined Glock Slide

Target Market:

Pistol builders, Glock users that want a complete slide cut for a miniature red dot

FNBs (Features & Benefits of this product):

  • Tighter Tolerances

  • Made from 416R Stainless Steel

  • Cerakoted

  • Vented

  • Optional cover plate

  • Tapered - not square (adds a non-glock look)

  • RMR cut (optional Vortex Venom cut)

What other aesthetic options or finishes are available?

With or without optics cut and vents.

FDE, ODG, Burnt Bronze, Tungsten, Pink, Unfinished

What others are saying?:

Rusty M. - 5/5 stars at Rockslideusa.com

Top notch company!!! I received my slide within a couple weeks after ordering, it looked and ran great, unfortunately there was a small ridge on the chamber face that I didn’t even notice until I ran some rounds through it. It was just enough to slightly dent the fired case head, I reload my ammo or I probably wouldn’t have worried about it. I gave Rock Slide a call, they said no problem, sent a postage paid return label and I had a replacement slide within two weeks. The slide is flawless, the finish is awesome, it fits the frame great, looks and runs great. I had the venom sight cut which fits absolutely perfect. I couldn’t be happier with my purchase and the great customer service. I highly recommend Rock Slide USA to anyone who is looking for a quality custom slide. Check out the other products they offer too, I picked up a SilencerCo threaded barrel and extra mags for my Glock 17 and the pricing on everything is very reasonable.

Link to other reviews:

YouTube review by Dark Knight Adventures

Price point:

MSRP = $219.99, $239.98 as tested

Retail = $199.99-429.98 depending on options

I need it now! Availability:

Rock Slide USA

Our Rating:

Pros:

  • Price

  • Vent cutouts

  • Precision machined

  • RMR cut

  • It just looks good

Cons:

  • Not machined for individual optic

Score: 9.00 Amazing

90.jpg

Favorite Link:   Axelson Tactical

Axeon Optics 4-12x40 rifle scope

 Axeon optics is a newer company with some interesting optic products, but they also make normal scopes. They sent me one of their 4-12x40 scopes for review. Axeon is distributed by Umarex USA. I thought this would be great to try on my .17hmr rifle. So off I went to mount it up.

 I first want to mention that this is a budget scope, so I am comparing it to other budget scopes that I have used. The Axeon has the old standby Plex reticle. I personally think plex style reticles are fine, but I prefer some sort of ranging reticle. The reticle is in the second focal plane, so it stays the same visual size throughout the magnification spectrum. As stated, this is a variable 4-12 power scope with a 40mm objective lens. It also uses a 1” main tube. It does not have a fast focus eyepiece. I tend to set the focus and leave it alone anyhow.

 The Axeon scope does have some decent features. It comes with fully coated “green” optics. The green is the actual color of the coatings. The coating seemed to give really good light transmission through the scope, even at 12 power. Clarity was nice and sharp also. So much so that I could see the little 17 caliber holes at 100yds. Axeon also throws in a set of flip covers, and they aren’t so bad that you want to toss them away. The magnification adjustment knob is also really smooth. This makes it really nice to switch magnification while looking through the scope.

Taken at 4x - Target board is 100yds

Taken at 12x - Target board is 100yds

 For windage and elevation adjustments, Axeon uses capped turrets. The caps screw on and off easily. Underneath the caps are the actual ¼ MOA adjustment knobs. The knobs are plastic, but have a decent grip to them, this made turning the knob easy. Now for the really bad part. The click adjustments are terrible. They can barely be felt. So much so that I couldn’t really tell if I went one click or four. Even with this, the scope held it’s zero every time I used it.

 The rest of the specifications are down below, so I won’t bore you with them here.

 If you are in the market for a budget scope, go at least look at Axeon. If the adjustments were better, it would be a good little scope. It has some decent features. it just needs a little refinement.

Firearms Insider Reviews - 8 Key Points

Claim to Fame:

Inexpensive quality scope

Target Market:

Those wanting an entry level optic

FNBs (Features & Benefits of this product):

  • 4-12 power magnification

  • Plex reticle

  • Multi coated Green optics

  • 40mm Objective lens

  • 1” main tube

  • 13.25 ounces

  • 11.875” in length

  • 3.5”-4” eye relief

  • Field of View - 25f eet @ 4x, 8.3 feet at 12x

  • ¼ moa adjustments

  • 30 moa windage and elevation adjustments

  • Waterproof

  • Shockproof

  • Fogproof

What other aesthetic options or finishes are available?

2-7x32 and 3-9x40

What others are saying?:

Nothing found

Link to other reviews:

None found

Price point:

MSRP = $138.99

Retail =$118.67 on Amazon

I need it now! Availability:

Axeon or Amazon

Our Rating:

Pros:

  • Large field of view

  • Flip caps included

  • Good light transmission

Cons:

  • Duplex reticle

  • Non-positive clicks on adjustments

  • Made in China

Score: 6.5 Okay

65.jpg

Favorite Link:   Thor Targets

Holosun HS507C

 If you have listened to the podcast, you already know that we are fans of the Holosun products. Holosun came out with their micro reflex sight, the HS507c, some time ago. This little reflex sight has some really awesome features. After waiting a while for the green one to come out, I asked if they would send a red one out for review. Yes, I got tired of waiting for the green, which is either available now, or soon will be.

 The HS507c is small. Coming in at 2.65 ounces, it is light also. Dimensions are - 1.8” long, 1.2” wide, and 1.6” tall. The visible window is 0.63”x0.91”. I like the window size, it works well for me. One of my favorite aspects of the 507’s are their “industry standard” mounting platform. Holosun did some homework and decided to use the Trijicon RMR mounting holes and form factor. This means the 507 should work with all RMR cut pistol slides and mounting bases. I used it on two different RMR cut glock slides. The 507 fit both of them just great.

 As opposed to many other micro red dot sights, the 507 has different reticle options. Not only can you choose the 2moa dot, but also a circle dot, or just the ring! The ring is a 32moa circle, and the circle dot adds in the 2moa dot in the center of that ring. I tried out all 3 types of reticles. I liked the ring only reticle for close up shooting, around 5 yards and closer. Of course the circle dot worked well for me from about 5-10 yards. Which leaves the 2moa dot. The dot is what I actually leave the sight set to. Brightness adjustments are on the left side with a “+ or -” button. There are 10 daylight and 2 night vision settings. I found that the dot reticle works best for me, of course your choices might be different. Either way, the Holosun gives you choices that other sight manufacturers don’t.

 The Holosun HS507c is also packed with a “Solar Failsafe”. Yes that means that the 507 can be run off of solar power. On top of the window housing is a solar panel. The panel allows the 507 to run without the need of a battery in all but the very darkest of conditions. This feature also automatically adjusts the diodes brightness. I am not big into auto adjusting sights, but the Holosun’s works well. FYI, I don’t like the auto adjust features because if the sight is in a dark place, and the targets are well lit, the dot will not be bright enough on the target. Having a “Failsafe” for when or if the battery dies is still a great option. Speaking of battery, it uses a CR2032 with up to 100,000 hours of life. Or around 50,000 hours of constant on in the middle brightness setting. It is a good thing that it has long battery life. To change the battery, one has to remove the sight, as the battery is changed through the bottom of the sight. Not my favorite, especially since some of Holosun’s regular sights have a battery tray on the side.

 If you are using the 507 in the battery mode, it has an auto off/shake awake feature. As one can guess, the sight will automatically turn off after a set time time period of no movement. Settings are something like 1,2,4 hours of non-use. There is also a “don’t turn off” feature. The instructions tell you what buttons to press for adjusting this. Along with the auto off comes the shake awake feature. Just as it states, any movement of the sight will wake it up to the last brightness setting. I left the 507 in my safe, facing to where I could see it. It is so sensitive, that just opening the safe would turn it on. So I left it undisturbed in a safe, dark place. When I returned, I could tell the sight was off, when I just touched the sight lightly, it turned on! So it works spectacularly. This feature aids in the extra long battery life.

 This little sight is a beast. The 7075 anodized aluminum housing can take quite a beating. They rate the thing at 5000G’s! I even ran the 507 loose, yes I didn’t loctite the screws at first. If you want to use the 507 on something else, it does come with a picatinny rail mount.

 I may not have as many rounds through the sight as I’d like. But so far, the 507 has done everything I wanted it to do, even more. The dot or circle is pretty clear. A lot better than many red dots, but not as sharp as a few. Some notable firearms people have used the 507 way more than me. Guess what, they have held up for them. I’d say the 507 is good to go, especially since I have used other products from Holosun.

 All in all, I am super happy with the HS507c. Holosun turns out a nice product. It has various reticle, auto off/on functioning, solar use, and uses a RMR mounting pattern. So if you are looking into something like this sight, check out Holosun. Holosun keeps impressing me with their products.

Firearms Insider Reviews - 8 Key Points

Claim to Fame:

Compact reflex style sight with multiple reticles

Target Market:

Those wanting a pistol or shotgun mounted red dot sight

FNBs (Features & Benefits of this product):

  • Parallax free

  • Multi-reticle System 2moa dot and 32moa ring

  • Included CR2032 battery - up to 100000 hours of use

  • 10 Daylight & 2 NV Compatible brightness settings

  • Shake Awake technology with last setting recall

  • Failsafe solar power

  • Auto brightness

  • 1 moa adjustments

  • Picatinny mount

  • Adjustment tool

  • RMR mounting platform

  • 7075 aluminum housing

What other aesthetic options or finishes are available?

Green dot/circle

What others are saying?:

5/5 stars on Amazon

Better Than The Rest... HANDS... DOWN!

I have to say, this beats out the RMR on EVERY front. I gave the RMR a try and it failed miserably to impress me, especially for almost $600.

The HS507C is rugged and has withstood my 1,000 round test on my 226 Legion. It’s dead accurate with the 2MOA dot and the CQB Circle it fantastic for that speedy target acquisition. Holds zero perfectly as I didn’t have to adjust it at all since I sighted it in with the first mag.

The clarity of the glass and lack of severe parallax (unlike the RMR) is unparalleled in such a rugged micro red dot. The ability to change reticles puts it a head above the rest and the battery life is second to none! 10 + YEARS! I’ve used them all, The Delta Point, Burris FastFire, Doctor, RMR, Vortex Venom, etc.

The auto adjust brightness works well and on a sunny Texas day that dot it bright and very crisp. The RMR is splotchy and oblong.

For only $300 you are getting a VERY Feature-Rich product that has a lifetime warranty to back it and it worked so well I bought a second one.

Definitely worth the money and don’t get me wrong, I waited 3 months for the first one, it was agony and I wasn’t expecting to wait any longer than 2 weeks for the backorder. But honestly it was DEFINITELY worth the wait.

5 stars all day long. And I have worked with Holosun before and if you have a problem, they will fix it and have it back to you up and running within a week.

Let’s face it, even Trijicon and Leupold manufacture a lemon every once in a while. It’s the luck of the draw when it comes to mass produced items.

Link to other reviews:

Warrior Poet Society

Price point:

MSRP =$299.99

Retail = $299.99 on Amazon

I need it now! Availability:

Amazon

Our Rating:

Pros:

  • Multiple Reticles

  • Solar

  • RMR mounting platform

  • Battery life

  • Price

Cons:

  • Battery Location

Score: 8.50 Great

85.jpg


Favorite Link:   AR15 Podcast

The Mag Feeder

  As a shooter, we all sometimes want easier magazine loading. Welcome to The Mag Feeder. I am not one to typically use magazine loaders, so there is that. But with lots of them on the market, this AR15 magazine loader is a little different. Manufactured by Six Axis Development. I can’t remember if I contacted them, or the other way around. Either way, the sent me one for review.

 The Mag Feeder is very well thought out. The first notable feature is the USGI magazine catch. Yes, the same one as on an AR15. This keeps your magazine locked in place while using the loader. Now, as with everything now days, it is made from a chemical resistant polymer. So you don’t have to worry about destroying it from gun lube or cleaners. It also folds up for storage and ease of transportation. Last up is the neat little slider that does the actual work.

 Loading the Mag Feeder is pretty self explanatory. First unfold it so that it lays flat. There is a magnet that holds it in the folded position. Lay it on a flat surface. Slide a magazine on until the mag catch latches. Throw some 223/556 or 300 Blackout rounds in the loader. Or put them in the little load slot toward the top. Organize the shells so they all point the correct direction, they will not go in the wrong way. You can also take out the pusher block and load them in from the top. Once all the rounds are in the loader, slide the “pusher block”  down and the magazine is now loaded. Then, of course, push the mag button and pull the loaded magazine out. Now go shoot.

 Now we know how The Mag Feeder is suppose to be used, I’ll tell you how I use it. I basically just pour a bunch of rounds into the body of the Mag Feeder. Then I straighten them out. I only need to use the “loading port” for the last few rounds. So it is pretty quick, and really easy to use. I tried it on a bunch of different magazine styles, from USGI to Pmags and they all worked fine. The pusher block is also held at the top of the loader with a magnet, actually one of the same ones that keeps the loader folded. This is nice because it doesn’t fall out. But if it does, it will only go back in one direction.

 There are lots of things to like about The Mag Feeder. Ease of use, of course. It also has marks for how many rounds are in the loader, well at least by 5’s and up to 30. This is nice if you want to load a 20 round magazine for example. I have one dislike about the Mag Feeder. It doesn’t stay open. I would have some sort of catch made to hold it open. When you pick the loader up off of a table, it just folds partway. I also like how it will fit in a double magazine pouch. Because it folds, you can stick it in an ammo box, or most soft case side pouches.

 The Mag Feeder is staying in my range bag. I am very pleased with how it works, and it can save your thumbs. If you need an easy way to load AR15 magazines, this might be a good option. Six Axis was also kind enough to send a .30 cal ammo can and some .223 ammo. That was a plus that I didn’t expect. Go check out The Mag Feeder and maybe some of their other products while you’re there.

Firearms Insider Reviews - 8 Key Points

Claim to Fame:

Foldable 30 round AR15 magazine loader

Target Market:

AR15 users who want easy loading of magazines

FNBs (Features & Benefits of this product):

  • Made in the USA

  • Safe for hands and magazine lips

  • Folds in half for portability

  • Magnetic operated to keep closed in your bag/box

  • Magnetic pusher block to keep from falling out

  • Works with all AR15/M4 magazines

  • Chemical Resistant

  • Allows for easy inspection of rounds prior to shooting
    Securely grabs on to the magazine

What other aesthetic options or finishes are available?

None

What others are saying?:

Nothing found

Link to other reviews:

Some Youtube videos, but that’s it

Price point:

MSRP = $59.99

I need it now! Availability:

The Mag Feeder

Our Rating:

Pros:

  • Easy to use

  • Quick

  • USGI Mag catch

  • Folds and stays closed

  • Fits in double mag pouch and ammo cans

  • Capacity markings

Cons:

  • Doesn’t lock in open/use position

  • Price

Score: 8.00 Great

80.jpg

Kineti-Tech Glock Trigger

 When I was looking for a Glock replacement trigger, I ran across Kineti-Tech. They had a trigger that interested me, mainly because a complete drop-in trigger assembly was under $100. I reached out and they said they would send one out for review. I received their style 4 drop in trigger.

 Kineti-Tech’s trigger kits have 4 different shoe options. This gives you a bunch of options. All of them are non-radiused and smooth. The first is a curved trigger. Next is the hooked trigger, Third up is the standard straight. Last, and the one I received, is the short straight. I call it the short flat. It has an angle about ⅓ of the way down, and the rest is straight. I like the design of this trigger as it shortens the reach over the all straight trigger.

 I installed the Kineti-Tech trigger in my Polymer 80 PF940C. Installation was super easy. Simply because Kineti-Tech sent me the complete drop-in trigger. They also have an option for just the trigger shoe, or the shoe and trigger bar. My stock Glock parts trigger had a 7lb trigger pull. Just by installing the trigger kit, it reduced the pull weight to 5lb’s. It did decrease the pull length by about ⅛”, so not a lot. Trigger pull was smooth, but so was the stock trigger. The break didn’t feel as crisp, but most upgraded Glock triggers feel this way to me. Reset was real good, comparable to the factory trigger, but a little shorter. The Kineti-Tech trigger retains all of the factory safeties. I did install a 3.5lb connector. This reduced the pull weight to 4.5lb’s. That lasted around 200 rounds, then I reinstalled the connector that came with the trigger. I prefer the crisper break over the mushy feel I get with the light connector.

 Kineti-Tech’s trigger has a nice feel to it. They use 7075 aluminum to craft them. Then anodize them black. The trigger safety can be had in red or black. I like the look of the red, as it gives some contrast. The trigger doesn’t feel like a stock Glock trigger, and that makes me happy. Being all aluminum, the trigger doesn’t seem to flex as much either. I have no hard data for this, just my experience. I wouldn’t say it’s a competition trigger, but it is better than stock. So maybe I’d label it as tactical.

 Everyone seems to be making Glock triggers now days. Kineti-Tech has done a decent job with theirs. It is priced well. Easy to install. But most of all, it is an improvement. It is worth checking out if your in the market for an upgraded Glock trigger.

Firearms Insider Reviews - 8 Key Points

Claim to Fame:

Aluminium Glock trigger with 4 different shoe options

Target Market:

Those wanting a different Glock trigger at a decent price

FNBs (Features & Benefits of this product):

  • Different shoe options

  • 7075 Aluminum

  • Short reset

  • Pull weight reduction

  • Optional polished trigger bar

What other aesthetic options or finishes are available?

Shoe options 1-4

Red or Black trigger safety

What others are saying?:

OUTSTANDING  ⅘ stars on Kinteti-Tech.com

Love these triggers. Bought two already and a third very soon. Take up seems to be about standard, although very smooth if parts are polished, but the reset is super short. Very satisfied customer right here.

Link to other reviews:

Nothing decent found

Price point:

MSRP = $47.95 - $116.44

Retail = $96.44 as tested

I need it now! Availability:

Kineti-Tech

Our Rating:

Pros:

  • Decent trigger pull

  • Great Reset

  • Price

  • Feel of trigger shoe

  • US made

Cons:

  • Long take-up

  • Not as crisp trigger break

Score:  7.0 Good

70.jpg

Favorite Link:   Axelson Tactical

Kagwerks Extended & Raised slide release

 One thing that has plagued me and plenty of others with the Glock brand of pistols is the slide stop placement. The guns just don’t lock back on the last round for me all the time. For some people, they never lock back on the last round. I’ve had plenty of shooters, albeit none with much training, tell me I need to change my grip and that will solve the problem. And that is true, I could alter my grip to a less optimal one for shooting but more optimized for getting lock back. I suppose if I wanted to compromise my ability to get first second and third round hits in order to perform a reload better 17 rounds later I could do that. Those people apparently don’t really understand the concept of “most likely to least likely”. That is if I did find myself in a situation that I needed to employ deadly force are the first few hits more important or that sweet IG video like sub second reload more necessary? Obviously the former is better so maybe my grip is fine.

Photo from Kagwerks

 I’ve always worked around it and never really considered it a problem as if I don’t get lock back, I’d get a click and tap/rack,  then it’s locked back so it’s reload time. Or, if able to recognize that I’d been on the gun for more than a few shots a “click” means that mag gets dumped immediately and a new one goes in. A quick overhand rack and we’re back in business.

 Neither are perfect but there is really no other solution, or is there?

 Enter the Kagwerks extended slide release. When I first saw this I thought “neat, maybe one day i’ll check it out” and thought no more about it. That is until I saw all the hate it was getting from internet operators. Everything from “a solution looking for a problem” to “it’s a slide stop not a slide release” , and my favorite “shearing forces could cause that to break”. These claims seemed unfounded at face value and it appeared no one making them had any time with the product.

 So I reached out to the company and they were happy to send one out for review. I needed to see what the hate was about.

 Spoiler alert: I have no idea what the hate is about. I love this thing.

 It is installed easily, like any other slide stop but the company recommends a gunsmith do it. One can only assume this is for liability reasons.

Photo from Kagwerks

 I had no fitment issues with any holsters I have, so that was nice. After some dry practice it was off to the range. Long story short, it works as advertised. I had zero failures to lock back. One benefit I noticed that I hadn’t thought of is it puts the release back just enough that it’s a tad more intuitive to hit. There was very little learning curve and I don’t recall ever “missing” on a mag change. I did, however, inadvertently lock the slide back a few times during administrative racking. This gave me cause for concern so I spent a good portion of my next training session on malfunction clearances. The “problem” didn’t manifest itself at real speed in real time once. Despite operating the slide several different ways this only time I unintentionally locked the slide back was during administrative tasks that arguably I should have done anyway or should have done at full speed for positive reps. Personally I’m chalking this up to a nonissue, but your mileage may vary.

Overall the Kagwerks extend slide release gets a huge two thumbs up from me and I just can’t wait for the gen 5 version to come out as I’d like it on both of my carry guns for commonality.

Photo from Kagwerks

Do you need this? Well, probably not. For the casual plinker or ccw’r its likely to never be a problem if you don’t have this, unless it is. A buddy of mine who is a patrol cop,  who trains regularly and shoots competition told me after using one for a while “I like the concept it’s just not worth the thousands of reps to retrain myself on something radically different to maybe shave 1/10 off my reload” he also went on to say he fails to get lock back only about 10% of the time and uses his support hand to release the slide. I use my primary hand thumb to release the slide and saw very little learning curve so there could be something there.

I suppose if the gun always locks back for you it’s not for you either, got it. But, if you do experience failures to lock back from your Glock, I would encourage you to take a good look at this product. I also would really like to see a g42/43 version as the problem is much more common for me in the single stack glocks.

FIREARMS INSIDER REVIEWS - 8 KEY POINTS

CLAIM TO FAME:

Solves lock back issues for gen 3 and 4 double stack glocks in 9mm, .357sig and .40 S&w

TARGET MARKET:

Glock shooters that have a high grip or big hands or anyone that doesn’t get lock back on the last round

FNBS (FEATURES & BENEFITS OF THIS PRODUCT):

Moves the slide stop up and back

WHAT OTHER AESTHETIC OPTIONS OR FINISHES ARE AVAILABLE?

Any color you want as long as it’s black

What others are saying:

They are saying a lot. Nothing I found in written review form. A few YouTube reviews are available.

Price point:

MSRP - $45

I need it now availability:

Kagwerks

Our Rating:

Pros:

  • Works exactly as advertised

Cons:

  • It’s expensive for what it is


Score: 9.0 Amazing

90.jpg
 

Tandemkross 10/22 Ultimate trigger kit


 The rimfire experts over at Tandemkross have a new trigger for your Ruger 10/22. They released the “Ultimate” trigger kit on 10/22 of 2018 in collaboration with Brimstone Gunsmithing. I immediately contacted them to ask for a review trigger kit, well here we are with the trigger review! I was sent a red trigger, but black is also available.

 As mentioned, this trigger system comes in a “kit.” Of course there is the trigger. The trigger is made out of aluminum and anodized either red or black. It uses a wide flat faced design, with very sharp knurling on the face of the trigger. I loved the knurling. My finger immediately knew that I was on the trigger. Now I would maybe put a small chamfer, or angle, on each side of the trigger face. It felt a little sharp on the edges. There is also a over travel adjustment in the trigger shoe. The adjustment is just your standard set screw that butts up against the back of the trigger guard housing. A hex wrench is supplied for adjustment.

 Tandemkross’ Ultimate trigger also comes with a new hammer and sear. This is really what makes the trigger pull lighter. Tandemkross redesigned the sear and hammer. This leads to a reduction in pull weight and a boost in reliability. The reliability is increased, due to the fact that the hammer-sear still have strong engagement. It doesn’t say if the surfaces are polished, but it does mention they are EDM cut for precision. Either way, the trigger pull is fantastic.

 Last up in the Ultimate trigger kit, is the return spring. Why should you care, you ask? Well Tandemkross has ditched the spring and plunger system used on the stock Ruger 10/22. They have gone with a wire spring. This spring mounts to the side of the trigger shoe and rests on a shelf in the trigger housing. I found it gives a positive reset without adding anything to the trigger pull.

 I’m not going into installation. Tandemkross has some very good instructions. If you don’t think you can install the trigger, take it to your local gunsmith. I did have a small problem with the hammer, the hole was too small for one of my rifles hammer pin. Another of my 10/22’s hammer pin fit fine. I chalked this up to the one not fitting, having been built in the early 80’s.

 I am really impressed with the Ultimate trigger kit. It reduced my trigger pull from the factory 5 lb pull to an amazing 2 lb pull. Just by installing the kit and using factory springs. There is a tiny bit of pre-travel, but not even close to the factory trigger. I’d say the pull was smooth, but the travel is so short that it just breaks without being able to feel any creep. As mentioned, getting rid of that spring and plunger system is great also. It now looks like a trigger should. Having over-travel adjustment is nice also. The set screw supplied also has a rubberized tip to keep from marring the trigger housing. I also love the feel of the sharp textured WIDE trigger.

 Tandemkross did an excellent job, in my opinion, with this trigger kit. If you know anything about them, that probably doesn’t surprise you. At $145 for the Ultimate 10/22 trigger kit in red, it might be pricey for some. After using it, I feel it is worth the price. If you’re in the market for rimfire parts and accessories, do yourself a favor and go check out Tandemkross.


Firearms Insider Reviews - 8 Key Points

Claim to Fame:

Better trigger for your 10/22

Target Market:

Anyone wanting a better 10/22 trigger, but mainly competition shooters

FNBs (Features & Benefits of this product):

  • Wide flat trigger

  • Sharp texture on trigger shoe

  • Wire return spring

  • Redesigned Hammer and Sear

  • Reduced pull weight

  • EDM cut parts

What other aesthetic options or finishes are available?

Black

What others are saying?:

Essential Trigger! 5/5 stars on Tandemkross

Installs in minutes with YouTube help. And makes a scary big difference. 10/22 factory triggers are like Glock triggers. We usually just compare them with something worse. But this TK Ultimate Trigger is a whole different world of goodness. Silky smooth take-up right up until the glass-rod break. Even upgrades Ruger's own BX trigger upgrade. Mine breaks clean and reliably at about 3.2 pounds. And since the heavily textured flat shoe provides oversized purchase onto the pad of your trigger finger, the effect is even more dramatic. Dry firing with the Ultimate Trigger is impressive, but when out in the field whether poking targets or hunting small game, the TandemKross Ultimate Trigger immediately makes itself essential. I've upgraded a lot of 10/22s and I cannot name a better single upgrade than this trigger for better performance, increased accuracy, and most importantly just the sheer pleasure of shooting.


Link to other reviews:

GunsAmerica

Price point:

MSRP = $134.99-$144.99

I need it now! Availability:

Tandemkross

Our Rating:

Pros:

  • Textured trigger surface

  • Reduced pull weight

  • Crisp break

  • Over-travel adjustment

  • Trigger return spring

Cons:

  • Slight creep

  • Price (for some)

Score: 8.5 Great

85.jpg

Favorite Link:   Axelson Tactical

Nightstick USB-556xl

 Everyone should have a good flashlight, at least in my opinion. Nightstick is starting to be one of my favorites. Recently they introduced a new series of USB rechargeable tactical flashlights. After reading the press release, I asked if they would send one out. Nightstick sent the USB-556xl. The 556xl is a single cell LED flashlight with a max output of 750 lumens.

 The usb-556xl is packed with features. As one could guess, it is USB rechargeable. It comes with a little usb cord also, but not the charger. In today’s world, finding a usb charger is easy enough. Since I am on the usb, the 556xl has a built in micro-usb charging port. The port is hidden underneath part of the handle. One must unscrew the center section and then slide it down to reveal the usb port. It is not the easiest to unscrew because of the o-rings used to seal the flashlight charging port. There is also a tiny light above the charging port. The light is red when charging, and green when fully charged. Nightstick says it takes 4 hours to fully charge, and that seems correct, but I never actually timed it. While I like the usb charging function, the 556xl does use a proprietary lithium-ion battery. Once charged, just slide the cover back on, and screw it closed.

 Since the usb-556xl is a tactical light, it has options that are quite useful. For instance, it uses a push button tailcap. The light will automatically shine on high, momentarily, if you push the button part way down. Of course it then turns off when released. Also, if you push the button all the way in, it turns on, on the high setting. To get it into the medium or low setting, hold the tailcap down while the light is on, then release pressure when it gets to the setting you desire. Once the light is turned off, it defaults back to the high position. This is probably my favorite function. Because when I want the light on, or need it on, having it on the high setting is ideal. The light also has a strobe function. To access the strobe, you have to push the tailcap button all the way down, twice, quickly. It only strobes at the high output, but can be turned on from either low, med, or high while the light is on. I prefer lights without a strobe, but Nightstick doesn’t offer this light without a strobe function. I would like the button to be inset farther into the tailcap, that way one could set the flashlight down on a flat surface, and have it shine upward to illuminate a room or something.

 I seldom use a pocket clip, but the 556xl has one. Mainly the light just gets put in my pocket, but some people find the clip useful. The clip on the 556xl isn’t that great. It works, but is a little flimsy or thin. The clip is easily removed also. One advantage to the removable clip is that it can be turned around. By doing so, it can be clipped to things, letting light shine outward away from it. I actually did this and clipped it to a hat bill. So everywhere I looked, the light was shining. Kind of like a headlamp.

 Specs, everyone wants to know these. First up, the light is bright. On high it is rated at 750 lumens and 9350 candela. Medium is 250 lumens and 2950 candela. Low is 80 lumens and 1115 candela. You get a 1hr/2hr/5hr runtime at the above settings. So pretty good for a 750 lumen light. I loved these, the high setting lights up my backyard better than my porch light. On high the beam wasn’t too wide and the light shines pretty far. I do use the medium setting alot. It is useful for finding dropped screws and such. Not too bright, but not too dim. I hardly use the low setting, it is a little too bright for finding stuff in the car at night. But then again, the low setting works good if you need to see where you are going, especially if there isn’t much ambient light. The 556xl can be submerged up to 1 meter for 30 minutes before something bad might happen. At 4.7” in length, it is not too big for pocket carry. It also only weighs 4.4 ounces. The body on the 556xl is 1” wide, and the head is a little larger at 1.2”s. If you like black, your in luck, because you can have any color, as long as it’s black. But, it is a class III anodized aluminum body, so it should last a long time.

Low setting

Medium setting

High setting

 This light has been in my pocket, everyday for almost 6 months. It shows some wear, but not too bad. I really like how it can be charged just about anywhere. At 750 lumens, it is bright enough for anything I need. It doesn’t classify as “all the lumens,” but what can you expect for a single cell light. I’ve dropped it on concrete, in water, and it keeps on working, the lens isn’t even scratched up. Do I think this is a decent tactical light? The answer would be yes, even if it has some minor flaws.

 If you are looking for a decent flashlight, the Nightstick usb-556xl is worth looking into. I really like the usb charging feature. It has good runtime, especially if you don’t use it on the high setting. At around $100, it’s not cheap, but is in the same price range as competing models. Do yourself a favor and go checkout Nightstick, they manufacture all different types of lights.

Firearms Insider Reviews - 8 Key Points

Claim to Fame:

USB rechargeable tactical light

Target Market:

Anyone wanting a bright rechargeable tactical flashlight

FNBs (Features & Benefits of this product):

  • 750/250/80 lumen output

  • 1/2/5 hour runtimes

  • 4.7” long

  • 4.4 ounces

  • Rechargeable

  • IP-X7 waterproof (1m for 30 min)

  • 6061 anodized aluminum construction

  • Momentary, constant on, and strobe

  • LED

What other aesthetic options or finishes are available?

320 and 900 lumen models

Link to other reviews:

None found

Price point:

MSRP = $111.00

Retail = $83.25 on Amazon

I need it now! Availability:

Amazon or Here

Our Rating:

Pros:

  • Bright

  • Momentary (750 lumen only)

  • Low, Med, High settings

  • USB Rechargeable

  • Lightweight

Cons:

  • Pocket Clip

  • Proprietary battery

  • End cap (button recess)

  • Strobe function

Score: 7.00 Good

70.jpg
 

Work Sharp - Ken Onion Edition

 If you carry a knife, of any type, then you need a good knife sharpener. The people over at Work Sharp Outdoor have supplied me with just that. Welcome the Ken Onion edition knife and tool sharpener. I talked with them at the Blade show West and they kindly sent this out for review.

 The Work Shop Ken Onion Edition (WSKOE) is an electric sharpener. To sum it’s looks up, it resembles a handheld angle grinder. On the side is the belt/knife guide area, this is where all the magic happens. Then there is a handle with a trigger system. Then up front is the motor assembly. One can use this sharpener by holding it, but setting it down on a bench or table works best. The belt/sharpening assembly can also be rotated around to different angles by a spring loaded push button release.

 This little handy sharpener comes with everything you need. The excellent instructions give you an idea of what belt/belts to use for each task ,along with what angle might work best. The WSKOE comes with 5 belts. Basically they range from extra course to extra-extra fine. The extra course belt is basically for shaping metal. I used it to reshape a knife that the tip had broken off. It made fast work of it. The extra-extra fine belt is more of a polishing belt, used to give a mirror like edge. It is also super easy to change the belts. Just push up on the spring loaded tensioner, pop the belt off and slide a different one on. I may have tried polishing some fire control parts with it also, of which it worked quite well.

   To further enhance the sharpening abilities, the WSKOE has even more features. The trigger system uses variable speed and can be locked in whatever speed one wishes. There is also an edge guide that folds out for use with longer knife blades. I used the edge guide for big kitchen knives and hunting knives. Also on the belt head is an angle adjustable guide. This guide keeps the angle of the sharpening blade somewhat controlled. It is adjustable from 15-30 degrees. As mentioned earlier, the whole belt sharpening system can be rotated. I didn’t use this feature, but I can see where it would be useful for sharpening my lawnmower blade, or just general grinding on something larger.

 This sharpener works. I must have sharpened almost every knife we own, including kitchen knives. It is very quick once you get the hang of it. I only found one thing I didn’t like about it. The blade angle rest takes some getting use to. When you are sharpening the knife, you rest the cheek of the knife on the angle guide and pull the knife through. If you put too much pressure on the angle guide, you can overtake the spring and get a sharper angle. After a little use, this wasn’t a problem. Also when using the angle guide, the guide ends before the tip of the knife is guided in. This meant that I had to freehand the sharpening of the tip. Not a big deal, in fact I did take the angle guide off and sharpen some knives freehand, which also worked well.

 I really don’t even know how I sharpened knives the old way. I was actually looking for things to sharpen. The WSKOE does use a standard 110-120V wall plug in, so it isn’t cordless. Replacement belts are easily found, a couple of local sportsman stores have them. Other sharpening adapters are also available through Work Sharp Outdoors.

 The Ken Onion edition sharpener is top notch. Some might say it’s a little pricey at $130, but if you want sharp knives, it might not be. There is a small learning curve, but once mastered you will have sharp knives forever. Go check out Work Sharp Outdoors, they make all kinds of knife sharpening tool.

Firearms Insider Reviews - 8 Key Points

Claim to Fame:

Powered Knife Sharpener

Target Market:

Anyone who wants a fast knife sharpener

FNBs (Features & Benefits of this product):

  • 15-30 degree edge angle

  • 5 belts from 120-6000 grit

  • ¾” wide belts

  • Variable speed (1200-2800 SFM)

  • Speed lock

  • Adjustable head

What other aesthetic options or finishes are available?

NA

What others are saying?:

⅘ stars on Amazon

Great little sharpener. Beautiful convex edges. Tape the sides of your blades to avoid scratches.

I really like the Ken Onion Work Sharp. I purchased it because I wanted to try convex edges on my knives without the risk of ruining them while learning to do it freehand. My first attempt on the Work Sharp involved a brand new Ontario Knives Rat-1, an inexpensive, well-made knife with a pretty AUS-8 satin finished blade. In just a few minutes, I was able to produce a razor-sharp, beautifully mirrored edge. I also produced a LOT of UGLY scratches on that pretty AUS-8 satin finish because the metal particles that come off the edge during sharpening build up on the angle guides. When you pull the knife through as instructed, you get scratches. I honestly don't mind if my knives get banged up during use but I just can't see defacing them during sharpening. It's just not necessary. A quick search of Blade Forums confirmed others have experienced the same problem, especially with highly polished finishes. After reading a bit further, I decided to use painters tape on a different knife to protect the blade. Problem solved, a perfectly sharp convex edge in minutes and not a scratch to be seen. Other sharpeners like the Apex Edge Pro actually suggest this method. It would have been nice if the Work Sharp folks had done the same. Despite that issue, if you want to try convex edges, (they really are better), the Work Sharp is a great little machine at a fair price. I highly suggest reading the instructions carefully and taping the sides of your blades. Cheers and thanks for taking the time to read my review.

Link to other reviews:

The Truth About Knives

Price point:

MSRP = $129.95

Retail = $129.95 on Amazon

I need it now! Availability:

Work Sharp or Amazon

Our Rating:

Pros:

  • Quickly sharpens knives

  • Adjustable grinding angle

  • Mirror cutting edge

  • Edge guide

Cons:

  • Angle guide

  • Learning curve

Score: 8.5 Great

85.jpg


Favorite Link:   AR-15 Podcast

Fowler Industries Gen 5 Glock Trigger

Written by Zane M.

If you listen to the podcast then you probably are aware that I’m a fan of flat faced triggers in my glocks. You also are probably aware that I think the stock gen5 triggers are much better than previous generations of Glock triggers. So much so that I had no intention of replacing my oem trigger in my gen5 Glock 19.

FI-2.jpg

Then Fowler industries sent me their zero trigger. With low expectations and little enthusiasm I installed the trigger in my g19, as I’m the only reviewer with a gen5 glock apparently. I was pleasantly surprised.

Installation was simple, like all Glock drop in triggers, and took just a few seconds to get it in there. The first thing I did was check that the trigger didn’t compromise safety. After checking the ledge and cruciform engagement (technical terms?) everything appeared to be good so I dropped it and hammered it a few times to see if I could get the trigger to trip. I could not. So it passed test one.

FI-4.jpg

Next up is feel, the trigger feels great and as a fan of flat faces triggers I really like this one. The sides are cut at angels so the trigger feels rounded and is comfortable for a variety of finger placements. Despite popular belief there isn’t a single spot everyone should place their finger on the trigger. While all flat faced triggers work fine when using the pad of your finger, they can be less comfortable with less or more finger on the trigger. Depending on your hand size and reach this could be important.  While it’s hard to convey over text it really feels good.

FI-3.jpg

On to the trigger pull. The trigger is just slightly more smooth than the oem trigger. This is to be expected since they use an oem trigger bar that’s been polished. They recommend using an oem -connector and stock all other parts and springs. I ran the trigger with a few different connectors and I always (like all my other triggers) come back to the stock 5.5lbs connector. You could get the same smoothness but putting several thousands rounds through the gun but you’d still have a plastic curved shoe.

If you want a 1911 like trigger, this isn’t the trigger for you but none of the drop safe options I’ve tried are either. If your looking for an better feel on the trigger, this might be it.

FIREARMS INSIDER REVIEWS - 8 KEY POINTS

CLAIM TO FAME:

Flat faced aluminum gen 5 trigger

TARGET MARKET:

Anyone looking for a better trigger show for glock

FNBS (FEATURES & BENEFITS OF THIS PRODUCT):

  • Provides a better contact surface for the trigger finger

  • Smooths out the trigger travel.

  • Removes unnecessary take up or pre travel without compromising safety.

  • Looks cool(if that matters to you)

WHAT OTHER AESTHETIC OPTIONS OR FINISHES ARE AVAILABLE?

  • “Spider-Man edition”

  • Red

  • Blue

  • Green

Website isn’t super easy to navigate, most of these are options I found on other companies’ sites

What others are saying:

They seem to like it but I only found video reviews

Price point:

MSRP - $145.00

I need it now availability:

Shootingsurplus

Fowler Industries

Our Rating:

    Pros:

  • Improved feel

  • Pre-travel removed

  • Smooth

    Cons:

  • Price

Score 8.5 Great

85.jpg

Write here…


MantisX

 If you haven’t heard about the MantisX shooting system, you are missing out. If you are interested in improving your shooting, MantisX could be the help you need. This is the easiest training system I have used. Mantis did send this out for review, and I was pleasantly surprised at what it can do. All you need is a smartphone or tablet and the control module to get started.

 The MantisX is a novel concept in the shooting world. The smart sensor, which attaches to your rail, is only half of the training system. The other half being the app, which I’ll discuss later. At just under 2” long, 1.375” wide, and 1” tall, it doesn’t add much size to the firearm. It also only weighs 1 ounce. So you really don’t even notice it’s on the firearm. The smart sensor comes with a charging cord and a nice little carrying case. I just use my phone’s charger and cord and it works fine. I never use the carrying case since I seem to always have it mounted on a firearm. On the bottom of the sensor is also an on/off button and led to show when it’s on. The smart sensor basically senses tiny amounts of movement in the firearm. Then it relays that, via bluetooth, to the MantixX app. Then all the magic happens.

 I said the app was half of the system, it is probably more like 90%. The MantisX app does so much, that I will likely forget something about it. First up, it has training courses, with the first one being an introduction. The intro course basically take you through how the app works along with some training shots. The other courses are Basic marksmanship and a FBI Qualification course. The FBI course has to be done with live fire, but the others can be done with dry fire.

 The other part of the app is the “train” section. In this Train section it has: Open training, Shot timer, MantixX Benchmark, Timed Benchmark, Surprise Break, Reload in Battery, Reload out of Battery, Reload Tactical, Primary hand only, Support hand only, and Cadence of 0.5, 1.0, & 2.0 seconds. Once you have used these, there is a history tab that keeps track of them. I like the history tab because it lets me see how I am doing over time. It also tracks how many shots you have completed on each “train” tab. The History tab at the bottom of the app will also show total number of shots fired. A really nice bonus to keep track of how many rounds have been fired through a particular gun.

 If you are into competing with your friends, or even people you don’t know, the MantisX has a “groups” tab. In the groups, you can enter a friends name to compete or compare with. The tab also has groups that you can add. All of this helps you to compare how you are doing with others. It can help you improve your skills by making you accountable. But you don’t have to use this feature if you don’t want to.

 Last up is the “settings” tab. It is not all that one would think. In it, it has rifle or pistol selection. Right or Left hand. Live fire, Dry fire, and CO2. I don’t have a CO2 pistol to try it on, but I have used Mantis’ at a shooting event, using the CO2, and it worked fine. There is also a sensor mounting direction and location. I actually mount the sensor on the bottom and backwards on my pistol. With it mounted backwards, I have access to the charging port without having to remove the sensor. When you select rifle or pistol, it has a very long list of manufacturers to choose from. I usually use mine on a Polymer80, so I chose the Glock 19 and it works great. If your firearm doesn’t have a mounting rail, Mantis offers adapters for certain pistols. Of course there are also the normal app settings along with an instruction guide.

 I’ve been using the Mantisx since I received it. Mostly with dry fire practice, but some live fire. I even mounted it to a rifle for testing. Within the sections, for instance in the “Open Training,” The app gives you a list of scores, time between shots, etc. If you swipe left, a round chart comes up with an average score. Around the center circle are red areas. When you touch one of the red areas, it brings up what was possibly wrong during that shot and then how to correct the issue. If you swipe left again, it brings up a graph with trigger press movement and stability. Swipe left again and see an actual movement display for each shot.

 Now that I went through a lot of the functions, here are my thoughts. The MantisX is a really useful training tool. If nothing else, it gets you to dry fire more. I even got my family to try it out. Once in awhile during dry practice, the MantisX didn’t seem to want to pick up every shot. What I thought was weird about it, was that the phone was only a foot away. I just reconnected the sensor and it worked fine. I did notice that during range time, if I was too far away from my phone, it wouldn’t register shots either, so just keep your phone in your pocket and it will work fine. The sensor worked good no matter where, or how, it was mounted. I mounted it at the end of a 15” handguard, as well as right up on the receiver, without any problems. I really like all the charts, graphs, etc in the app. You will need a holster for a light if you want to do draw and fire practice. I really liked how the app accesses what you did wrong. This was especially helpful during live fire when recoil can offer up more challenges.

 If you’re in the market for some sort of training app, I would go check out the MantisX. If nothing else, it is fun to see what is going on with your shooting. At a price of $150, it won’t break the bank either.


Firearms Insider Reviews - 8 Key Points

Claim to Fame:

App based firearms training system

Target Market:

Anyone wanting to improve their shooting skills

FNBs (Features & Benefits of this product):

  • Rail mounted sensor

  • USB charging

  • Bluetooth connectivity

  • Small and lightweight

  • Carrying case

What other aesthetic options or finishes are available?

Adapters for magazines and other firearms without a rail to mount the Mantis X on

What others are saying?:

R.King on Amazon 4/5 stars

It works as advertised - a must have tool for both students and instructors

I think this tool is great for both instructors and students of marksmanship. Not only does it save you plenty of money on ammo, it lets you see exactly how you are pulling the trigger visually. This has helped me alone better understand how my trigger pull has been affecting my shots. I already knew this. However being able to SEE it made a nice difference.

I have yet to try it at the range. I have been dry firing daily trying to improve my trigger control. I will be going this week likely and see how much I have improved.

Pros: Works great, many settings to choose from, visually appealing, visually educational. I plan on using this tool with my students if they are having trouble with trigger control.

Cons: This is a very very small con, as MantisX explains, they are continually updating the software. However, there are times when it does not detect dry fires. However it is NOT a deal breaker at all. Just shoot again. Where it becomes a problem though is when you are doing timed shots. Other than that, I really have nothing bad to say about this product. Also, mine didn't come with a "pelican case." It was just a zipper case. Still good quality.

Suggestion: It would be very helpful if it came with a quick release rail mount or something. It is a little pain in the ass to have to remove it every time I want to carry or holster. Granted, it isn't difficult to remove, more of an inconvenience. However, if you already have a holster cut for tac light or something, this might not be a problem for you.

Link to other reviews:

The Truth About Guns

Price point:

MSRP = $149.99

Retail = $149.99 at MidwayUSA

I need it now! Availability:

MantisX

Our Rating:

Pros:

  • Easy set up

  • USB charging

  • Lightweight

  • Diagnostics of shooting

  • Fun

  • Shot number tracking

  • Movement graph

Cons:

  • Sometimes it didn’t want to read shots

Score: 8.5 Great

85.jpg


Favorite Link:   Axelson Tactical


SentryShield Level IIIA backpack insert

 SentryShield is making a IIIA ballistic panel intended for backpacks. I noticed the press release a while back and inquired about it. Sentry Shield then sent me a panel to review. Having a teenage daughter that attends high school, any bit of extra protection for her is a good thing. Plus, I get the advantage of using it also.

 I am going to not actually shoot at this ballistic panel. Having a NIJ (National Institute of Justice) certified level IIIA rating tells me what I need to know about its protection level. I have shot level IIIA vests, so I understand what this level of protection does. This rating is for handguns only, as rifles and fast moving projectiles will pass right through the armor. Click on the picture wheel to see what level IIIA is. Remember level IIIA covers the previous levels also.

 Now that that's out if the way. The SentryShield panel is made of UHMWPE (ultra-high-molecular-weight polyethylene) thread woven together. It then has a nylon shell around the UHMWPE. UHMWPE does have its pros and cons. One big pro is its weight. The 16.25×11.75” panel only weighs 1.74 pounds. So putting it in a pack is barely noticeable. Another pro is its slim size. At less than ½ inch thick, it doesn't take up much of the useful space in your pack. Now a downside to UHMWPE is temperature. Basically you want to keep it between -15°F and 150°F. Anything above or below this specification and the material will start to degrade. And no one wants that in a ballistic panel.

 Some of you might be wondering why anyone would want or need this. Well, we live in an unpredictable society. A backpack or laptop bag is basically a man purse. Anyone seen wearing or carrying one is not really noticed. Now you can blend in and still have some ballistic protection, if needed. With a backpack, if the need arises, one can just put the backpack on backward, and have a front level IIIA protection while keeping your hands free to do other work. As mentioned earlier, you can equip a child with a ballistic panel, without adding huge amounts of weight. It may not be rated for rifle rounds, but level IIIA is better than nothing to keep a loved one safe.

 Gun fire is also not the only use for ballistic panels. As we have seen, explosives can be a hazard also. Just look at the Boston marathon bombing. Panel's, like the Sentry Shield, may also protect you from shrapnel or flying metal produced by an explosion.

 I know we are talking about just one single ballistic panel. But, what about the use of it against blunt objects. Every body armor I've tried, seemed to also help with spreading out the force, of say, a bat, or even a fist. So a backpack panel might also help you out of other situations.

 When I used the backpack panel, I really didn’t even notice it. The panel slides nicely into most packs. I happen to slide it in the laptop section of my pack. The Sentry Shield panel does goes have a front and back side, just remember to put the side labelled “strike face” outward, away from your body. I really did not even notice the panel when carrying the backpack. If you want a smaller panel, they make one for a handbag, so it is slightly smaller.

 The SentryShield ballistic panel is pretty nice. It fits into just about anything, even a plate carrier, if one wanted to do so. The price is excellent at $90. It’s rated for most handgun and shotgun rounds. So if you’re in the market for something like this, go check out SentryShield.

Firearms Insider Reviews - 8 Key Points

Claim to Fame:

Level IIIA ballistic panel for backpacks

Target Market:

Travelers, children, those wanting ballistic protection without the typical “vest”

FNBs (Features & Benefits of this product):

  • NIJ level IIIA

  • 16.25×11.75”

  • Less than ½” thick

  • 1.74 lbs

  • -15 to 150 F temperature range

  • Made in China

What other aesthetic options or finishes are available?

Handbag version

What others are saying?:

Kerry 5/5 stars at Sentry Shield
Fit great and actually comfortable
I have a backpack that I really like because it has a weird kinda design that I haven’t been able to find anywhere else so I didn’t want to replace it, even though everyone’s talking about bulletproof backpacks nowadays. I can’t afford a bulletproof tactical backpack and a kevlar vest is uncomfortable. My friend told me about inserts and then I saw that SentryShield makes them. It came to me in about 2 days (business) and it’s made nice. it fits the weird inner slot of my backpack perfectly. I’m hoping I never have to use it, but I’m glad I got it. I did have some questions about the product and I called customer service. They were nice!

Link to other reviews:

Best Travel Gear

Price point:

MSRP = $120.00

Retail = $89.99

I need it now! Availability:

SentryShield

Our Rating:

Pros:

  • Lightweight

  • Fits into most packs well

  • Price

  • Slim

Cons:

  • Made in China

  • Temperature range

Score: 8.00 Great

80.jpg

Favorite Link:   Medford Knife & Tool

Guntec 9mm Bolt Carrier Group

 I was in the process of putting together a pistol caliber carbine or PCC for short. So of course I needed a bolt. I contacted GunTec USA since they had recently come out with a 9mm bolt. They were kind enough to send one out for review, along with a 9mm compensator for the same build. I have reviewed other GunTec products in the past with good results.

 This review will probably be on the shorter side, after all it is a bolt carrier group (BCG). The GunTec 9mm BCG has a very nice QPQ Nitride finish. This makes cleaning a little easier than a standard run of the mill Mil-Spec BCG, plus it looks nice. Another function of the Nitride finish is it’s smoothness, if that’s a word. When I installed the GunTec BCG, it cycled very smoothly. This could also be due to the fact that the exterior machining on the bolt is top notch.

 The GunTec bolt has pretty much all the features one would need for this type of BCG. It has a roll pinned in weight to add mass. This makes it possible to run a standard weight buffer in your recoil system. The bolt is heavy at almost 15 ounces, but this is needed for the straight blowback style action used in most 9mm PCC’s. I did run into a small problem that was probably my OCD. Where the gas key block is located, right behind it on the bolt, was a little raised area. When I cycled the upper by hand, you could feel it drag against the buffer tube, but only right at full extension of the charging handle. It however did not cause any wear or problems during use. I smoothed them out so I felt better. Other than my OCD, the bolt has ran flawlessly using the Stern Defense mag block and all different types of glock magazines. The gas key bolts are staked in. They could be a little more, but since it is really only there to manually cycle the firearm, I didn’t pay much attention to them. The BCG also uses an external extractor. A big plus if you actually shoot enough to wear it out.

You can see here where I polished off the small lip.

Same lip on bottom of bolt. Neither top or bottom lip actually affected function.

 I am not sure how many round that I have out through the BCG. But it has not failed me so far. I would estimate around 700-800 round through it at the time of this review. I have ran it with three different AR15 triggers. A mil-spec, a KE arms, and a Velocity. All worked well. The Velocity was on the light side of the trigger pull weight, so I took it out and am currently running the KE arms trigger with good luck.

 If you are in the market to assemble a pistol caliber carbine, take a look at GunTec. PCC’s are an economical way to practice. This 9mm BCG will do both styles of receivers. It has given me no problems and is made right here in the U.S.A. Go take a look at GunTec USA, they probably have everything needed for a PCC.


Firearms Insider Reviews - 8 Key Points

Claim to Fame:

9mm AR bolt for Glock or Colt style magazines

Target Market:

Those building a pistol caliber carbine

FNBs (Features & Benefits of this product):

  • Compatible With Glock & Colt Style Lower Receivers

  • MIL-SPEC 8620 Steel

  • External Extractor

  • Dust Cover Compatible

  • Total Weight : 14.9 Ounces

  • USA Made

  • Fully Heat Treated

  • QPQ Salt Bath Nitride Finish

  • 1 Year Warranty

What other aesthetic options or finishes are available?

In Nickel Boron

What others are saying?:

None found at time of writing

Link to other reviews:

None Found

Price point:

MSRP = $159.00

Retail = $135.99 at OpticsPlanet

I need it now! Availability:

GunTec USA or OpticsPLanet

Our Rating:

Pros:

  • Drop in installation

  • External extractor

  • Nitride coated

  • Works with Colt and Glock style magazines

  • Works with standard AR15 hammers/triggers

  • Made in USA

Cons:

  • Slight raised lip by gas key

Score: 8.00 Great

80.jpg

Favorite Link:   Brothers & Arms


Stern Defense Mag-AD9


 Stern Defense has introduced a magazine block for standard AR-15 style rifles. 9mm converted AR’s are excellent for cheaper practice. Stern Defense was kind enough to send their AD9 magazine block. This product converts a regular AR-15 lower to accept Glock 9mm and 40 cal magazines. One will still need a complete 9mm AR upper, with a Glock style bolt, to work with the magazine block.

 The Stern Defense AD9 is probably one of the nicest magazine blocks around. It is beautifully machined and engineered. Made from 6061 aluminum, hard coat anodized, with some steel and plastic parts where needed, it should last a lifetime. The built in feed ramp is also NiB coated to help smooth out the transfer of the round from the magazine into the chamber. I also noticed this makes the feed ramp easier to clean. I ran various types and weights of 9mm through the AD9. All of them fed reliably, even my 124gr Gold dot hollow points.

 Installation of the magazine adapter is super easy. I used a standard forged mil-spec receiver. First, if new, just insert the adapter into the magwell, like you would any standard AR magazine. Push it until the standard magazine release clicks back out, just like the standard AR magazine. Now, on the bottom of the Stern Defense magazine block, are 3 screws. Take the supplied allen wrench and tighten up the gib screw, while pulling down on the adapter. The gib screw is the larger set screw toward the front of the adapter. What this does is force the gib (plastic piece at the front of the adapter) against the lower receiver’s magazine well. Then lightly tighten the other 2 smaller set screws until they touch the lower receiver. Now you are done with the hard part.

 This AD9 insert is great. I am using a Guntec USA BCG, which is cut for both the Glock style and Colt style, just for your info. Every magazine I have tried fed reliably. All the magazines drop free with a press of the magazine release. Now, the magazine release on the AD9 is a push forward type. Located if front of the trigger guard. All you have to do is push it forward with your trigger finger, and the magazines drop free. It took me a little bit to get the hang of this, but once I did, it works very nicely. If you try and hit the regular magazine release, it does absolutely nothing because of the mag block being wedged in with the gib. I used Glock, Magpul, ETS, and Amend2 magazines, all worked great, as mentioned above. Since the magazine release is only on the right side, left handed people will have to find a different way of releasing the magazines. I did find that if you push the magazine release with your left hand thumb, you can kind of strip the mag out, similar to an AK. I would love the magazine release to be ambidextrous and larger so that I don’t miss it when reloading quickly. Speaking of quick reloads, the magwell is also slightly beveled to help with the insertion of magazines.

Left hand using magazine release

 Some people may not see the purpose in a magazine block. I must admit, this thought has gone through my head before also. But, if you have a SBR, and want to run a short 9mm setup, a mag block allows someone to do this without having to pay another $200 tax stamp on a dedicated 9mm lower. Or if you are fortunate enough to have a full auto m16, you can convert it to 9mm with the AD9!

 I almost forgot to mention. The Stern Defense AD9 has last round bolt hold open. And it worked with all my magazines. It pushes up on the regular AR bolt release. So there is no need to learn any new aspects to your training, at least as far as the bolt release goes. The ejector is also part of the magazine adapter. Replacement ejectors are also available from Stern Defense.

 Stern Defense has made a great product. It is expensive, but worth it in my opinion. So if you think a magazine block might be for you, go check out Stern Defense.

Firearms Insider Reviews - 8 Key Points

Claim to Fame:

Magazine block to convert standard AR-15 lowers to 9mm Glock magazines

Target Market:

Those wanting a 9mm carbine on a standard AR-15 lower receiver

FNBs (Features & Benefits of this product):

  • Made in the U.S.A.
  • Constructed from 6061 T6 aircraft grade aluminum.
  • NiB coated feed ramp.
  • Hard coat anodized type 3.
  • Sturdy Construction.
  • Ergonomic mag release.
  • Works with all generations of Glock magazines.
  • Works with any mil spec ar15 lower receiver.
  • All gun components besides the Bolt and Barrel remain stock

What other aesthetic options or finishes are available?

Beretta 92, M&P, and M&P .45ACP

What others are saying?:

4 / 5 stars at Brownells

RELIABLE
Building a 9mm AR Carbine on a budget can quickly become an expensive endeavor if you buy unreliable parts. The AR-15 9mm Conversion Adapter for Glock® Magazines by STERN DEFENSE Is a reliable way to use Glock magazines in a Mil-spec lower. I use it for USPSA PCC division and Steel Challenge matches to keep the feel of an M-4 and for training. I’ve personally tried other methods and this system is far superior. The feed ramp angle on 9mm is critical for proper function and reliability, with the vast array of projectile profiles. So far I’ve had luck with multiple types of 9mm projectiles I.E. Winchester 124gr FMJ, 145gr RN Bayou, and 147gr FP/HP Berry’s. The last round Bolt hold open is somewhat unnecessary for PCC, however, is great to feel the weight transfer of the bolt carrier group and buffer and have it lock on the last round. The only feature that I dislike is the magazine release is located at the bottom of the unit which is not a big deal if your state allows “standard capacity” magazines. However, I’d like index the same magazine release in the same configuration of an AR series firearm, which would be difficult without permanently modifying the magazine. Overall a great product the moment you open the package you can see that a lot of thought went into its development and manufacturer.

Link to other reviews:

OutlivetheOutbreak.com

Price point:

MSRP = $179.99

Retail = $179.99 at Brownells

I need it now! Availability:

Stern Defense or Brownells

Our Rating:

Pros:

  • Easy Installation

  • Last round bolt hold-open

  • Beautifully made

  • Magazines drop free

  • Bevelled magwell

Cons:

  • Price

  • Magazine Release is not in the standard location

Score: 8.50 GREAT

85.jpg


Favorite Link:   GunTec USA

9mm MagPump

 If you shoot enough, you probably have looked into magazine loaders. MagPump has introduced a 9mm magazine loader. Their first adventure into the market was their AR-15 magazine loader. They went one step farther with the 9mm version. This was sent to me for review, but it will still get my honest review.

 When I first received the MagPump, I had to try it out. So I assembled it. To assemble it, all you have to do is pull the 2 pins from the hopper, set in on the pumping system, then push the pins in to hold it together. But of course, there is more to it then that. One has to select the magazine adapter and install it. I first chose the Glock adapter. It comes with adapters for: Glock, Sig, Smith & Wesson, Springfield, CZ, and Ruger. They also have other adapters for sale. As with all the magazine adapters, it has two raised circles that slide into the MagPump. Just squeeze them gently, and slide the adapter in place. Now you are ready to install the magazine. I found that if you angle the magazine at about 45 degrees, it makes this step easier. See the pictures, it helps explain these steps. Then push the magazine down as it slides into the adapter. Once down, push the magazine and adapter forward until it clicks in. There is a trigger looking mechanism that catches the magazine/adapter in place. Make sure it clicks in, or the magazine will get pushed out when trying to load it up. Now dump some rounds in the hopper, and start “pumping” the handle! When done, pull the trigger mechanism to unlatch the magazine, and now you have a loaded magazine.

 The MagPump is something used for high volume loading. Because of the size, it is not something you would probably take to the range with you. It does come with a base that can be mounted to a table or workbench. The base is basically a picatinny rail and then the MagPump mounts on it with two large thumbscrews. Because of this feature, the loaded can also be mounted to any picatinny rail that is long enough. The MagPump is pretty stable when mounted to a bench. In the video, you will see I had to hold the base, that is because it wasn’t mounted. I could see a range having some of these for their members to use. All of the MagPumps use the same style of mounting base. So if you have limited space, and more than one style of MagPump, they are easily swapped onto a mounted base.

 I mentioned the hopper system. This system allows you to literally just dump a box of 50 rounds into it, and start loading. There is a little spring loaded latch on the hopper. You can push this to help start loading the rounds into the feed slot, if needed. I would really like the hopper to hold more rounds. Somehow the mechanism that flips the rounds to the proper direction, doesn’t care for hollow points. It does work fine with round nose bullets. MagPump does state that it is optimized for FMJ/Round nose bullets, so I wasn’t surprised.

 After using the MagPump for thousands of rounds, here is what else I found. The pumping handle feels a little flimsy, but it has held up fine. Even when trying to force it. The loader does take a few tries until you get the hang of it. Loading practice ammo has never been easier. It handles all different capacity magazines, from 10 rounders up to the 33’s. So if you are looking for a bench style magazine loader, you may want to go try one of these out. Now, if I could just motorize it.


Firearms Insider Reviews - 8 Key Points

Claim to Fame:

Easy, fast magazine loader

Target Market:

Those wanting quick and easy loading of magazines

FNBs (Features & Benefits of this product):

  • Fast magazine loading
  • Picatinny mounting
  • Bench mountable
  • 50 round hopper
  • 6 different magazine retainers included

What other aesthetic options or finishes are available?

9mm Elite loader

What others are saying?:

4 / 5 stars from Midway

Limited usage

I purchased this product thinking it would be a useful tool. Basically what it does is saves your fingers if you do a lot of target shooting. It will not load hollow point cartridges or any flat nose cartridge. It will load round nose practice ammo very well, although in my experience, one cannot go quite as fast loading rounds as the ad videos purport. Slow and steady loading works best for me. My recommendation is based on this information.

Link to other reviews:

Pistol Forum Review

Price point:

MSRP = $149.99

Retail =$124.95 on Amazon

I need it now! Availability:

MagPump or Amazon

Our Rating:

Pros:

  • Hopper system
  • Mountable base
  • Ease of use
  • Comes with more than one magazine adapter
  • Loads magazine quickly

Cons:

  • Doesn't work well with hollow points
  • Hopper only holds 50 rounds
  • Handle feels flimsy

Score: 7.00 Good

70.jpg


Favorite Link:   Nevada Cerakote