Review

Infinity Target with "zones"

  Anyone that shoots, knows about replacing targets. Infinity Targets has come out with a solution for anyone using USPSA/IDPA silhouettes. They are making reusable rubber targets that look like those cardboard humanoid ones. When I first noticed these, I knew I just had to have one. Infinity Targets agreed to send me one.

  Construction of the Infinity Target is recycled rubber. Similar to the “rubber dummy” style, but flat and thinner. The target depth runs about ¾”. They then paint one side white. I was sent the target with “zones”. The zones are cut into the target to resemble the scoring zones on a USPSA target. When I first received the Infinity target, these zone marks were black, but after painting over the target, they are now the same color as the target, but still noticeable.

  The Infinity target came with 2 heavy duty metal clamps. These included clamps are used to clamp the target to a stand. When I say “stand”, I mean the typical 2 piece, 1”X2”, wood uprights, that are typically slid into some type of metal base. The 2 clamps hold the target to the sticks pretty good. The target itself is not light, I’d say it weighs around 10-12 lbs. If the sticks in your target base are loose, the target can seem to lean a little. Another set of clamps will fix this, but I just lived with it because it wasn’t enough to matter. Replacement clamps are pretty cheap, should you choose to shoot one.

  These type of targets are great for practice. Since the Infinity Target has zones, you can see where your hits are. Seeing the hits is helpful if you compete. I even used it to sight in a few pistols. If you get too many holes for your liking, just grab your can of spray paint, and paint over the hits. I will mention that since the target is self healing, the marks it makes in the paint do not look like the nice holes in a paper target. 

  Every range trip, I take the Infinity Target out. The range I use does not allow steel to be shot with rifles any closer than 100yds. It’s for safety, and I understand. By using the Infinity Target, I am able to shoot rifles on the pistol bays. Plus I just paint it when I paint my pistol steel target. I am also able to shoot the Infinity target at very short distances. At muzzle close distances, it doesn’t blow apart like cardboard targets. If you live where it rains a lot, I do, the rubber doesn’t soak up water like paper or cardboard, so you can shoot longer in the rain. The target also works as a nice paper target backer, just staple your paper target to it and go. 

Closeup of 12 gauge slug

Back side of target - slug hole

  I have pretty much shot the Infinity Target with everything I have. As one might expect, hollow points will do more damage to the target. This is because they literally punch a hole out instead of pushing their way through. Infinity Targets says you can use anything up to 12 gauge 00 buck, but no slugs. The smaller calibers like .22lr and .223 hardly do anything to it. 9mm and up seem to actually do more damage to the target itself. Now, I shot 00 buck at about 3 yards, it took a pretty big chunk, out of the back side, of the target, but no visible holes. I did shoot one 12 gauge slug at it, it put a nice size hole in the target (I expected this). After 4 months and probably well over 1000 rounds, it’s still holding up well.

Circles are 00 buck impacts from 3 yards

  If you don’t want the Infinity Target white, just paint it. If you want it to look like a USPSA cardboard target, paint it a brown color. I painted mine grey as it is slightly harder to see. The darker the color, the harder it is to make out where you hit the target. I like this for training because I can’t see the hits and have to just go on training. I did notice that “flat” paints and primers do a better job of covering the target and covering of the bullet holes.

  The Infinity Targets, zone target, is nice. As the saying goes, I would recommend it to a friend. Shipping costs aren’t very cheap because of the size/weight, but sometimes Infinity Target’s has deals on shipping. If you are looking for some sort of usable, reusable, target, definitely go give them a look.

Firearms Insider Reviews - 8 Key Points

Claim to Fame:

Reusable Torso target

Target Market:

Anyone wanting a reusable target

FNBs (Features & Benefits of this product):

  • Reusable

  • Comes with clamps

  • “Zone” lines

  • Approximately 0.75” thick

  • Self sealing

  • Up to 12 gauge 00 buck ammunition

  • Uses regular target sticks and stands

What other aesthetic options or finishes are available?

No Zone lines, Hostage add on

What others are saying?:

Ben A. at Infinitytargets.com  5/5 stars

Great for close contact drills

I am the training director at diamondback shooting sports in Tucson, Az. These targets are awesome for our close contact drills. Paper targets last all of two rounds from close distance, but these targets hold up great. They seem to take as many rounds as full size rubber dummies but for 1/4 of the price! Would always suggest these targets, and will be ordering some for our sales floor asap!

Link to other reviews:

None found

Price point:

MSRP = $55.00

I need it now! Availability:

Infinity Targets

Our Rating:

Pros:

  • Takes multiple hits

  • Uses standard target stands

  • Paintable

  • Made from recycled rubber

Cons:

  • Heavy-ish

  • Clamps can be shot

Score: 7.50 Good

75.jpg

Favorite Link:   Gun and Gear Cult


Atibal SLR-1

  I first learned about the Atibal SLR-1 red dot at Triggrcon. To say the least, I was impressed with the prototype I handled. After some time, the production versions were released and they sent one for review. The SLR-1 is 1x20 red dot sight.

  There are a lot of red dots on the market, but only a few are even similar to the Atibal. The Atibal SLR-1 is solar and/or battery powered. The solar works so well that I even ran the red dot without a battery, in overcast weather. Because the SLR-1 is so efficient, it has a combined battery life of over 100,000 hours, that’s over 11 years! Another innovative feature is the removable solar panel, should you break it or something, just order a new one. Much better than ordering a whole new sight. When in the “solar” mode, brightness adjustment is done automatically depending on ambient light. One can switch over to “manual” mode if they want to set the brightness level.

  As with most red dots, the Atibal SLR-1 has a bunch of expected features. The SLR-1 has a 2 moa dot or a 35 moa circle dot reticle. 8 brightness settings, 1 of them is night vision compatible. It’s shockproof, water proof, parallax free, nitrogen filled, and has multi-coated lenses. The battery is easily accessed on the side of the sight, as are the multi-use buttons. Length on the SLR-1 is 3”. Weight is 5.6 ounces. It comes supplied with a very nice AR co-witness mount, but has mount compatibility with Aimpoint T-1 and H-1 mounts

  Now that all the technical stuff is out of the way, let’s dig into some of the good stuff. My SLR-1 came in a nice plastic padded case with everything needed to mount it, zero it, clean it, and cover it, they even threw in an extra battery. I can’t say enough good things about the supplied mount. Most supplied mounts are usable, but not great. The Atibal mount is sturdy, good looking, and mounts very securely. A wrench is even supplied to tighten down the mount.

  Actual use of the SLR-1 is where it shines. The dot and circle dot are very clear. Looking through the 20mm tube, I see little to no color differences. Because the solar panel is mounted on top, it picks up light well. When using the “solar” mode, the brightness of the dot is automatically adjusted. One drawback to the “solar” mode is that you can only use the 2 moa dot reticle, not the 35 moa circle dot. The auto brightness function adjusted brightness extremely well, never did I feel like the dot was too bright or too dim. It is also very responsive to changes in ambient light. To switch over to the “battery” mode, just tap the “+” button and you are now using the battery. Here you have manual brightness adjustments. As you can guess, “+” increases the brightness, and “-” reduces the brightness. The dot does flare when turned up, but that’s pretty normal for any red dot. Since we are on “battery” mode, if you hold down the “-” button for about 3 seconds, the reticle will change over to the 35 moa circle dot. After using the circle dot, I think I prefer a 65 moa dot over the 35 moa dot. Mainly because the bottom of a 65 moa circle is the height over bore zero of an AR at 7 yds. Now if you want to switch back to “solar” mode, just hold down the “+” button for about 3 seconds.

  I’ve been using the SLR-1 for around 4 months. I really like the 2 moa dot and hardly ever use the circle dot. Like mentioned before, it is super clear and easy to find the dot. It has held zero, even with me bouncing it off a wooden bench. It’s light, so it fits in well with the carbine it is on. One design aspect I like is the protected turrets. Yes, it makes it harder to get the caps on and off for adjustment, but protects them from being broken off. Speaking of caps, the turret caps also can be turned over and used to adjust the windage and elevation, both of which are 1 moa adjustments. The actual clicks on the adjustments are pretty good also. There is no problem hearing or feeling them. 

  Atibal did a stand up job designing the SLR-1. It’s clear, tough, and has some of the best battery life in the game. The use of industry standard mounts is smart, as is the multiple reticle option. Plus it has a lifetime warranty. Atibal has been upping their game in the optics industry, definitely give them a look.

Firearms Insider Reviews - 8 Key Points

Claim to Fame:

Solar Red dot sight

Target Market:

Those wanting a red dot with solar capability

FNBs (Features & Benefits of this product):

  • Solar and battery powered with run times in excess of 100,000 hours

  • Removable solar panel

  • Parallax Free

  • Easy accessible battery (no tools needed)

  • Shockproof

  • Multiple Dot System (MDS)

  • 1 Hour Auto Shut Off when in battery mode

  • Multi-coated lens

  • 2 MOA dot, 35 MOA circle dot

  • 1 MOA click adjustments

  • Brightness - 8 Settings (1 night vision, 7 daylight)

  • Detachable Co-witness mount

  • Lifetime Warranty

  • Nitrogen Filled

  • Water Proof

  • Battery - CR2032

  • Length 3"

  • Weight 5.6 oz

What other aesthetic options or finishes are available?

None

What others are saying?:

Rich F. on Atibal 5/5 stars

Sweet dot!

Competitive 3-gunner, USPSA shooter, steel challenge ringer, and firearms enthusiast. I’ve owned the SLR-1 for almost a half year now. I have almost a thousand rounds with it on my competition shotgun. It's had up to 1,400pfs shells through it throwing 1 3/8 ounce of shot and don’t forget about slugs and buck shot. I can’t wait to run this thing next season in competition. Awesome dot, slim, good looking, love the solar feature and dual reticle. The circle dot setup maybe perfect on the shotgun! I'm proud to own four Atibal optics, and I’d recommend them to anyone. The price and no BS warranty seals the deal on these guys! Great job Atibal, I'm excited to see what other optics you guys come out with. I’d recommend this brand and product to anyone.

Link to other reviews:

Nothing found

Price point:

MSRP = $379.99

Retail = $323.00 at Rainier Arms

I need it now! Availability:

Atibal or Rainier Arms

Our Rating:

Pros:

  • Clear, Crisp Dot

  • Solar

  • Replaceable solar panel

  • Circle dot

  • Industry standard footprint

  • Protected turrets

Cons:

  • 35 MOA circle dot

  • Dot only when using solar

Score: 8.50 Great

85.jpg

Favorite Link:   Gun and Gear Cult

Midway USA Range Backpack

The Midway USA range backpack measures 17in x 15.5in x 9in, has three removable pistol bags and the two main compartments can be combined to form one single compartment by removing the divider between them. The  zippers on the top compartment, main pistol compartment and pistol cases are lockable. There is a shell in the pistol compartment which adds support and can be removed to join the two main compartments together. In front of the top compartment is a smaller pouch for smaller items (cell phone, pens etc.).  The water bottle pouch will hold a 750mL Camelbak bottle easily.  There is plenty of Molle webbing on the back and side to attach accessories.

I used this backpack in classes where the ranges were in a remote location so you had to carry in what you needed.  This backpack easily held what I needed for the range sessions and the padded straps distribute the weight sufficiently to make the backpack comfortable.  

When i was in remote areas with no access to a table the backpack would remain upright and the cover for the pistol compartment makes a nice work area and keeps small items off the ground (so they don’t get lost). The top compartment can store several boxes of ammo or whatever you want to put in there.  The side compartment can easily accommodate ear muffs and a small first aid kit. 

I loaded the three pistol cases with six Glock Mags and a Glock 17 pistol in each and had an issue inserting them into the pistol compartment.  I could get two in easily but to insert the third i had to slide out the first two and then slide the third one in between them and then push them in.

The construction is decent for what i used it for, but is not designed for heavy use.  

All said, this backpack does what it is designed to nicely and is handy for carrying range items to remote areas.  


Firearms Insider Reviews - 8 Key Points

Claim to Fame:

Versatile range backpack

Target Market:

Anyone looking for a range backpack.

FNBs (Features & Benefits of this product):

  • 8 x 10.5 x 8 pistol compartment 

  • Large upper compartment.

  • Top front compartment with additional zipper pocket

  • Side compartment with mesh pouch and zipper pocket

  • Pouch on the side which can hold a 1L bottle

  • Three removable pistol cases which measure 6.5 x 9.5 x 2.25.

  • Two elastic loop target holders

  • Molle on the back and sides

What other aesthetic options or finishes are available?

This only comes in coyote.

What others are saying?:

4.8 out of 5 stars on Amazon.com (based on five reviews) 

4.8 out of 5 stars on MidwayUSA (based on 42 reviews)

Link to other reviews:

Amazon.com

Price point:

Retails for $129.99, but can be occasionally found on sale at Midway USA for $112.99.

Retail = $129.99

I need it now! Availability:

Midway USA or Amazon

Our Rating:

Pros:

  • Versatile range backpack 

  • Three removable pistol cases which can be used 

Cons:

  • Does not seem to have enough space to hold three fully loaded cases.

  • Construction is not for ‘rugged’ use. 

Score: 7.0 Good

70.jpg


SiOnyx Aurora Sport

  Night vision seems to be on everyone's want list. Really, who doesn't want to see in the dark. The cost is usually what keeps most of us from getting into it. Welcome to the SiOnyx Aurora Sport day and night vision camera. We have discussed the Aurora's on the podcast. I now have had actual hands on with the Sport version and co-host Rob has the Aurora Explorer edition. 

  The SiOnyx Aurora Sport, sports a lot of features. It's touted as an action camera. So you get 720p video at 60fps. This allows for okay videos. The actual camera megapixel rating is 0.9MP's. This doesn't allow for great snapshots, but is that really why we're discussing the camera. What really matters is the 3 different camera modes, day, twilight, and night. More on that later. The Sport also has some water resistance to it. It has an IP67 rating: so under 1 meter of water for 30 minutes. It uses a standard micro-sd card that is not included in the Sport version. One rechargeable battery is also included. 

Extreme low light - color, No IR

Extreme low light - black & white, No IR

Extreme low light - green, No IR

  The real question is, how about the "night vision". To start things off, it's not normal night vision. SiOnyx uses a really large sensor in their digital camera. This allows way more light into the camera. By doing this, you get a really good low light camera. Plus it is in color, or way more colors than normal night vision! For all you die hards out there, there's an option for green monochrome or black & white. If it is real dark, you will need some sort of extra illumination, like an infrared flashlight. When using IR, the colors will change slightly, but still essentially color! The IR light is a definite need on cloudy nights. Even with some ambient light, the picture would start to pixelate without IR. 

Low light - Night mode

Low light - Twilight mode

  I proceeded to take some photos with the Aurora. Because of the small camera sensor, the pictures aren't great. For instance, you can tell my dogs are dogs with the night mode turned on. Daylight picture are far better. As far as video goes, it's better than the pictures when in night mode. But it is also far better in daylight. Like I mentioned before, it really needs an InfraRed illuminator for really dark pictures and video. At night, I think it would best be used for target identification.

Battery and SD card access

  Since the Aurora Sport is sold as an all around sporting night vision camera, I had to try it on a rifle. Especially since they show the other Aurora model on a rifle in their advertising. To make things short, the sport flat out sucks on a rifle. When mounting behind an optic (the optic in front of the camera), the parallax is so bad that shot impacts were 3 feet low at 30-50 yards. Rob also had this problem with his Aurora Explorer. This was with a 1-6x scope and a red dot. I then proceeded to mount it in front of a red dot optic. It did at least get rid of the parallax, so shots hit where I was aiming. There was also a problem with this set up. Not enough light was projected on the camera’s sensor, so the night mode worked worse than without an optic. I was going to film, through the red dot, during the day, but the next problem happened. Every time I would shoot the rifle, an AR15 in 223, the battery compartment and eyepiece would unlatch and turn the camera off. This was with the camera mounted toward the front of a handguard. So, if you are looking at mounting this on a rifle, I would highly discourage the Sport model for this. The Explorer edition comes with a picatinny mount that, I am told, keeps the eyepiece from unlatching during recoil.

Candle light - Day mode

Candle Light - Night mode (color)

Candle Light - Night mode (color)

  What would I use the Aurora Sport for? With an IR illuminator it can be used for viewing wildlife at night. Tactical use is pretty much out because the IR light can be seen with any form of night vision, including other Aurora’s. As a sport camera, it would work okay, but the lack of autofocus really kills it in this area too. It does however use the camera industries ¼-20 mounting threads and makes it hook to almost any tripod. The ability to see the picture through an app on your phone or tablet could come in handy, especially if you mounted it to some other radio controlled device.

  The Aurora Sport is an okay nightish vision camera. I would really like to be able to use it on a rifle, but mount it on a helmet with an IR illuminator and have some fun. The price isn’t bad for what you get. SiOnyx keeps improving these camera’s, with a “pro” version out now. Maybe an autofocus is next.

Firearms Insider Reviews - 8 Key Points

Claim to Fame:

Night Vision Camera

Target Market:

Those wanting some sort of night vision capabilities 

FNBs (Features & Benefits of this product):

  • Water resistant - IP67

  • Color or Mono display

  • 1" optical sensor

  • Lenses - f/1.4 (Night), f/2 (Twilight), f/5.6 (Day) – 16mm

  • 720p video

  • 0.9 MP photos 

  • Wi-Fi and USB connectivity 

  • Micro SD card to 32 MB

  • Micro OLED display

  • Rechargeable battery pack

  • Approximately 8 ounces

  • Approximate size - 4.75” x 2.5” x 2.0”

What other aesthetic options or finishes are available?

Regular Aurora, Aurora Explorer Edition, PRO

What others are saying?:

⅘ stars on Amazon 

A low resolution low light camera - not night vision

  This is a decent low light camera. Sensitivity is primarily achieved by larger pixels and by removing the IR filter which takes full advantage of the spectral sensitivity into IR of modern sensors.

  Here are the negatives: resolution is very low and on a moonless night it really struggles. This is definitely not comparable to gen 3 night vision as the video's on the manufacturer's website suggests. Those are very misleading. This camera / tech is probably more comparable to a Gen 2 night vision device.

  But for the price it does a decent job. The connectivity to smartphones is very useful.

Link to other reviews:

Standard Aurora review

Price point:

MSRP = $399.00

Retail = $399.00 on Amazon

I need it now! Availability:

SiOnyx or Amazon

Our Rating:

Pros:

  • Color Night vision

  • Water resistant

  • Wi-Fi connectivity

  • Lightweight

  • Price

Cons:

  • Needs InfraRed Illuminator

  • Manual focus

  • Adds Parallax

  • Problems when mounting on a firearm

Score: 6.00 Okay

60.jpg

Bravo Concealment Holster (IWB and OWB)

  Bravo Concealment bills their holsters as “the best in everyday concealed carry.”  When they offered to send me a holster to review my expectations were high, however, when I received the IWB holster, at first, I was ambivalent.  

  The holster is constructed from two pieces of Kydex which are joined together by four screws that also hold the belt clips in place.  The following items were in the bag:  

  • IWB Kydex Holster (for Glock 17)

  • Single magazine holder

  • Extra fasteners

  • Two additional belt clips

  The pistol is aligned vertically with the holster shell (i.e. no built in cant) but the belt loops are adjustable for ride height and cant angle.  The belt loops are at an offset angle to allow for better concealment (they call it Torsion Technology). The pistol fit securely in the holster with no slack or rattling.  A loaded magazine was inserted in the pistol and holstered. I tried to shake the pistol loose but was not successful.  

  The holster was comfortable to wear and the pistol could be inserted and removed with ease.  I am overweight and most IWB holsters are uncomfortable, particularly when seated. With this holster I experienced a little discomfort, but not nearly as bad as others.  

  I used this holster for a few months, took it to several training classes and it worked fine.  Drawing was simple and fluid and I could re-holster without sweeping myself (important for use on ranges).  

  In addition an OWB holster was ordered for review (paid for by reviewer).  This holster is larger than the IWB model and pistol is slightly canted forward in the shell.  Similar to the IWB the holster can be adjusted for ride height and cant, although not as much as the IWB holster.   

  This holster was used in a training course without prior testing (a mistake on my part).  The holster held the pistol a little too tight, which resulted in the pistol pulling up the holster when drawing.  This caused me to use my left hand to hold the belt down to aid in drawing. The instructor informed me that I was dangerously close to sweeping my hand, which would result in disqualification, so i changed the holster to the IWB model.  

  When I returned home customer service was contacted.  They asked me a few questions to verify I was using the proper firearm, belt etc.  Once this was established they promptly provided a prepaid shipping label to send the holster back to be repaired.  Once the issue was corrected the holster was returned, at no cost, and the draw was much smoother. This is great customer service. 

Firearms Insider Reviews - 8 Key Points

Claim to Fame:

Kydex IWB holster

Target Market:

Anyone who is looking for holster for their pistol  

FNBs (Features & Benefits of this product):

  • Belt Clips are adjustable for ride height and cant.

  • Currently shipping with a fee magazine holder.

  • Reasonably priced.

  • Available in Left and Right hand holsters

  • Available in Glock, Smith & Wesson, SIG and several 1911 platforms.

What other aesthetic options or finishes are available?

Black

What others are saying?:

63 reviews give it a 4.7 out of 5 stars on Amazon.com 

Link to other reviews:

Amazon.com

Price point:

MSRP = $49.99

Retail = Currently on sale for $44.99 from manufacturer.  

I need it now! Availability:

Bravo Concealment website - $43.39 with extra mag holder

Amazon.com - $39.99 with extra mag holder

Our Rating:

Pros:

  • Currently shipping with magazine holder,

  • Designed for multiple platforms

  • Can accommodate lights.

  • Available for left-hand use.

  • Lightweight

  • Easy to draw from concealment. 

  • Great customer service.

Cons:

  • Not currently making models for FN pistols. 

  • Belt clips do not work with belts > 1.5 inches

  • Only comes in black.

Score:   8.5 Great

85.jpg

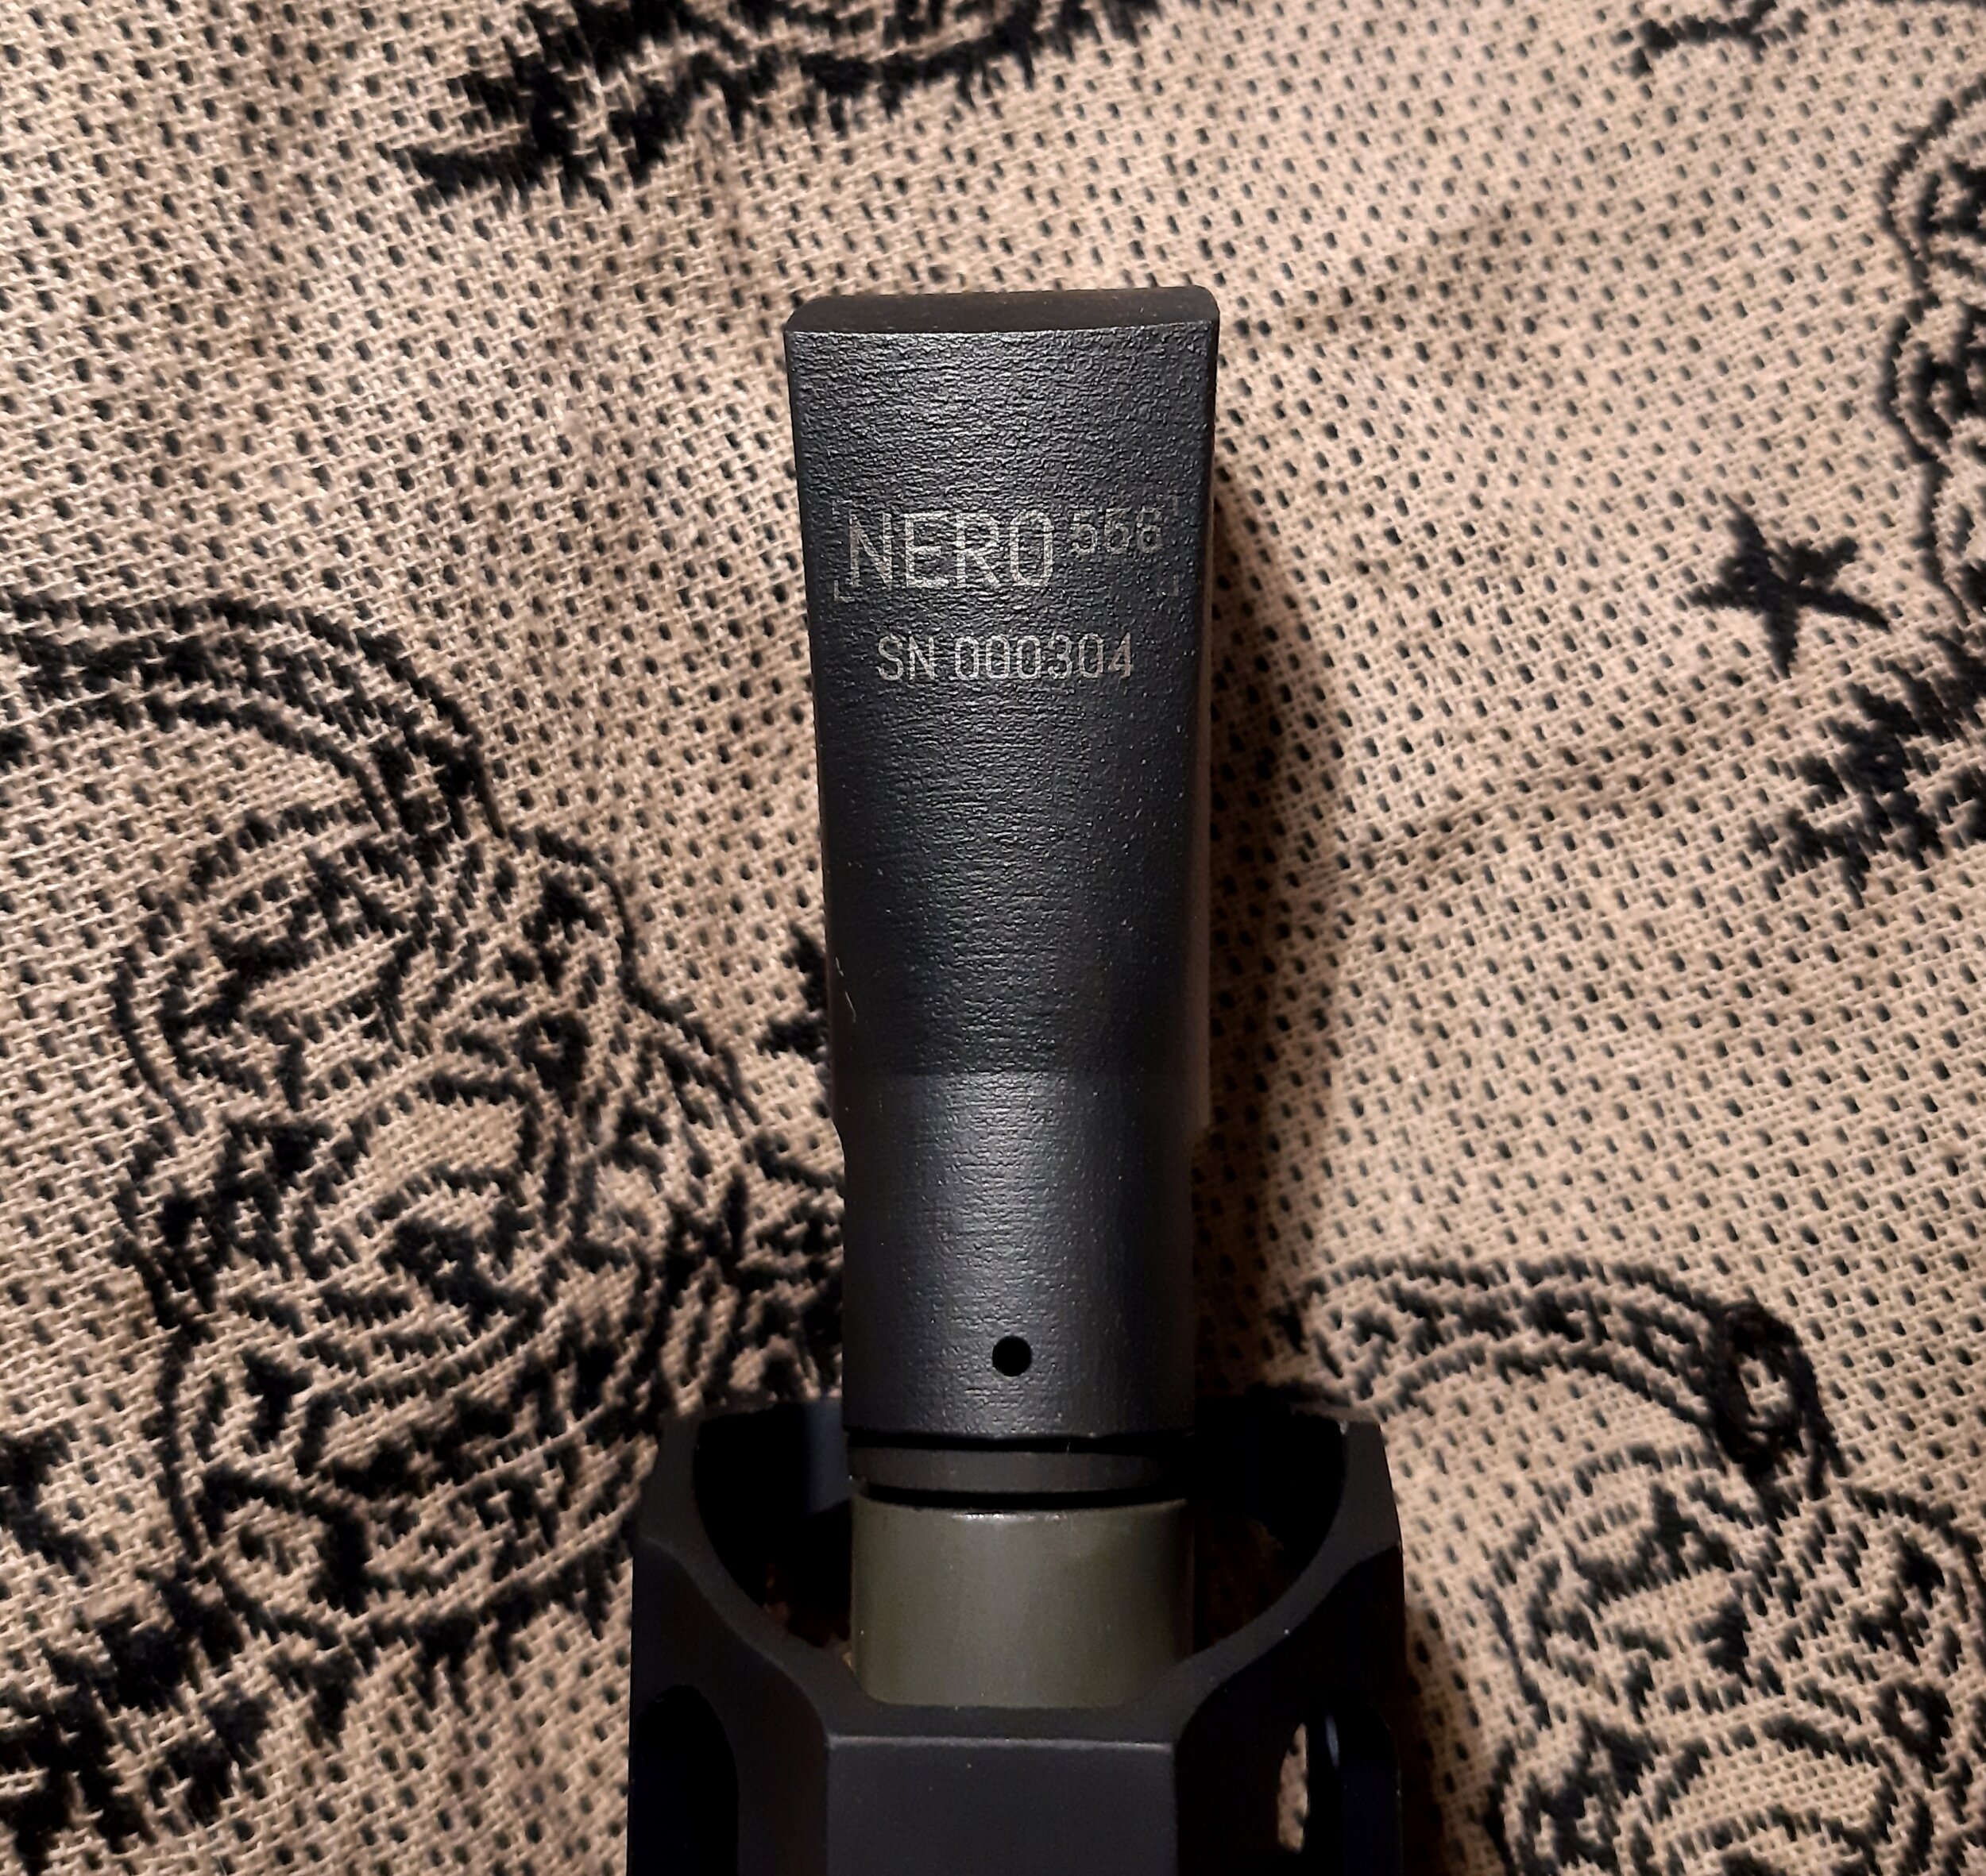
Walker Defense NERO 556 muzzle brake

  Walker Defense has come on the market with some truly innovative products. One of those is the NERO 556, a 3D printed hybrid muzzle brake/compensator manufactured from Inconel.. By using state of the art 3D manufacturing, Walker Defense was able to design the NERO without the constraints of normal machining. I had watched one of their videos on the NERO and needed to see if it was really that good, so I reached out to them for a review sample.

  3D manufacturing brings a whole new level to muzzle brakes. Walker Defense uses an additive manufacturing process called DMLS (Direct Metal Laser Sintering). Basically this process uses a laser to melt powdered metal together. By using this process, Walker Defense was able to design a muzzle brake that doesn’t have to use standard machining processes. Instead, they designed it using fluid dynamics for the best possible reduction in muzzle rise and recoil.

nero8.jpg

  The NERO 556 is manufactured using inconel. Inconel is a superalloy known for its resistance to heat, pressure, and corrosion. You may have heard about inconel because some suppressor companies use it for the initial blast baffle. Inconel is not the easiest metal to machine and thus can add a huge cost. By laser sintering the inconel, costs can be kept down some. 

  Walker designed the NERO for zero muzzle rise. It is optimized for a 14.5” or 16” 5.56 (.223) barrel length. If you run it on a shorter barrel, it definitely pushes the muzzle down. I know this because I tried it on a 11.5” and a 7.5”. It does this because the pressure going through the NERO is much larger on the shorter barrels. Walker Defense actually sent me a cutaway diagram (see picture). The diagram helps to understand what is going on with the NERO, and why it looks the way it does. As Walker Defense mentioned:

“It (nero) was designed using fluid dynamics to force the gases to take a different trajectory than the bullet. Upon entering the muzzle device, the vectored flow nozzle (#1) acts as an inverted ramp, and along the dimpled compression ramp (#2), focuses a jet of gas into the curved blast surface (#3) directly below the bore. This focused gas striking the curved blast surface is intended to create a balanced counter-recoil force that directly counteracts the rearward and upward recoil with a downward and forward counter force.”

  Now that we know the technical description, here is my take. The NERO 556 works like nothing else I have ever used before! Like I mentioned earlier, I did try it on a 11.5” and 7.5”, but most of the use was on a 16” barrel. Running the NERO on the 16” did exactly as stated. Recoil was reduced extremely. Most importantly, muzzle rise was effectively eliminated. The recoil impulse almost felt as if it was slightly pulling away from my shoulder. When I tried it on the short barrels, results varied. On the 11.5”, recoil was reduced and the muzzle dipped a little during recoil. On the 7.5”, recoil was reduced also, but more importantly was the huge downward force pushing the muzzle down. I would recommend also running it on a 14.5” or 16”, as it was designed for that. With the shorter barrels, there was also more concussion from the blast. With the 16”, I didn’t really notice it, as it is less than other muzzle brakes I own. While shooting a standard USPSA target, at ranges from 5-25 yards, A-zone hits were really easy. Even when I shot really fast, the muzzle stayed on target and the hits were all on the target. FYI, the AR15 that the NERO resides on weighs in at 6 pounds empty.

  Walker Defense also noted about handling the rifle differently. When shooters use the NERO for the first time, some have a tendency to pull the muzzle down during recoil. With the NERO, this is definitely not needed. Since I was warned about this, I literally shot the rifle with the handguard resting on a flat hand, after first installing the NERO. Yes, it shot very flat with no support. However, I did go back to my standard grip without any problems. 

  I was trying to measure recoil and give a comparison, but the data wasn’t there. I did get a few decent readings on muzzle rise (see attached screenshots). The last one in the group is always off because I moved the rifle after the last round was fired. All of the ones I have are in the standing, off hand, position. The average muzzle rise is near zero. This is consistent with what Walker Defense say about the NERO.

  The NERO 556 may not be for everyone, but it should be. If you are a competitive shooter, you need this. If you just want reduced muzzle climb, you need this. If you want faster follow up shots, this will definitely help. The NERO may seem pricey at first, but after shooting with it, you will probably change your mind. The videos put out by Walker Defense really are how the NERO shoots.

  The NERO is definitely innovative. Just by looking at it, the NERO 556 doesn’t look like your normal compensator/muzzle brake. Well, it isn’t, thanks to the 3D design and sintering. If you want an awesome, recoil and muzzle rise reducing, muzzle brake, look no further than the NERO from Walker Defense Research.

Firearms Insider Reviews - 8 Key Points

Claim to Fame:

3D printed muzzle brake with soft recoil and ZERO muzzle rise

Target Market:

Those wanting the best technology in a muzzle brake

FNBs (Features & Benefits of this product):

  • Reduced Recoil

  • Minimal muzzle climb

  • Standard ½-28 thread pitch

  • Use on .223 Remington, 5.56 NATO, .224 Valkyrie

  • Inconel 718

  • PVD coated

  • Pre-drilled hole for pinning and welding on 14.5” barrel

  • Direct Metal Laser Sintered

  • Weight: 3 ⅝ ounces

  • Length: 2.6 inches

  • Individual Serial Numbers

  • Optimized for 14.5”-16” barrels

What other aesthetic options or finishes are available?

NERO 9 and NERO 762

What others are saying?:

5/5 stars  Carl @ Walker Defense Research

Incredible Upgrade

There are lots of ways to spend money on AR-15’s these days... The Nero 556 is one modification that made an immediate, substantial improvement to performance of my AR. Muzzle rise was virtually eliminated allowing for faster and more accurate follow up shots. My buddy’s girlfriend had never shot a rifle and handled it with ease. It is well made and installed easily. I will be buying more!

Link to other reviews:

Jerking the Trigger

Price point:

MSRP = $179.99

I need it now! Availability:

Walker Defense

Our Rating:

Pros:

  • Zero muzzle rise

  • Reduced recoil

  • Faster follow up shots

  • PVD coating

  • 3D printed Inconel 

Cons:

  • Price

Score: 9.00 Amazing

90.jpg

Favorite Link:   Gun & Gear Cult

Meprolight Foresight

  Meprolight has come out with an Augmented holographic style sight. It is called the Foresight. Along with the Foresight, is a downloadable app to work in conjunction with the optic. The Foresight is really unique in how it gives information to the user. When we first talked about it on the Gun & Gear Review podcast, I was so intrigued that I asked for a Test & Evaluation unit.

  This brings us to the actual Foresight, a 1x optic. It is not a small sight, coming in at 4.6” x 2.35” x 2.68”’. Think Eotech size. It does however come with quick mount levers, built into it’s picatinny mount. It also does not have a removable battery. The battery is rechargeable using a USB-C connector. A short USB cord is provided, but not a charger. I just used my phone charger and it worked fine. The viewing window is extremely large at 1.3” x 0.79”. Operational buttons are mounted on the top front of the sight, in front of the window. The whole unit weighs 9.9 ounces.

  Let’s get into the features of the Foresight. It uses a green projected information and sighting display, not your typical red. But that’s not all. In conjunction with the APP, you have a choice of 20 different reticle options! One downside, you can only upload 5 at a time to be used in the sight. That does however give you 5 different sight in the optic itself. All of which are zeroed to the same point of impact. To cycle through the 5 in-sight reticles, just press the left or right arrow on the control pad. 

  Along with the different reticles, other information is also displayed. The Foresight has a built in level displayed on the left side of the screen. The level is 6 lines with a triangle pointer in between. There is another pointer just to the right. When the 2 pointers line up, the sight is level. Otherwise the right pointer moves, up or down, as you tilt the sight left or right. Right moves it down, Left moves it up. The level really helps when sighting in a rifle. I found it useful without being too much in the way. Another feature of the heads up display, is the built in compass. The compass displays in the upper left corner. It reads in degrees from 0 to 359. North is 0, South is 180, etc. 

  When first turning on the Foresight, or cycling buttons, even more information is displayed. This information is only displayed for 3 seconds and then disappears. In this info, is battery capacity, brightness level, and bluetooth. The battery display is in the upper right hand corner. It has both a battery percentage and battery icon. However, it does not tell you how much time is remaining at the current setting. Below the battery indicator is the bluetooth symbol. If you see it, the bluetooth is on, if not, then it is off. The Foresight uses bluetooth to communicate with the app. Last up is the current brightness setting, from 0-9. This is displayed on the right of the window. Brightness is adjusted by using the up/down keys on the control pad. Since we are discussing brightness, the Foresight also has an auto adjust brightness setting. To enter the auto brightness mode, just hold down the up, or front arrow, on the control pad for 3 seconds. The number on the right will disappear when in auto brightness mode. Auto brightness will also turn off if you cycle the sight off and then on again. If all the displayed information is too much, you can put the sight into “low power mode” by pushing the middle button on the control panel. In low power mode, only the reticle is displayed. However, auto brightness does not work in the low power mode.

  Lastly, there is a control menu in the display. Push the center control button twice to access it. Here you can also turn off all the on screen displays, except the reticle. This is also where bluetooth can be turned on or off. You can also calibrate the compass here. Or factory reset the optic. But more importantly, this is where you can adjust the sights zero. Access the “zeroing” option, then you can adjust the zero by moving the sight left or right, displayed as “Y” and “Z” axis. Each number is a movement of 1 MOA. I would have liked finer adjustments, but it is only a 1x optic. You can also adjust zero from the APP.

  The APP has a bunch of different abilities. For the app to work, it must be in range of the Foresight. As mentioned previously, you can zero the optic in the APP also. It pretty much works the same way, select the proper profile, click “Zeroing”, then adjust zero with the arrows. Once done, it will sync with the sight. The APP allows the creation of 10 different profiles. Thes can be different firearms, or different shooters. Each profile has its own individual zero and reticle choices. So if I take the Foresight off of one firearm, install it on another, I can just upload the new profile to the foresight. It will be zeroed and have the 5 chosen reticles for the new firearm. This of course only works if your new firearm profile has been previously zeroed. I love the ability to do this. Especially when installing a .22lr conversion kit. Just bring up the 22lr profile, and it’s zeroed and has the 5 reticles I want for that firearm. In each profile, you can also choose the 5 reticles that you want in the actual Foresight. There are a total of 20 to choose from. Some are courser than others, with the 1 moa dot probably being the finest. 

  Meprolight has impressed me with this sight. It is durable. It may have bounced off of some concrete once or twice. When switching between firearms, it has held zero. At least from what I can tell with a 1x sight. The quick mount thumb levers are a nice touch, especially if you do want to move the sight from firearm to firearm. The sight window is huge and easily picked up. I could live without the compass. But for military applications, it probably can be useful. The angle indicator is pretty awesome, it would really be more useful with a magnifier attached. The Foresight is supposed to have an auto off, shake awake. Either this one doesn’t, or it doesn’t work. It will auto off after hours of non use, but won’t turn on when moved. I tried contacting Meprolight twice, by email, about this, without any luck. I was also curious about stated battery life. So much for tech support. My favorite aspect of the sight is the different reticles. Not just the 20 available, but having 5 options in the sight is amazing. Supposedly a shot counter is in the works. I’d really like to see how that would work.

  I would hold the Meprolight Foresight up against other top tier 1x optics. It would look, function, and be geographically correct on an IWI product. The Foresight worked extremely well for me. If you are interested in an optic like this, definitely look into Foresight.

Firearms Insider Reviews - 8 Key Points

Claim to Fame:

Holographic Augmented sight with different reticles, level indicator, auto brightness, different zero’s, and an APP

Target Market:

Anyone wanting a feature rich holographic sight

FNBs (Features & Benefits of this product):

Sight:

  • 1x magnification

  • Window size - 33x20mm

  • 4.6″ legth  x 2.35″width  x 2.68″ height

  • 9.9 ounces

  • Quick detach mount built in

  • Holographic sight picture

  • 5 preset reticles

  • Built in compass

  • Built in level indicator

  • Digital Zeroing 

  • USB-C Rechargeable

  • Bluetooth (for App)

  • 10 brightness levels (displayed on screen)

  • Auto Brightness

  • Low Power Mode

APP

  • 20 different reticles (5 transferable to sight at one time)

  • 10 different Weapon profiles and zero’s

  • Zero firearm from app also

  • Choose between sight or app data

What other aesthetic options or finishes are available?

None

What others are saying?:

Nothing found

Link to other reviews:

None found

Price point:

MSRP = $714

Retail = $649 at Midway

I need it now! Availability:

Midway USA

Our Rating:

Pros:

  • Multiple reticles

  • Level indicator

  • Auto Brightness

  • Quick detach mount

  • APP profiles

  • Durability

  • Window size

  • Innovation

Cons:

  • Price

  • Tech Support

  • Shake awake doesn’t work like other manufacturer’s 

Score:  7.5 Good

Sight - 8.5

Tech support - 5.5

75.jpg

Favorite Link:   Gun And Gear Cult

Combat Flip Flops "Sneakers"

 This review is really more about the story, then the shoes. Combat Flip Flops (CFF for short) manufactures flip flops, of course, but also a Hi-top style sneakers. CFF sent my daughter and I some of the hi-tops to try out. They are stylish and comfortable.

  I met Matt Griffin, “Griff” as everyone calls him, at Triggrcon. Griff is one of the co-founders and CEO at CFF. He explained to me a little about what the story is behind the combat flip flops. I had heard some of the story before, but what really interested me was the sneakers they were now making

  The Combat Flip Flop story started in Afghanistan. Griff had joined the Army Rangers to make a difference. After various time spent in war torn nations, he saw people making good with what they had. When standing outside a combat boot factory, in Afghanistan, he came up with the idea of making combat flip flops. What a better way to help these countries, then by having them make products for US markets. Sourcing the materials locally if available. And thus the story began.

  Many of the items sold by CFF help to fund a day of school for an Afghan girl. CFF does this because they understand that female literacy is the key to improving nations. It is real easy for corrupt governments to radicalize children if the can not read. Since women are the teachers of their families in these countries. Teach the girls and then they will teach their families. Illiteracy rates among women, in Afghanistan, is around 15%. Seems like a reasonable idea to me. 

  The shoes are currently made at a factory in Columbia. CFF chose Columbia because of the free trade agreement with the USA. The free trade was put into effect to help pull Columbia out of its Narco state. As many materials as possible, come from the local area. This helps the local economy. Rubber for the shoe sole is made from rubber tree plantations that were once producing cocaine. All aspects of shoe manufacturing is done there. Then they are shipped to the US to be sold.

  CFF sent me a women’s Weekender and men’s MK-19 shoe, both in hi-tops. The MK-19, and the Weekender, are both a canvas material. Think Chuck T’s style. Both use natural rubber soles, but I thing the women’s Weekender’s are grippier than the MK-19’s. The soles are also sewn on and glued, not just glued like other brands. Both have cordura lace security. This means that the nylon laces go through the cordura, keeping the tongue of the shoe in place. Cordura is also used for the pull strap, the one at the rear of your shoe, to help you pull it on. They also use an EVA mid-layer. What is EVA, I asked google: “An EVA midsole, made from ethylene vinyl acetate, helps to disperse weight and provide stability. This foam-like material is lightweight, flexible, and cushions the foot with each step.” 

  I’m not a big flip flop guy, which is why the MK-19’s are perfect for me. They are really comfortable. I did put in an insole, mainly because I needed more arch support. The MK-19’s are pretty flat inside. As of me looking on CFF’s website, the MK-19’s in tiger stripe camo, are not on it, but those are the ones I received. They are all black, with a green and black sole. All the MK-19’s are the same except for looks. When CFF says the shoes are “StickyAF” they are. My feet stick to the floor, no matter what the floor is made of. So far the MK-19’s have held up great.

  My daughter also received a pair of the Weekender’s. These are the female version of the MK-19. Hers are in the Green/Gum color, which is an almost OD green with a brownish sole. The also use a yellow canvas inside. A really nice looking shoe. She gets all kinds of compliments on them. I think the rubber sole on these is even stickier than the MK-19, but I am just going off of pushing them across the table. Griff did informed me that the soles are stickier because they have less color additive in them. Everything else is pretty much similar to the MK-19’s

  Here are my daughters thoughts:

  These Weekender’s have an incredible flexibility and fit. The sole molds to your feet and has a relaxed feeling to it. The sole is not too firm and not too soft, and it would be an understatement to say that these are the most comfortable shoes to wear all day. Everything about them is comfy and extremely wearable. The price is affordable and amazing for the quality of these shoes. I am so impressed with these shoes and I wear them almost everyday. They’re stylish and absolutely adorable. I would highly recommend these to anyone who is looking for a casual, but chic shoe, and one that is incredibly worth the price.

  If you are interested in Combat Flip Flops, go check them out. The shoes are awesome, the mission statement is fantastic, and they are helping to do good things. If your interested in the long story of how it all got started, go check out “Steps Ascending: Rise of the Unarmed Forces”. 

Firearms Insider Reviews - 8 Key Points

Claim to Fame:

Shoes made in war torn countries to supply girls with education

Target Market:

Those liking the mission statement and needing shoes

FNBs (Features & Benefits of this product):

  • Men's boot/shoe size 7–15

  • Women's sizes 5–11

  • HALF SIZES GO DOWN IN SIZE

  • Proprietary rubber outsole (StickyAF)

  • Proprietary EVA mid-layers

  • Canvas upper

  • Nylon laces

  •  8 eyelets on mens, 7 on womens

  • Cordura lace security

  • Funds 1 day of school for an Afghan girl

  • Combat Flip Flops Lifetime Warranty

What other aesthetic options or finishes are available?

Lots, just go to Combat Flip Flops

What others are saying?:

MK-19:

Great everyday shoe! 

5/5 stars on Combatflipflops.com

The soles are absolutely as grippy as advertised. I wouldn't suggest doing any facing movements wearing these, you'll be crying "corpsman!" in no time. The included insole is better than I thought, I didn't want to strip it out right away like most flat-soled shoes I buy. I probably still will eventually, but it's nice to have a shoe out-of-the-box comfy. The look is styling as all hell, blends great with almost any outfit. Even is reasonably water resistant, though I wouldn't suggest fording a creek or anything.

Only gripe is though while grippy beyond belief, the soles are thin. You feel everything through them. I wouldn't take these truly off-roading or hiking too much - definitely not deliberately. But for my urban commuter lifestyle, they're absolutely perfect.

Weekender

SO CUTE

5/5 stars on Combatflipflops.com

I received these shoes a couple of months ago in size 7 I wear a size 7.5 but they fit perfectly. They are SOOO comfortable and I'm always getting compliments on them. Seriously I could walk for ages.

Price point:

MSRP = $64.99 mens

$59.99 womens

I need it now! Availability:

Combat Flip Flops

Our Rating:

Pros:

  • Great story and mission statement

  • Comfortable

  • Sticky AF

  • Metal shoelace eyelets

  • Sewn on soles

  • Long shoelaces

Cons:

  • No half sizes

  • Color options

Score: 8.00 Great

80.jpg

Favorite Link:  Axelson Tactical

Velocity Adjustable Gas Block

  Velocity Precision is known mainly for their triggers. They have introduced some other items lately, One of those is an adjustable gas block for AR15 rifles. If you are looking to tune a suppressed rifle, or just want less strain on your rifle’s parts, an adjustable gas block just might be what you need.

  An adjustable gas block can be very useful. By allowing the gas system to be adjusted, one can “tune” the rifle. If you run a low mass bolt carrier group (BCG), adjusting the gas down, will smoothen out the recoil impulse, and not beat the crap out of your equipment. Suppressors are notorious for “over” gassing the recoil system. So tuning the gas block, when running suppressed, is also a big plus. Another advantage to an adjustable gas block is being able to tune your rifle or pistol for the specific ammunition you use. As you can see, there are numerous reasons why someone might want an adjustable gas block.

  The Velocity adjustable gas block has many features. It is of the “low profile” design, manufactured from stainless steel, and then black nitride coated. So it should last a lifetime. Velocity also cuts some diamond shapes in the gas block to help lighten it up. The gas block has a 0.750” journal diameter, which is pretty much the industry standard. Though I would like to see a 0.625” one for lightweight builds. The Velocity gas block uses 2 set screws on the bottom to clamp it down tight. Also included is a new gas tube roll pin, which was nice. Since the one that came with the gas tube went flying across my garage. It also comes with the allen wrenches to adjust it.

  Adjustment on the gas block is pretty straight forward. On the front of the gas block, is a brass set screw. The brass screw is used as a lock screw, to keep your adjustment from wandering. Loosen it first before making any adjustment on the adjustment screw. The gas adjustment screw is stainless steel, and located on the left side of the gas block. To adjust the gas flow, turn the SS screw clockwise to decrease the amount of gas being sent to the BCG, and turn it counter clockwise to increase the amount of gas to the BCG. Once you have it adjusted where you want it, tighten the brass screw back down. The SS adjustment screw just blocks off flow by making the gas hole smaller, simple as that. If you are switching between suppressed and un-suppressed, the gas block can get annoying to keep adjusting. But, Velocity coats both screws in hi-temp anti-seize for a lifetime of easy adjustability.

  I installed the Velocity adjustable gas block on a 7.5” AR pistol build. In my opinion, the shorter the barrel, the harsher the gas system is on the BCG. The barrel I used was not dimpled for a set screw style gas block. So I just lined up the Velocity gas block, and tightened those set screws down. The gas block hasn’t loosened up, or moved, on me yet. I did use some medium strength thread locker on the screws. I opened up the adjustment screw, all the way, at first. The pistol ran fine on an assortment of ammunition. I then proceeded to adjust it in, 1 turn at a time, until it started malfunctioning with the lightest loads that I regularly shoot. Then I backed it out ½ turn and locked it down with the brass screw. I get a much softer recoil impulse now that the gas system is adjusted for the AR pistol. It really did make for a much nicer shooting pistol. The only problem I ran into, was that the allen wrench provided was to short to tighten the lock screw, at least with my chosen handguard. This is not a Velocity Precision problem, it’s a handguard problem. So check your handguard to see if it blocks the adjustment screw. 

  The Velocity adjustable gas block can be useful. If you need some gas system adjustment, but won’t be adjusting it a lot, this might be exactly what you are looking for. The gas block is well made, fairly light, and won’t break the bank. Go take a look at Velocity Precision, gas blocks aren’t the only thing they make!

Firearms Insider Reviews - 8 Key Points

Claim to Fame:

0.750 sized adjustable gas block for AR15 type rifles

Target Market:

Builders, Suppressor users, competition shooters

FNBs (Features & Benefits of this product):

  • 0.750” journal diameter

  • 1.7 ounces

  • 303 Stainless Steel

  • Black Nitride coating

  • SS adjustment screw

  • Brass lock screw

  • Set Screw installation

  • Includes adjustment wrenches

What other aesthetic options or finishes are available?

None

What others are saying?:

Jon B. 5/5 stars at Velocity Precision

Can’t believe the quality of this gas block for the price. Fits great..installs easy…easy to adjust. What more could you ask for?!?!?

Link to other reviews:

None found

Price point:

MSRP = $59.95

Retail = Same

I need it now! Availability:

Velocity Precision

Our Rating:

Pros:

  • Lightweight

  • SS adjustment screw

  • Brass lock screw

  • Nitride coating

Cons:

  • Only Available for 0.750” barrel journals

  • Handguard can get in the way of adjustment

Score:  7.50 Good

75.jpg

Favorite Link:   


Tactical Kinetics AR15 Barrel

Tactical Kinetics is an aftermarket or OEM barrel manufacturer. I had not heard of them until I talked with them at Triggrcon. They produce all of their barrels, in house, from start to finish, in Tennessee. Currently they are offering AR15, AR10, and Glock style barrels. I was sent a 7.5” AR15 barrel for review, partly because that was the length I was looking for.

  What drew me to Tactical Kinetics was the all in house manufacturing. In my opinion, other barrel manufacturers buy barrel blanks, and then machine them for the intended purpose. Tactical Kinetics starts with a bar of raw steel, either 4150V grade Mil-spec B-11595E Chrome Moly Vanadium (CrMoV) or 416R stainless steel. They precision air-gauge and button rifle the barrels for accuracy. Drill appropriate size gas holes in them, if needed. Then thread, profile and heat treat them as needed. All in the USA.

  As mentioned, I received a 7.5” barrel from Tactical Kinetics. It is beautiful, to say the least. Superbly machined and Black Nitride coated. It came in a medium profile and chambered in .223 Wylde, with a 1:7 twist. It is made from 4150 CrMoV steel. Because it is a 7.5” AR barrel, it has the gas port drilled for a pistol length gas system and uses a 0.750 diameter gas block. The barrel is not dimpled or drilled at the gas block. The barrel extension is also installed, as it should be. The barrel extension is the M4 style. Being a .223 barrel, the muzzle is threaded ½-28. There is not a recessed, or target crown on the muzzle, most likely because the intended use is to screw a muzzle device on it anyhow.

  I installed the Tactical Kinetics barrel in an AR15 pistol. Installation was easy, as expected. I did use a Velocity Precision adjustable gas block. Mainly because this pistol may get suppressed. I first ran the gas block wide open, just to see how the pistol worked. Because Tactical Kinetics drills the proper gas port size, the pistol ran flawlessly with a standard buffer weight and BCG. I then adjusted down the gas block. I was pretty happy with the way the barrel helped make the pistol function.

  I may have been made fun of, but I did check barrel accuracy at 100 yards. So I mounted up a 3x9x40 scope and headed out to the range. Yes, it looked like a sci-fi weapon, but what else was I suppose to do to check the accuracy. Well, as expected, the barrel shoots. I was consistently getting 1.5” to 2.5” groups, off of a rest, with cheap plinking ammo. I did also shoot some 75 grain reloads I had, they shot a ¾” 3 round group, and then the flyer opened it up to 1.6” 5 round group. For a 7.5” 223 barrel, I couldn’t be happier with the accuracy. What am I really going to shoot at 100yds with a super short barrel anyhow? I even ran some 50 grain loads through the barrel to see if maybe they wouldn’t stabilize, but they shot fine.

  The short barrel makes for a real nice maneuverable rifle. I also put this barrelled upper on my SBR. Wow, what a dream this thing is to move from target to target. Then, I shot a steel plate match with a .22lr conversion kit in the Tactical Kinetics barrel. It also shot great with the slightly smaller .22lr bullets. What can I say, I like this barrel.

  Just because this is a short AR barrel, don’t rule out Tactical Kinetics for your next barrel purchase. They machine them from start to finish and even have reasonable prices. I’m happy with the performance of this barrel. Go give them a look at https://www.tacticalkinetics.com/

Firearms Insider Reviews - 8 Key Points

Claim to Fame:

In house made AR barrel

Target Market:

AR builders or OEM manufacturers 

FNBs (Features & Benefits of this product):

  • SAAMI spec .223 Wylde chambering

  • 1 in 7 twist rate

  • Button rifled

  • 7.5”

  • Pistol gas length

  • Uses .750” gas block

  • Medium profile

  • M4 extension

  • Black Nitride coated

  • 4150 CrMoV steel

What other aesthetic options or finishes are available?

Different Lengths, chamberings, and profiles. Also Glock barrels

Link to other reviews:

Gun World

Price point:

MSRP = $92.00

Retail = $87.00 at Tactical Kinetics

I need it now! Availability:

Tactical Kinetics

Our Rating:

Pros:

  • 100% made in house

  • .750 gas block diameter

  • 1:7 twist

  • .223 Wylde chambering

  • Accuracy

  • Proper gas port size

  • Made in USA

Cons:

  • Non recessed crown

Score: 8.50 GREAT

85.jpg

Favorite Link:   Black Bag Resources

Guntec Micro Breach pistol brace

 Guntec USA has a new pistol brace kit out. Yes, everyone has a pistol brace kit out now. But does the complete kit cost $69.95? Yeah, that’s what I said. I have found that Guntec parts are of good quality, especially for the price. The Micro Breach pistol brace falls into this category also.

  The Micro Breach is a blade style brace. A blade style brace has a triangle piece that sticks down from the AR buffer tube. By doing this, one is able to rest the brace against your forearm for support. There is also a slot in the angled piece. The slot can be used for a sling or to put a strap through, so you can affix it to your forearm. It is made from a Zytel polymer, so it should hold up to most gun maintenance supplies. It is also ATF approved.

  Since this brace is in a kit, it comes with everything needed for installation, minus the buffer tube wrench. Buffer tube, check. Spring and buffer, yep. Castle nut, uh huh. End plate with sling attachment, of course. Even the wrench to tighten down the brace to the buffer tube! 

Viewed from top of rifle

  Guntec’s brace is also adjustable. It is not as easy to adjust as a positional stock, but acceptable for a pistol brace. Just find the position that works best for you. Then tighten down the 2 bolts with the wrench provided. The 2 bolts essentially tighten down a clamp around the buffer tube. This system worked well and the brace has never moved on the buffer tube.

  The Micro Breach works okay. As a pistol brace, it falls short. It is not very comfortable to rest against your forearm or when strapped to your forearm. It has a decent look to it and is very sturdy. Now, if you were to accidentally put the pistol up to your shoulder (not legal advice), it makes a great substitution for a stock. Since the brace comes with everything, It would be a great way to shoot an AR build until your Short Barrelled Rifle (SBR) tax stamp comes back. The metal parts in the kit are decent quality, as I would expect from Guntec. If something were to happen to the kit, Guntec has you covered with their lifetime warranty

  The Micro Breach pistol brace might be an option for you. Especially if you are looking at it as an economical, get you through until your SBR paperwork comes back, option. Guntec also makes the brace kit for pistol caliber carbines. So if you are looking into a pistol brace, go give Guntec a look. They have always treated me well and make good products.


Firearms Insider Reviews - 8 Key Points

Claim to Fame:

Pistol Brace for AR15 pistols

Target Market:

Builders or those wanting a pistol brace for better control

FNBs (Features & Benefits of this product):

  • Adjustable length

  • ATF approved

  • Low profile

  • Complete kit, includes:

    • Buffer tube

    • Castle nut

    • Single point end plate

    • Recoil spring

    • 3 oz Buffer

    • Brace

  • Brace Length - 6.25”

  • 5 ounces, complete kit is 12 ounces

  • T6 aluminum for buffer tube

  • Brace is Zytel polymer composite

What other aesthetic options or finishes are available?

9mm version

What others are saying?:

Nothing found 

Link to other reviews:

Nothing found

Price point:

MSRP = $69.95

I need it now! Availability:

Guntec USA

Our Rating:

Pros:

  • Price

  • Complete kit

  • Locks down tight

Cons:

  • Not comfortable to use

  • Hard to strap to forearm

Score: 6.50 Okay

65.jpg

Favorite Link:   Walker Defense Research


XS F8 Night Sights

  XS Sights is known for their fast acquisition Big Dot sights. XS has come out with a more conventional night sight called the F8. These F8 sights combine the fastness of the “big dot” with the sight picture of a standard sight. When they first came out about a year ago, I was on the list for a review sample.

  First thing one notices on the F8’s is the big orange dot front sight. Inside this orange ring is a green tritium dot. The orange ring makes it extremely easy to pick up the front sight with the eye. Besides the glow from the tritium, the F8’s orange dot is photoluminescent and can be “charged” up with a flashlight, or other bright light. The white glow, from charging the front sight, lasts a few minutes. I even charged the dot up when just using my handheld flashlight, while dry firing with both the light and pistol. It just happened to get enough spill over to illuminate the dot. The tritium is also very bright, but more on that later.

  The rear sight uses the standard square notch style. This pairs nicely with the front sight. XS uses what they call a “wide notch rear”. This wider notch allows for more light on each side of the post, aiding in quicker pick up of the front sight. I really like this style of system. I tend to like narrower front posts and a wider rear. The F8 rear does this, but with a wider front post. More light on each side of the front sight picture is faster for me also. The tritium is a single dot below the notch of the rear sight. This is to give a dot over dot sight picture, or figure eight, as some call it. This is where the “8” in F8 comes into play. The rear sight is also very square shaped, with a slight angled overhang on the back side. Angling the rear sight slightly helps to reduce glare in certain lighting conditions. The squared shape also gives plenty of real estate for one handed slide manipulation. Another thing that is nice about the rear sight, it is all black with only the one tritium insert.

  I installed these on an aftermarket G17 slide. Installation was straight forward enough. XS provides a front sight tool and threadlocker in the box. The front sight was a little loose in the oval hole. I would have like it tighter. So what happens when you overtighten a screw, it breaks off in the first few rounds. XS has one of the best warranties in the business. I emailed them, and a few days later a new front sight showed up. Free of charge. So I followed the instructions perfectly for the new installation. A few months later, and hundreds of rounds, at a match, the front sight breaks off again. I emailed XS and even sent a video of when the sight fell off. I offered to buy a new one, NOPE. They sent me a shipping label to send the slide in for them to install the front sight! I have had no problems with the front sight since. They get a 10/10 for customer service. Now onto the rear. I coated the dovetail with XS’s threadlocker, slid the sight in, and tightened down the 2 set screws. I was done, and it hasn’t ever moved on me.

Low light, no photoluminescence

After shining flashlight on front sight (photoluminescent glow)

  As a combined sight set, the F8’s really shine. They are slightly taller than most factory sights, which I like. But not so tall that they can be called suppressor sights. The front is 0.280” tall, and the rear is 0.300” tall. The tritium is super bright. I just love the sight picture I get. Everything needed for installation is in the package (threadlocker, sight tool, allen wrench). The height, along with the bright orange front, really does make them easy to get on target fast.

  If you hadn’t guessed by now, I like these sights. XS Sights did a fantastic job with the F8’s. If you are in the market for some night sights, or just a really good sight, definitely go check out the F8’s. The warranty is also fantastic!

Firearms Insider Reviews - 8 Key Points

Claim to Fame:

Night sights with photoluminescent front sight

Target Market:

People wanting fast, easy to see sights

FNBs (Features & Benefits of this product):

  • Tritium

  • Orange color front ring around tritium

  • Glow dot front sight

  • 0.160” front sight blade width

  • Wide, square notch rear sight

  • Rear sight ledge

  • 10 year warranty

  • Figure eight sight picture

What other aesthetic options or finishes are available?

Other handgun models

What others are saying?:

Imaposer on Amazon 5/5 stars

My favorite pistol sights of all time!

I absolutely LOVE these sights! I installed a set on my G19 last year. After using them a bit I decided that they were the best sights I'd even used on a defensive type handgun. Yes, they are larger than most. And for my eyes that along with the orange front sight ring makes them very fast to acquire. I've used XS Big Dots for years... since they were called Ashley Express Sights if that tells you anything. And while I always found them fast to acquire a flash sight picture with, I never felt that they offered much precision. Especially in terms of elevation. With the F8 on the other hand, I think they're just as fast. Maybe even faster since the more traditional sight picture gives me a very quick reference of elevation as well as equal light. While the Big Dot is quick to pick up, I often found myself losing time trying to get the front centered in the shallow rear trough and trying to get the front dot at just the right height above it... Just didn't work as well as the theory would suggest. For me at least.

A secondary thing that I like, other than the speed and visibility of these sights, is the rear sight. The height combined with the profile of the leading edge makes these the easiest sight I've ever used to do one handed manipulations with. I can easily run the slide on my belt, boot heel, table top, edge of a door jamb, and just about any solid surface I can press the rear sight against. And much more securely than any other I've used. Speed of acquisition and precision is obviously the primary focus of sights for me, but this is an added bonus, IMO.

This review is for the second set of these that I've purchased as since using them on the G19 I decided to put them on my new G43. And now I've considering replacing the Big Dots on a couple of other pistols, and an almost brand new set of Truglo TFX Pros on another, with these as well. Yes! I like these that much! And currently there's nothing else on the market I'd even consider buying.

Link to other reviews:

GunDigest

Price point:

MSRP = $142.00

Retail = $127.80 on Amazon

I need it now! Availability:

XS Sights or Amazon

Our Rating:

Pros:

  • Easy to pick up front sight

  • Good sight picture

  • Sight “Glow”

  • Bright Tritium

  • Excellent Warranty

  • Everything needed is in the package (Allen wrench, loctite, front sight tool)

Cons:

  • Wide front blade

  • Tritium washes out (a fault of all tritium sights)

  • Loose fit on front sight

Score: 8.5 Great

9.5 for customer service

85.jpg

Favorite Link:  Freedom Flag Products


Taccom Delayed Blowback buffer system

  Taccom has come on the market with a delayed blowback pistol caliber carbine (PCC) buffer. We discussed it on Episode 282 of the Gun & Gear Review Podcast. I was intrigued by the way it functioned, so I talked with Taccom and they sent one to review. Taccom has been really coming on strong with products for the 3-gun market.

  As mentioned, this system is a delayed carbine buffer system for AR pattern PCC’s. How do they delay blowback in a straight blowback system? Taccom uses rare earth magnets, that’s how. The magnets literally delay the blowback, for a split second. This results in lowering the pressure used to send the bolt backwards, thus reducing the recoil impulse. It is nice to see Taccom thinking outside the norm with this system.

  I installed the Taccom buffer system in a 9mm PCC. As noted, if you have a bolt with a weight in it, you must remove the weight for the system to properly work. Since the system is self contained, you can also opt to remove the buffer retainer and spring. I used it both ways and it made no difference. It is made to be used in Carbine buffer tubes, not rifle length tubes. Being that it uses a flat recoil spring, and is self contained, it does reduce some of the “twang” noise associated with the standard AR buffer/spring/tube system.

  After first installing the delayed buffer system, you immediately notice some differences. First up, it is quite a bit harder to charge the system. The magnetic delay system is really noticeable. It is not a problem, kind of like the difference between pulling the slide back on a 9mm pistol versus a .22lr pistol. Next is the “Short Stroke System”. With the delayed system, the buffer doesn’t allow the bolt to travel reward as much as a standard recoil system. This makes it not possible to use the bolt hold open. I really disliked this function, as I couldn’t lock the bolt back during matches, or when the gun runs out of ammunition in the magazine. Besides those, everything else works the same as a standard AR.

  I can see the benefits to the Taccom delayed buffer system. It definitely reduced the recoil impulse, making it easier to get back on target fast. I ran a bunch of different types of 9mm ammo through the system. Practice ammo would sometimes cause the system to short stroke, as the system was not quite travelling all the way to the rear. This was pretty common. Sometimes it would load a round but not reset the hammer, other times it wouldn’t even load a round. It did this with both the Stern Defense adapter, and the Endomag

  The Taccom system is lighter than what I previously was using. My stock system weighed in at 8.3 ounces. The Taccom weighs in at 7.3 ounces. So I did save a little over an ounce while reducing felt recoil. PCC’s tend to be heavier due to all the moving mass in the blowback system, so an ounce could possibly make a difference for some people.

  Taccom is innovating with this delayed buffer system. I would like to see it with a bolt hold open. It does delay the system and reduce recoil. So if you are looking at pistol caliber carbine stuff, or 3-gun specific parts, go check out Taccom.

Firearms Insider Reviews - 8 Key Points

Claim to Fame:

Reduced recoil system for Pistol Caliber Carbines (PCC)

Target Market:

Competition PCC shooters

FNBs (Features & Benefits of this product):

  • Momentarily delays movement of the 9mm bolt

  • Provides for less felt recoil, less sight bounce

  • Flat wire recoil spring

  • Second stage cushion at the end of the recoil stroke

  • Works in any carbine buffer tube

  • Short stroked system - No bolt hold open

  • Works with any ‘hollow’ pistol caliber bolt**

  • Self contained system, no need for traditional detent pin

What other aesthetic options or finishes are available?

None

What others are saying?:

Nothing found

Link to other reviews:

Nothing much, just a few forum discussions 

Price point:

MSRP = $149.95

I need it now! Availability:

Taccom

Our Rating:

Pros:

  • Less felt recoil

  • Faster follow up shots

  • Delay system

Cons:

  • No bolt hold open

  • Significantly harder to hand cycle

  • Short strokes

Score: 6.50 Okay

65.jpg

Favorite Link:   2A lifestyle podcast

KnightFall Customs OWB Teklok holster

I was looking around for an outside the waistband (OWB), competition-ish style holster when I ran across KnightFall Customs. Since they made one for Polymer 80 style pistols, I sent off an interest email. I hadn’t found many holster manufacturers’ that made the style holster I was looking for. KnightFall Customs sent this one for review, and it is appreciated.

  As one would guess, this is a molded Kydex holster. The OWB holster KnightFall sent was their OWB Teklok / Paddle, in black, but other colors are available. The holster is nicely molded. So much so, that it flows nicely around the contour of the pistol. There are no really sharp edges. If you like polished edges on your kydex, you can get it as an option. It is also open at the bottom so that longer / compensated pistols will fit. The molded in sight channel is very tall and will allow for “suppressor height” sights.  Lead times can vary, but they are still usually fairly short compared to some other holster manufacturers. 

  Now for the real reasons I wanted to try out the holster. First, it could be had with a TekLok belt mount. The Bladetech TekLok, is adjustable for different width belts, and then it actually has a little fold up lock to keep it on your belt. Mounting a TekLok, on a holster, also sets the holster farther away from your body. I’ve used the TekLok before, and so for a “competition style” holster, this was great. The zero cant was also a feature I was looking for. I like straight draws when using a holster for competition. Since I have a mini red dot on this particular pistol, I needed a holster that had an “RMR” option. The KnightFall has an RMR option, which cuts out the front of the holster to allow for the sight. This also can make the pistol presentation quicker, by allowing the gun to clear the holster sooner. This holster also has 2 tension adjustment screws. A nice feature for someone running different pistols in the same holster, like me. 

  This KnightFall holster is for a Polymer 80 PF940v2 with a 17 slide. Basically a fullsize pistol. Being that it has an open bottom, I was also able to fit my compact Polymer 80 in it, with the compensator. It also fits without the comp. I would have liked the holster to come with more drop, but that’s me. The holster makes the pistol ride about halfway above, and halfway below the beltline. I didn’t have any problems using it this way, just a personal preference.

  I really like the function of the Knightfall holster. Draws are super smooth, partly because of the adjustable retention. The pistol “snaps” in and out no matter where the retention is set. A testament to the molding process. I have shot 2 steel matches and one other match with the Knightfall. During these matches I carried the gun for at least 5 hrs. At no time did it feel uncomfortable, nor did I worry about the pistol falling out if I bumped up against it. I am also able to get a full grip on the pistol before the draw stroke. There is no extra kydex in the way, and the holster is cut upward a little too allow for the P80’s undercut trigger guard. 

  KnightFall Customs makes other style holsters also. If you’re in the market for this style of holster, or any other style, I would go check them out. Prices are on par with other places and the quality is top notch.

Firearms Insider Reviews - 8 Key Points

Claim to Fame:

Outside the Waistband holster with Teklok mounting

Target Market:

Competition shooters, Tactical Carriers

FNBs (Features & Benefits of this product):

  • Kydex

  • Teklok belt mounting

  • Options for Polymer 80’s

  • Straight Cant

  • Optic sight cut

  • Adjustable retention

  • Made in Alaska

What other aesthetic options or finishes are available?

Patterns, Colors, and Cuts

What others are saying?:

Adam at Knightfall Customs 5/5 stars

MY FAVORITE HOLSTER FOR OWB

I was having a hard time finding a holster for my P80 build with a compensator, then I saw these and thought I'd give it a try. Customer Service was very responsive, and even did custom mounting holes for the Safariland QLS system. Very happy with it, will be buying another soon for a G34 P80 bild.

Link to other reviews:

Nothing found for this particular holster

Price point:

MSRP = $69.99

I need it now! Availability:

Knightfall Customs

Our Rating:

Pros:

  • Optics cut out

  • Adjustable retention

  • Open bottom

  • Teklok

  • Available for Polymer 80, Faxon, and Grey Ghost pistols

Cons:

  • Lead time can vary

  • $5 for polished edges

  • Would like more drop from beltline

Score: 8.00 Great

80.jpg

Favorite Link:   Atibal

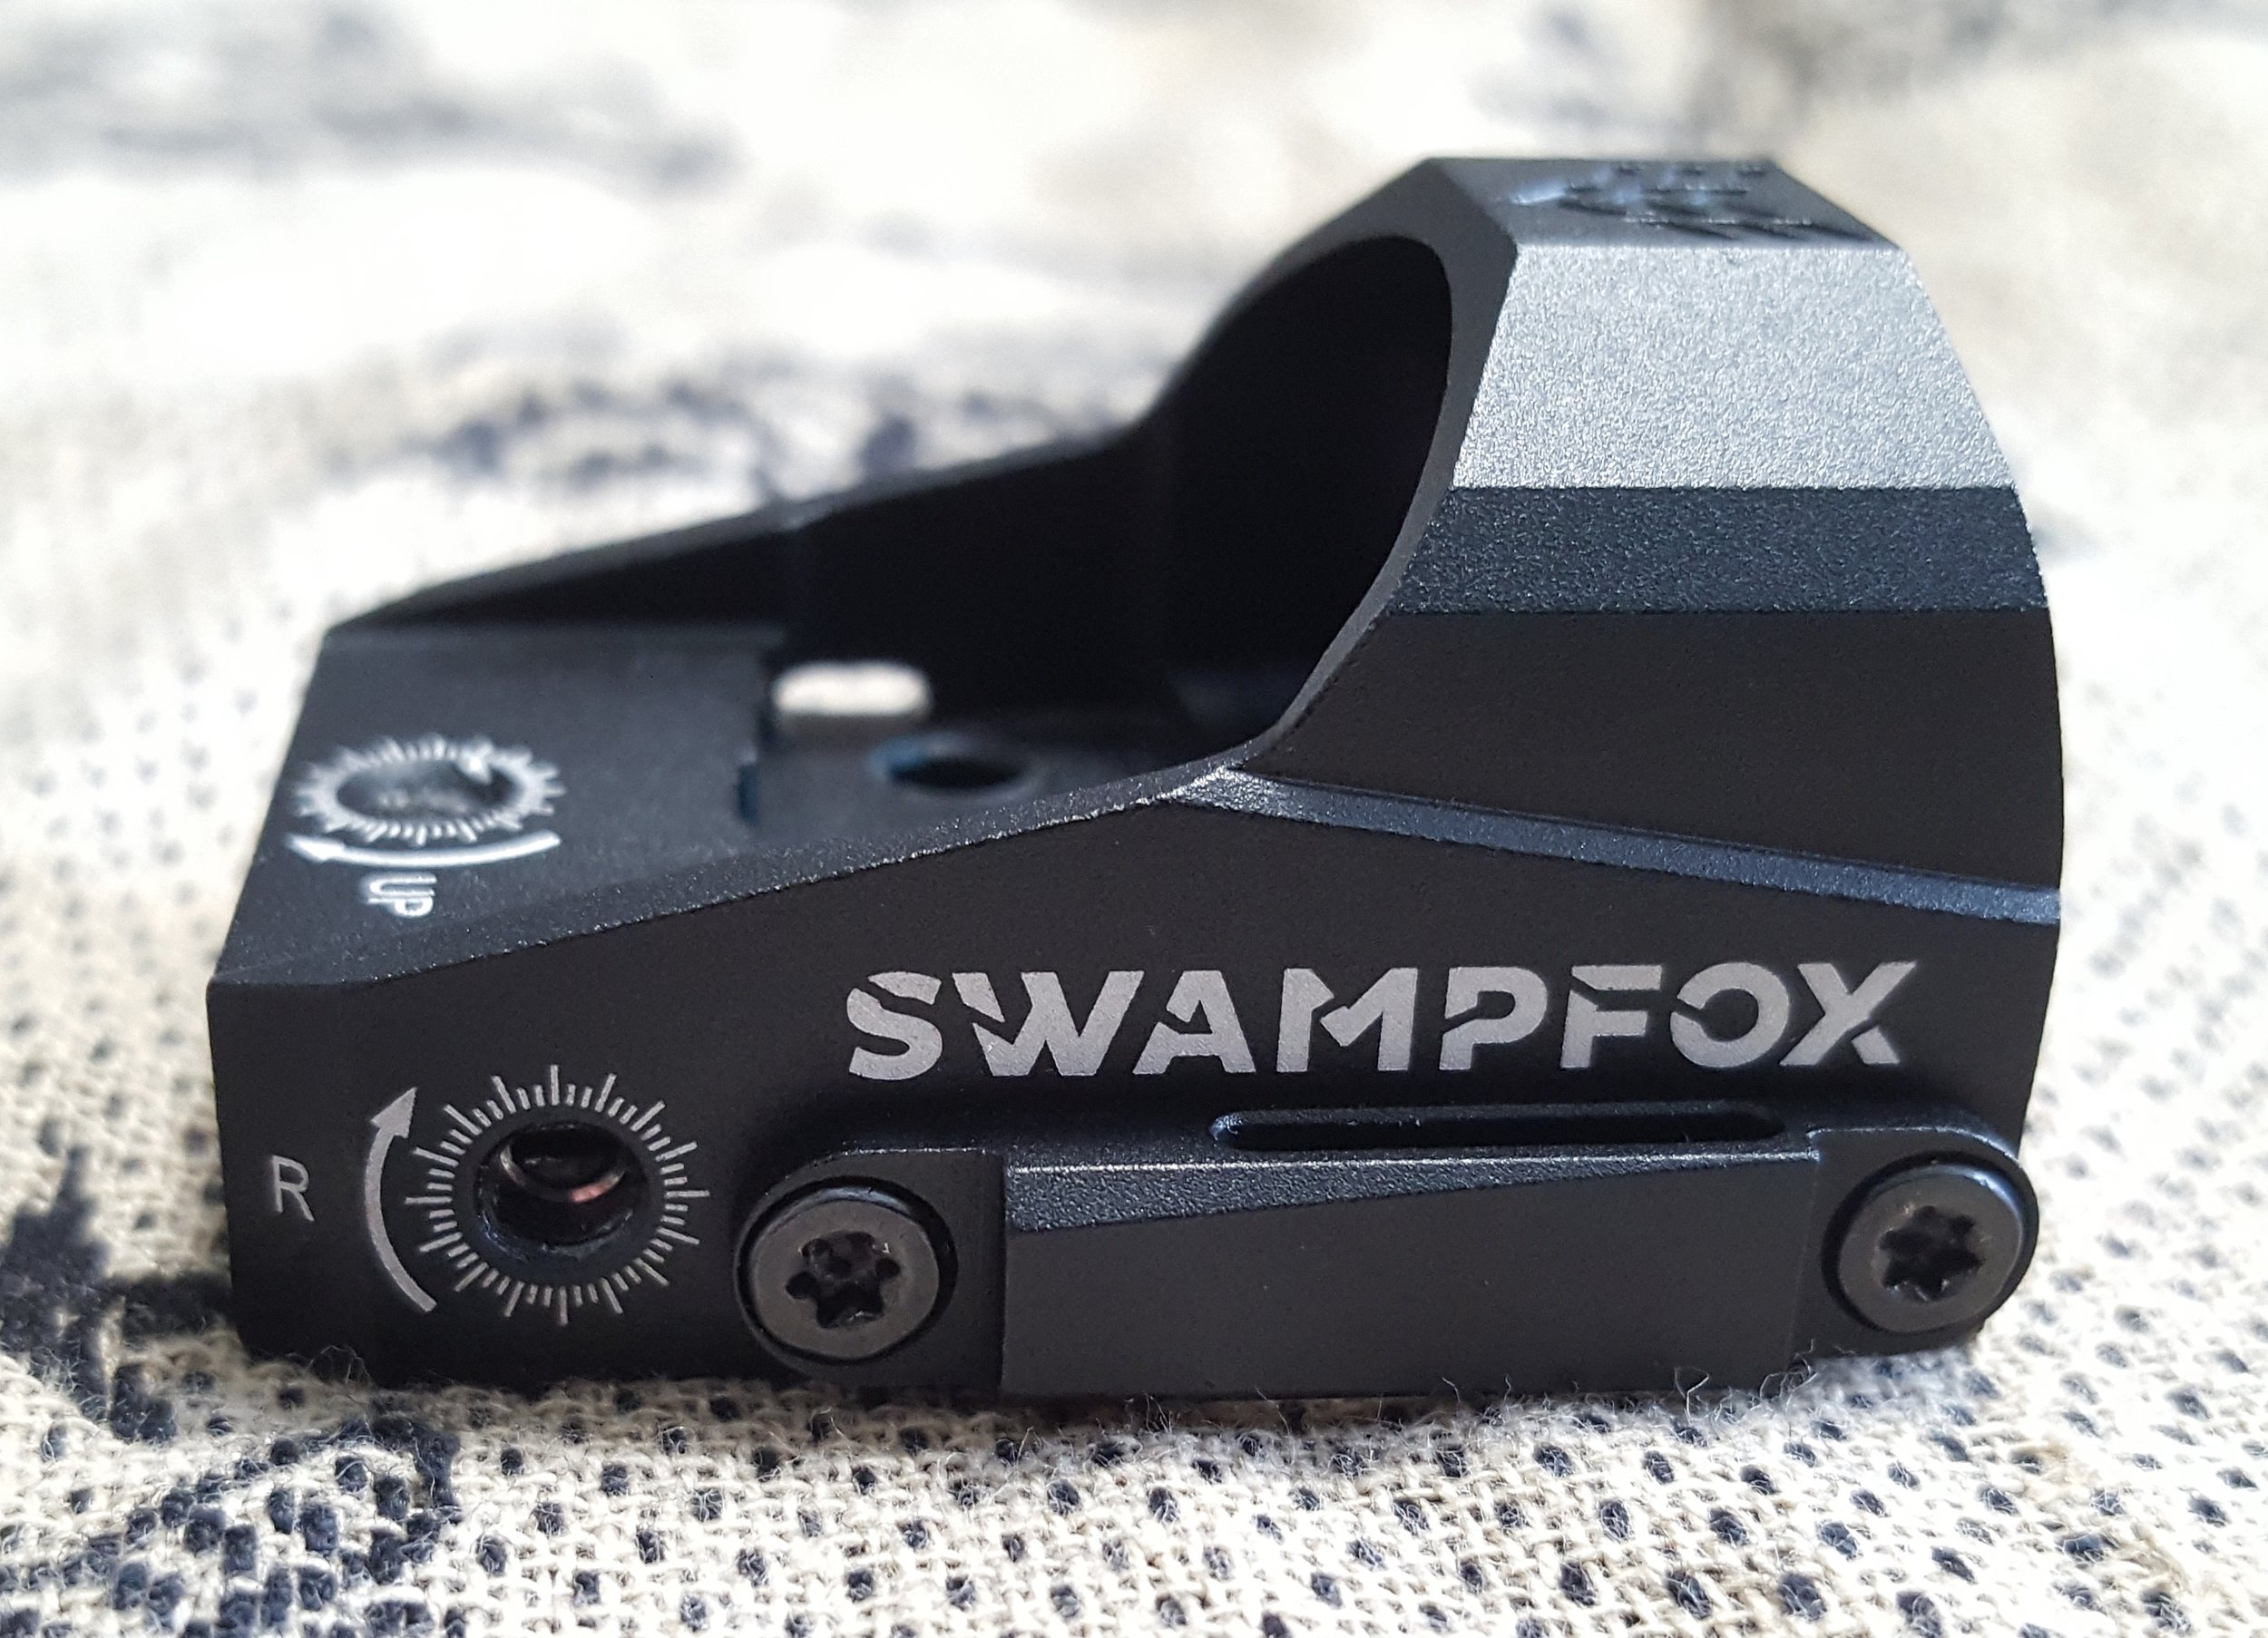
Swampfox Kingslayer

Swampfox Optics is a new optics manufacturer. They seem to be doing some good things, like the Kingslayer. The Kingslayer is a micro red dot. When I first heard about these, I ask for a review one. They shipped one right out and here we are.

  The Kingslayer micro red dot is your typical reflex sight. It mounts using the industry standard RMR footprint. A huge plus when mounting it on a pistol slide. It also comes with a picatinny mount. As one can expect, it is fairly small at 1”w x 1”h x 1.8”l. The size gives it a 22mm window to look through. I found the 3 MOA dot to be very useful. Not too small, but not too large, kind of in the easy to pick up and see category. Weighing in at 1 ounce, it is very light.

sf6.jpg

  Function of the Kingslayer is pretty self explanatory. There is an up and down arrow button on the side. This increases and decreases the brightness. The up arrow also turns the sight on when pushed. The down arrow will turn the sight of after holding it down for about 3-5 seconds. Also the Kingslayer has an auto off after 4 hours of button inactivity. Now comes one of the deal breakers for me, the battery life. The kingslayer uses a CR1632 battery. It’s smaller than your normal CR2032. Battery life is stated at 200 hrs on the high setting, and 3000 hrs on the lowest. The one saving grace to the battery life is the fact that the battery tray is on the side of the unit. No taking it off to change the battery.

  After receiving the Kingslayer, I mounted up on my Grey Ghost slide. Partly because it has an RMR cut-out. No problems with mounting. I then zeroed it. It has tiny screws for windage and elevation. The screws are snug and take a little bit of force to turn. A good thing since they are not “click” adjustable. Then I preceded to……..break it. While moving stuff around on a tall bench, the pistol fell onto concrete, on the Kingslayer. The fall was from 4 feet. The glass in the Kingslayer cracked, ugh! I could still see the dot, and it held zero, so I shot it a little bit. When I contacted Swampfox, they immediately sent me a call tag and replaced it with a new one. I’ve been a little more careful with this one. 

  Besides my self induced problems, the Kingslayer has worked well. It’s held zero, even after taking it off and installing it on a different slide, and then back. The side battery tray is a nice feature. The 3 MOA dot is easily picked up, but not as well as some . I attribute this to the 22mm window size. It is noticeably smaller than some of the other micro red dots I’ve used. It could just be the shape. For a fairly reasonable priced micro red dot, it seems to perform as advertised.

  If your in the market for a slide mounted red dot, the Kingslayer might just be the ticket. At around $200, it is a good way to try out using a slide mounted red dot. If you then decide to upgrade to a “name”, you can put it on something else with the picatinny mount. Go check out Swampfox Optics, they seem to be doing some decent stuff.

Firearms Insider Reviews - 8 Key Points

Claim to Fame:

Micro Red Dot on RMR footprint

Target Market:

Those wanting a Micro Red Dot

FNBs (Features & Benefits of this product):

  • 3 MOA dot

  • 10  Illumination settings

  • IPX7 waterproof to 1 meter

  • Shockproof to 800G’s

  • CR 1632 battery

  • 1500 hr battery life

  • 1,8”(length) * 1” (width) * 1.0”(height)/ 1.4"(height) with mount

  • 1 oz without mount / 1.3 oz with mount

  • Multi coated lens MOA windage and elevation adjustments

  • 4 hr auto off after button inactivity

  • Side battery tray

  • 50,000 round guaranty

  • 22mm lens diameter

What other aesthetic options or finishes are available?

Red or Green Circle dot

What others are saying?:

Doug on Swampfoxoptics 5/5 stars

Ok sooo a long story... I bought a Kingslayer off of eBay from an armed forces officer that had bought two. I’m a special operations officer and deal with very expensive equipment. The good: the product is solid, crystal clear glass and great concise dot. 

The bad: the thing drained batteries like nobody’s business even in the off position. 

The amazing: I contacted Swampfox via email even though I didn’t purchase it from them. In a matter of minutes I was contacted back and advised that they would honor their warranty and would ship a replacement and mailing slip right out. I received it only to find it had the same issue. Once again I contacted Swampfox and again I was immediately contacted back. This time they were not so fast to just send a replacement, Robert and Chris worked with me hand and hand for days trying to find the glitch. At no time in this process was I ever degraded, ignored or told it was operator error. We never could quite figure out the issue so I kinda just called it a wash for buying something second hand. About a month after our last conversation I was contacted by Robert and Chris who stated that they had found a virus in the tiny circuit board and had fixed all the issues and that they were sending me a brand new redesigned model and a postage paid slip for my return as well as everyone that owned a Kingslayer! This was a long process and my optics have to work every single time they are asked to or they cannot be used due to what I do. I have waited -on purpose - to write this review so that I can state with confidence that the optic is reliable. The Kingslayer is amazing crystal clear glass that rivals optics I run that cost HUNDREDS more. I have run the optic on a pistol, ar, and mp5 with zero malfunctions. But more impressive than the optic is the company. The team at Swampfox could have easily denied my claim due to me purchasing second hand and that is even stated in the fine print of their warranty. Swampfox never batted an eye at my claims, never tried to cover up a problem and never tried to sidestep my communication. The optic I received is still on the original battery, has been used extensively and has held zero on whatever I mounted it on. For the price I believe this is one of the best red dots on the market and the company service is second to none.

Link to other reviews:

Pew Pew Tactical

Price point:

MSRP = $219.99

Retail = $170.99 at OpticsPlanet

I need it now! Availability:

SwampFox or Optics Planet

Our Rating:

Pros:

  • Price

  • Clear dot

  • RMR pattern mount

  • 3 MOA dot

  • Side mount battery

Cons:

  • Window size

  • Battery Life

  • Battery size

Score: 6.50 Okay

65.jpg

Favorite Link:  Freedom Flag Products


Freedom Flag G17 slide w/Nevada Cerakote

  If you haven’t heard of Freedom Flag Products, you should go look them up. About a year ago, they collaborated with Nevada Cerakote to send me one of their G17 slides. When they ask what model or cerakote I wanted, I left it up to both of them. Freedom Flag also makes AR products, as well as other Glock style slides. The review slide they sent me is in their “Track Style”, without an optic cutout.

  I can’t really describe the “Track Style”, but it is not a typical cookie cutter slide. It has some oblong, straight up and down, cuts at the rear for cocking serrations. Then down the rest of the slide it has, what I like to call them, mathematical shaped recesses. At the front of the slide, there are also 2 angled cuts with 3 slots cut in them. On the top front, is also a diamond shape recess with 2 slots. So a compensated barrel might work with this slide. Freedom Flag’s slides are for Gen 3 style pistols, this includes Polymer 80’s. They also come in 5 more standard cuts, in case you don’t like this style. An RMR cut is $50 more, if that’s your thing.

  As I would expect, the machining on this slide is spot on. I couldn’t detect a single mill mark. Yes you can see marks through cerakoted parts. The Glock slide parts kit installed with zero problems and everything works smooth as butter. This is the second slide that Freedom Flag has sent me, which is why the review has taken so long. The first slide they sent had a very, and I mean very, small tool mark on the angled cut. I was okay with it, but they pretty much demanded I send it back, so I did. That’s top notch service. I don’t know if this slide is the same one, or a new one, but I suspect it’s new. The rear sight cut was spot on, and I had zero problems installing the rear sight. The front slot seemed a tiny bit larger than I needed, I could twist the front sight ever so slightly when tightening it down. I measured it, and it was within Glock factory specs, so it must have been the front sight and not the slide. All in all, they do an excellent machining job.

  All Freedom Flag’s slides are Cerakoted. As mentioned, this slide was sent to Nevada Cerakote for some magic. I told them to also surprise me and that it was being installed on a gray Polymer 80 frame. Nevada Cerakote did not let me down. They did a 4 color gray/black camo on it that looks amazing. The colors are blended together so smooth that you can’t even feel where one ends and the other begins. 

  Nevada Cerakote is pretty big in the cerakote market. They have their hands in lots of one off coatings for trade shows, like SHOT. They are factory trained and certified by Cerakote. But really, they just do a great cerakote and have great ideas for patterns. If you are looking to have something coated, please go check out Nevada Cerakote.

  The Track Style slide is a great addition to my Polymer 80. In fact I purposely bought the Poly 80 frame for the original slide. The slide mounted up easy. It slid right on and cycled smoothly. Frame to slide fit was phenomenal. Not so tight that I needed to break it in, but not loose either. I can barely wiggle the slide. To top it all off, the pistol cycles fine, even when the slide was brand new. When I first installed the slide, if you rode the slide closed on an empty magazine, it would stop about ¼” from going into battery. After 50 or so rounds, that stopped. It never did it using the slide release or sling shotting the slide. I’m using as Faxon barrel with the Freedom Flag slide. As expected, it shoots great. Both a testament to the slide and barrel.

  When using the Track Slide, I used it in a few OWB holsters. It fit fine in both of them. I did have to loosen the tension screws on both. I attributed this to the fairly squarish style of this slide. Not a big deal at all, more of just a heads up. To go along with this, the cerakote has not worn off the edges either. Another testament to the Nevada Cerakote quality.

  If you are in the market for a Glock slide, Freedom Flag does a fine job. They even make a slide that converts a G19 size frame into a G17 length slide and barrel. The slide is 100% made in the USA and at a competitive price. Definitely go give Freedom Flag a look, as well as Nevada Cerakote.

Firearms Insider Reviews - 8 Key Points

Claim to Fame:

Fully machined Glock Gen 3 slide with cerakote

Target Market:

Those wanting a unique, quality slide for their Glock or Glock style pistol

FNBs (Features & Benefits of this product):

  • “Track Style”

  • Designed for Gen3 guns, will not fit a Gen4

  • Cerakoted 

  • Optional Laser Etching

  • Tighter tolerances for increased accuracy, reliability, and performance

  • Precision machined from heat treated 4150 barrel steel

  • Barrel lock-up manufactured with tighter tolerances

  • When used with a match-quality barrel, accuracy will be greatly increased

  • 100% Made in the USA

  • Compatible with Polymer80 Frames

  • Tested for function

What other aesthetic options or finishes are available?

Lots of single colors, or ask about special Cerakote

What others are saying?

5/5 stars - Fantastic and Durable Slide

I bought a graphite black slide a few months ago to go with a Polymer 80 G17 I built. Taking it out of the box, it's a really good looking slide. The front serrations are very tactile and the back are equally good. When fitting it to the gun, it was indeed a very tight fit, but that really is a good thing. I did have to file a little bit on the inside of the slide around the barrel lock-up, but that was primarily due to the aftermarket barrel being a little out of spec. Once I fixed that, it worked great. I now have over 1k rounds through the slide and no issues. I've used it in the Limited Division at a USPSA match and it was great there, even got a couple compliments. I highly recommend filing in the logo on top of the slide with white to make it pop. Overall, I could not be happier. The customer service is very good and personal, and the shipping was quick. If you're on the fence about it, just do it! You won't find a better custom slide for the money

Link to other reviews:

Holster Reviewer on YouTube

Price point:

MSRP = $249.99, $400 as tested

MSRP (Cerakote) - $150 for 4 color camo

I need it now! Availability:

Freedom Flag Parts 

Nevada Cerakote

Our Rating:

Pros:

  • Tight slide to frame fit

  • Good barrel lock up

  • Custom Cerakote finish

  • Unique design

Cons:

  • Square (holster fit)

  • No front cocking serrations on this model

Score: 8.5 Great

85.jpg

Favorite Link:   Axelson Tactical

Build a Custom 10/22 Step by Step

  Just about everyone owns a Ruger 10/22. They are fantastically fun guns to shoot and build. Amilcar Hernandez has written a book called “Build a custom 10/22, step by step”. In this book we learn how to upgrade and/or build a 10/22. I was asked if I would like to get a copy to review, and being that I really like 10/22’s, I said sure.

  As with most “do it yourself” style books, Amilcar takes you through the process, literally, step by step. It is 175 pages long, but reads quickly. Up first is the Introduction and Things to Consider chapters. The Intro is really just that, an intro. However the “Things to Consider” chapter helps you determine what you want out of your rifle. Is the main use plinking, hunting, or target shooting. Then it goes into more detail on each.

  The layout of the book is very helpful. It walks you from a chapter on “Budget”, all the way through to a “Lubricant” section. I found the way each chapter built on itself, very useful. Amilcar also puts “references” in every chapter. Very helpful if you would like to look something up.

  Probably the most useful part of the book is the hands on explanations. In the “Bolt” chapter, it goes into how to polish the factory bolt and to what advantage the polishing has. The “Barrel” chapter has a section on different types of 10/22 barrels. From thread-in to press-fit, etc, and why you would want one over the other. The “Trigger” section is fairly lengthy, as it probably should be. Then the book moves on to “stocks, magazines, ammunition, sights”, and so on. Basically the book is a wealth of knowledge that Mr. Hernandez has compiled over the years.

  The “Build a custom 10/22, step by step” is a really good book. I learned some things, as will probably anyone who reads this book. My favorite part is the “Gallery” section at the end of the book. It has numerous 10/22 builds. All with a short build sheets as to which parts were used. This is probably one of those books that I will look at 100 times. Gaining little bits of info here and there.

  Not as involved as a machinists, build from scratch, book. The build a custom 10/22 book has a lot of good information. Just set it on your coffee table, pick it up when you see fit, look at all the detailed pictures, and decide to build a 10/22. I probably would have overlooked a book like this on Amazon, because you need to see it to appreciate it. Amilcar does a nice job and I am glad I was fortunate enough to get one

Firearms Insider Reviews - 8 Key Points

Claim to Fame:

Book detailing how to go about building a 10/22

Target Market:

Those wanting to upgrade or build a 10/22

FNBs (Features & Benefits of this product):

  • Describes what to do and where to go for your 10/22 build

  • Paperback

What other aesthetic options or finishes are available?

Kindle Version

What others are saying?:

Mandi 5/5 stars on Amazon

Great Literature, and Pictures both for the beginner builder as well as a veteran.

Highly recommend this book to anyone that owns, builds, or shoots a 10/22. Has everything you need to know.

Link to other reviews:

No real reviews, just press releases

Price point:

MSRP = $29.99

Retail = $15.99-29.99

I need it now! Availability:

Amazon

Our Rating:

Pros:

  • Easy reading

  • Photo’s

  • Chapter organization

  • Build lists in “Gallery” section

  • Minor gunsmithing instructions

Cons:

  • Few grammar and spelling issues

  • Actual web links will be outdated someday

  • Price for soft cover

Score: 7.50 Good

75.jpg

Favorite Link:   Axelson Tactical

EndoMag

  Mean Arms came into the Pistol Caliber Carbine (PCC) market with an interesting idea. They made a 9mm insert for Magpul Pmags, called the “EndoMag”. This eliminates having to use a special lower receiver or magazine adapter. I was intrigued after we discussed them on the Gun & Gear Review Podcast. Mean Arms kindly sent one for review.

  The Endomag is not your standard magwell adapter. First up, it goes inside a Gen 2 or 3 Pmag body. Just take your Pmag apart and set your spring and follower somewhere. Now, depending on where you live, cut the Endomag to the required magazine capacity. It has marks for 15, 20, and 30 rounds and comes in a 10 round configuration. The included instructions tell you how to do this and it is super simple. I cut mine to accept 30 rounds. Then all you need to do is slide the Endomag assembly into the Pmag body and install the floorplate. It is now ready to be used.

  Before using the Endomag, it is recommended that you break it in. Basically, it involves testing to make sure the mag body doesn’t rub the bolt. Then testing cycling, by hand, with the Endomag installed. Again, the instructions are very useful here. I could feel the bolt rubbing a little on the one they sent me. I just did as instructed and have had no issues.

  The Endomag has some great benefits, and a few that leave me wanting something else. I love the ability to load rounds just by pushing them down, much like a standard AR magazine. This is because the Endomag is a double column, double feed magazine, much like the Colt 9mm style magazines. The Endomag also features a last round bolt hold open feature. My biggest complaint about the Endomag is the built in ejector. It functions great, but takes some training to unload the firearm. One has to cycle the bolt back by hand to eject the live round. Then while the bolt is back, you have to drop the magazine. If you drop the Endomag out before cycling the action, the round will not eject, and thus just go right back into the firing chamber. Like I said, this is a training issue, but during a competition this could confuse some people and maybe even cause an unsafe condition. Besides this training issue, the Endomag doesn’t require any other learning curve. It is the same size as a standard magazine, therefore it fits in all your gear. All the rifle’s controls will also be the same, especially the magazine release button. I also noticed that the magazine spring, that Mean Arms uses in the Endomag, looks very much like the spring that came out of the standard Pmag. So much that I would guess it is the same spring. The EndoMag also lets one “try out” a PCC without having to purchase a lower receiver or magwell adapter. Of course you would still need a complete 9mm upper.

  I used the Endomag a lot. As expected, it ran like a champ. If I had a failure, it was minor, because I don’t remember any. One of the nice features about installing the Endomag in a Pmag body is that you can mark the Pmag with “9mm” in the dot matrix! That way you have a better chance of not getting your magazines confused. As far as training with the Endomag, I give it a thumbs up. 9mm is cheaper than 5.56/223, and has about the same felt recoil. So you can get some good training in, for cheaper.

  Mean Arms has a good idea with the Endomag. It has some decent features to aid in training. Goes into a magazine body that you probably already have, and works fantastic. I just had to get over the ejecting a round before dropping the magazine. If you think the Endomag is for you, go give one a try, they are inexpensive enough to see.

Firearms Insider Reviews - 8 Key Points

Claim to Fame:

9mm magazine kit for converting standard AR-15’s to 9mm without a magwell insert

Target Market:

Those wanting a 9mm carbine without the added cost of an adapter

FNBs (Features & Benefits of this product):

  • Converts a Magpul 30-round 5.56x45 PMAG (Gen 2 and 3) to 9mm

  • Functions as a standard AR magazine

  • No magwell adapter needed

  • Uses a standard AR15 receiver

  • Insert comes fully assembled.

  • Uses same controls as a standard AR

  • Uses standard mag pouches, etc.

  • Last round bolt hold open

  • Lifetime warranty

  • Built in Ejector

  • Compatible with Colt and Glock style BCG’s

  • Indents for 15, 20, and 30 round options, Ships as 10 round capacity

What other aesthetic options or finishes are available?

None

What others are saying?:

Charles F.  5/5 stars @RainierArms

Great 9mm option. Worked like a champ, I had no issues with the operation at all. Great product.

Link to other reviews:

The Firearm Blog

Price point:

MSRP = $29.99

Retail = $29.95 at AimSurplus

I need it now! Availability:

Mean Arms

Our Rating:

Pros:

  • Uses Glock or Colt 9mm BCG’s

  • No lower modifications or special lower required

  • Last round bolt hold open

  • Uses same spring as P-Mag

  • Fits same accessories as standard AR magazines

  • Uses same controls as standard AR

Cons:

  • Only available in 9mm

  • Magazine body required

  • Ejector in magazine

Score: 7.00 Good

70.jpg

Favorite Link:   We The Female

Velocity Pistol Caliber Carbine (PCC) Trigger

  Velocity Triggers has come out with a new trigger in their MPC (Marksman Performance Choice) line. This particular trigger is for pistol caliber carbines (PCC) that use AR15 trigger assemblies. I am a big fan of the original MPC trigger. I have also become a fan of the PCC trigger. They informed me at SHOT 2019 about the new trigger, so I requested one for review.

  The PCC trigger has the same features of the original MPC line. Probably the most notable is the ⅜” wide trigger shoe. Besides being wider than the average trigger shoe, it is available in a wide assortment of shapes and colors. This time I asked for a green flat, grooved, with finger stop shoe. I also have a curved radiused and flat radiused that can be swapped on in place of the original shoe. Yes, different shoes are available and can be installed on the trigger assembly. No more being stuck with a single shoe design. Additional shoes can be purchased individually. The shoe attaches with an allen screw. One big advantage to this attachment style is that the shoe can also be pivoted. I have mine pivoted just slightly so that the pad of my finger sits flat on the shoe. 

  Since a PCC functions differently than a standard AR, Velocity designed the trigger differently. The most notable difference is how the hammer is designed. It has a definite curved shape to it with more material. The disconnector is also slightly different. When laid out next to one another, it is easy to see the differences. Standard AR triggers don’t always work in the PCC”s. This is because the bolt has so much more mass. The mass can cause a standard trigger to bounce off the disconnector and cause a double fire. I’ve had this happen with non-pcc triggers. The Velocity PCC trigger does not have this problem. It has ran flawlessly for me.

Standard trigger on left, PCC trigger on right

  Velocity triggers’ have great trigger pulls, and the PCC is no exception. The PCC trigger has a pull weight of 4lbs and is non adjustable. When I measured it, it was an average of 4lbs, so it is consistent. As with all their triggers, it has zero creep, a smooth break, and positive reset. Along with that, there is also very little overtravel. Part of the reason the trigger has such a nice feel is that they Nickel Teflon coat the internal parts. This nickel teflon provides a superior resistance to wear, corrosion and friction. So to say it again, the PCC trigger has an excellent trigger pull. The trigger will also work with standard caliber AR’s.

  As an added bonus, Velocity sent some extras also. They sent a 3-hole Sentinel trigger guard in green. The Sentinel is made from aluminum and has more room for gloved hands. Also in the package was one of their new “Wicked” extended magazine releases. It looks like a face with straight teeth. When you see it, you’ll get the idea.  

  I used the PCC trigger in a standard AR lower. This lower usually runs a Stern Defense Glock mag adaptor, but I also used an ENDOMAG. The trigger functioned great with either system. I had zero failures to fire and zero double fires. I would say that’s a win. Purposeful double and triple shots were very well controlled also. 

  This PCC trigger is impressive! It did everything I wanted it to. If you are looking for a PCC trigger, or any other AR drop in trigger, go give Velocity Triggers a look. They keep impressing me with their products

Firearms Insider Reviews - 8 Key Points

Claim to Fame:

4lb single stage Pistol Caliber Carbine trigger

Target Market:

PCC shooters wanting a good trigger

FNBs (Features & Benefits of this product):

  • 4lb trigger pull

  • ⅜” trigger shoe, various shoes available

  • Drop in

  • Nickel Teflon coated

  • Made in USA

What other aesthetic options or finishes are available?

Different Shoe designs and colors

What others are saying?:

Nothing found

Link to other reviews:

None found

Price point:

MSRP = $189.95

I need it now! Availability:

Velocity Triggers or Black Bag Resources

Our Rating:

Pros:

  • Crisp break

  • Tactile reset

  • Different trigger shoes

  • Drop in

  • Nickel Teflon coated

  • Designed for PCC’s

  • Made in USA

Cons:

  • Only available in 4lb pull

  • Writing on trigger

Score: 8.50 Great

85.jpg

Favorite Link:   Radian Weapons


Odin Works Ragna Forend

  Our friends over at Odin Works have another forend on the market. It is called the Ragna. When I was looking for a 15” handguard, I remembered that they had come out with the Ragna at SHOT 2018. When I contacted Odin, they sent it right out for a review. I received the M-Lok version, but a Key-mod version is also available.

  As with the Odin Works O2 lite handguard I reviewed earlier, the Ragna is also really light. When one first picks up the package that the Ragna comes in, you really can’t believe there is a 15.5” handguard in it. It weighs 10.35 ounces complete with the barrel nut and hardware. One reason it is so lightweight comes from a large quantity of organic shaped cut outs. These cutouts give it a unique look also. 

   Mounting up the Ragna is pretty easy also. If you have installed a barrel on an AR, then you can do this. Take your old handguard and barrel nut off first, if it isn’t a new build. Put some of the supplied Vibra-tite on the upper receiver threads. Take the supplied barrel nut and tighten it to 50 ft-lbs. Install the gas block and tube. Then slide the forend on. Line up the top rail with your receiver and tighten the two set screws. Then tighten the three clamp screws. You now have a new Ragna forend installed. I really liked how easy this handguard installed. The top rail lined up perfectly with the upper receiver’s rail.

  As with most handguards, the Ragna is made from aluminum. They use 6061-T6 aluminum and then hard coat anodize it black. This gives it the same durability and finish as the upper receiver it is installed on. It also has 2 full length M-lok slots at 3 & 9 O’clock. These M-lok slots are out at the front of the handguard. M-lok slots also run the full span of the 6 O’clock position (or as I call it, the bottom). It has no top M-lok slots because the Ragna uses a full length picatinny rail. I personally have a love/hate relationship with full top rails. I like the looks of them, but feel like I only need a little rail section at the front and back. 

  The Ragna is also loaded with other features. The first one that comes to mind is the quick connects at the front and rear. Three of them are in the front at 3, 6, &9 O’clock, and two in the rear on either side. Being a long handguard, it has a lot of flex out at the muzzle end. This flex really only causes a problem if you sling up and are using some sort of sight on the front of the rail. I say “some sort’ because it could be an iron front sight, a laser, or something else. The rearward sloped angle, at the front of the handguard, is also very well thought out. It doesn’t have any sharp edges or angles for things to get caught up on. Most low profile gas blocks will fit inside the rail. It has an inside diameter of 1.35 inches, so other accessories might fit underneath also, especially if you are one to like longer than barrel length handguards. 

  I had expected a good performing handguard from Odin Works, and the Ragna did not let me down. The diameter isn’t too large or too small for me. I was able to get a good grasp on the rifle. The odd cut out shapes also dig into your hand to allow for a good non-slip grip, but not so much as to be uncomfortable. Most people don’t need attachment slots down the full length of the forend, and I am one of those. So I like only having the 2 M-lok slots at 3 & 6 O’clock, should I choose to mount up a light or other accessories.

  Odin Works has done a nice job with the Ragna. I really like the looks and functionality. Having to not index a barrel nut is a huge plus also. If you’re in the market for a new forend, check out the Ragna. It is available in 12.5”, 15.5”, and 17.5” versions.

Firearms Insider Reviews - 8 Key Points

Claim to Fame:

15.5” lightweight handguard

Target Market:

Those wanting a lightweight freefloat handguard

FNBs (Features & Benefits of this product):

  • Free floating

  • Type 2 Hard Anodized

  • One piece barrel nut that is Black Nitride coated

  • All mounting hardware included

  • Continuous top rail

  • Made from 6061-T6 aluminum

  • Inside Diameter: 1.35"

  • Outside Diameter: 2.02" Tall by 1.52"

  • Key-MOD or M-LOK available at 3, 6, and 9 o'clock

  • All .750 ODIN Works gas blocks fit inside 

  • Weighs just 10.35oz installed (including barrel nut)

  • Made in USA

What other aesthetic options or finishes are available?

12.5” and 17.5”

What others are saying?:

Ryan H. @ Odinworks.com 5/5 stars

Clean fit

Fits clean and looks amazing. Couldn’t be happier

Link to other reviews:

Nothing found

Price point:

MSRP = $179.00

I need it now! Availability:

Odin Works or Black Bag Resources

Our Rating:

Pros:

  • Really lightweight

  • Good feel in the hands

  • M-lok slots

  • Top rail

  • Front/Rear quick connects for sling swivels

  • Made in USA

Cons:

  • Flexes

Score: 8.50 Great

85.jpg

Favorite Link:   Axelson Tactical